Netgear MS2120 STORA User Manual - Page 24
Installing a Disk, To Install a Disk - hard drive
 |
UPC - 606449071467
View all Netgear MS2120 manuals
Add to My Manuals
Save this manual to your list of manuals |
Page 24 highlights
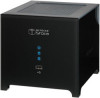
NETGEAR Stora User Manual Installing a Disk NETGEAR Stora comes with two bays that can accommodate SATA disks. The first bay is the primary storage disk, and the second can be set up as a mirrored backup for your primary disk. WARNING! Be sure that Stora power cord is unplugged before adding or removing the disks. Failure to observe this precaution could render your disks useless. To safely eject a disk, see Figure 16. The following instructions explain how to set up and install a single drive. If you purchased a Stora with only one installed drive, and you want to add a second drive, carefully repeat these same instructions. To Install a Disk 1. Unplug the power cord. 2. Remove front cover to add or remove a hard drive. 3. Unlock the drive. A lever on the back on the unit will release the hard drive from the locked position. See 4. Insert the hard disk. a. The label must face the outside of the unit. b. Slide the disk into place in either slot. c. Lock the drive in place and close the cover. The green LED on the front of Stora will blink continuously until the installed drive build process is complete. Figure 16 Remove front cover d. A pop up window will appear asking if you want to use the disk for "max capacity" or "max protection". • RAID1 will maximize your protection. • JBOD will maximize your capacity. See "RAID1" on page 108 and "JBOD" on page 109 for details about these options. WARNING! Stora formats hard drives differently than a computer does. Do not swap hard drives between a Stora and a computer or your data will be lost. 24 | Chapter 1: Getting Acquainted
-
 1
1 -
2
-
3
-
4
-
5
-
6
-
7
-
8
-
9
-
10
-
11
-
12
-
13
-
14
-
15
-
16
-
17
-
18
-
 19
19 -
 20
20 -
 21
21 -
 22
22 -
 23
23 -
 24
24 -
 25
25 -
 26
26 -
 27
27 -
 28
28 -
 29
29 -
30
-
31
-
32
-
33
-
34
-
35
-
36
-
37
-
38
-
39
-
40
-
41
-
42
-
43
-
44
-
45
-
46
-
47
-
48
-
49
-
50
-
51
-
52
-
53
-
54
-
55
-
56
-
57
-
58
-
59
-
60
-
61
-
62
-
63
-
64
-
65
-
66
-
67
-
68
-
69
-
70
-
71
-
72
-
73
-
74
-
75
-
76
-
77
-
78
-
79
-
80
-
81
-
82
-
83
-
84
-
85
-
86
-
87
-
88
-
89
-
90
-
91
-
92
-
93
-
94
-
95
-
96
-
97
-
98
-
99
-
100
-
101
-
102
-
103
-
104
-
105
-
106
-
107
-
108
-
109
-
110
-
111
-
112
-
113
-
114
-
115
-
116
-
117
-
118
-
119
-
120
-
121
-
122
-
123
-
124
-
125
-
126
-
127
-
128
-
129
-
130
-
131
-
132
 |
 |
