Netgear RT338 RT338 Reference Manual - Page 115
Switching to a Backup ISP, The Remote Node Network Layer Options menu opens as shown
 |
UPC - 606449004250
View all Netgear RT338 manuals
Add to My Manuals
Save this manual to your list of manuals |
Page 115 highlights
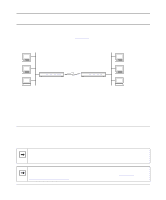
Reference Guide for the Model RT338 ISDN Router 11. Press Enter to open Menu 11.3. The Remote Node Network Layer Options menu opens as shown in Figure 6-5. Menu 11.3 - Remote Node Network Layer Options Rem IP Addr: Rem Subnet Mask= 0.0.0.0 My WAN Addr= 0.0.0.0 Single User Account= No Metric= 2 Private= No RIP Direction= Both Version= RIP-2B Figure 6-5. Press ENTER to Confirm or ESC to Cancel: Menu 11.3 - Remote Node Network Layer Options 12. In Menu 11.3, set the subnet mask of the remote node to 0.0.0.0. 13. Set RIP Direction to None. 14. At the bottom of the Menu, press Enter to save Menu 11.3. 15. At the bottom of Menu 11.1, press Enter to save Menu 11.1. Switching to a Backup ISP If you need to switch from your primary ISP to a backup ISP: 1. Select Menu 11, and select your primary ISP. 2. In Menu 11.1, set the Active field to No. 3. At the bottom of Menu 11.1, press Enter to save the menu. 4. Select Menu 11 again, and select your backup ISP. 5. In Menu 11.1, set the Active field to Yes. 6. At the bottom of Menu 11.1, press Enter to save the menu. You can now access the Internet through the backup ISP Remote Node. Using the Manager Interface to Configure Internet Access 6-9
-
 1
1 -
2
-
3
-
4
-
5
-
6
-
7
-
8
-
9
-
10
-
11
-
12
-
13
-
14
-
15
-
16
-
17
-
18
-
19
-
20
-
21
-
22
-
23
-
24
-
25
-
26
-
27
-
28
-
29
-
30
-
31
-
32
-
33
-
34
-
35
-
36
-
37
-
38
-
39
-
40
-
41
-
42
-
43
-
44
-
45
-
46
-
47
-
48
-
49
-
50
-
51
-
52
-
53
-
54
-
55
-
56
-
57
-
58
-
59
-
60
-
61
-
62
-
63
-
64
-
65
-
66
-
67
-
68
-
69
-
70
-
71
-
72
-
73
-
74
-
75
-
76
-
77
-
78
-
79
-
80
-
81
-
82
-
83
-
84
-
85
-
86
-
87
-
88
-
89
-
90
-
91
-
92
-
93
-
94
-
95
-
96
-
97
-
98
-
99
-
100
-
101
-
102
-
103
-
104
-
105
-
106
-
107
-
108
-
109
-
 110
110 -
 111
111 -
 112
112 -
 113
113 -
 114
114 -
 115
115 -
 116
116 -
 117
117 -
 118
118 -
 119
119 -
 120
120 -
121
-
122
-
123
-
124
-
125
-
126
-
127
-
128
-
129
-
130
-
131
-
132
-
133
-
134
-
135
-
136
-
137
-
138
-
139
-
140
-
141
-
142
-
143
-
144
-
145
-
146
-
147
-
148
-
149
-
150
-
151
-
152
-
153
-
154
-
155
-
156
-
157
-
158
-
159
-
160
-
161
-
162
-
163
-
164
-
165
-
166
-
167
-
168
-
169
-
170
-
171
-
172
-
173
-
174
-
175
-
176
-
177
-
178
-
179
-
180
-
181
-
182
-
183
-
184
-
185
-
186
-
187
-
188
-
189
-
190
-
191
-
192
-
193
-
194
-
195
-
196
-
197
-
198
-
199
-
200
-
201
-
202
-
203
-
204
-
205
-
206
-
207
-
208
-
209
-
210
-
211
-
212
-
213
-
214
-
215
-
216
-
217
-
218
-
219
-
220
-
221
-
222
-
223
-
224
-
225
-
226
 |
 |