Netgear WAB102 WAB102 User Manual - Page 14
Position and mount the WAB102 Dual Band Wireless Access Point., Disabled or Off - default
 |
UPC - 606449025231
View all Netgear WAB102 manuals
Add to My Manuals
Save this manual to your list of manuals |
Page 14 highlights
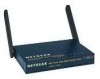
User's Guide for the WAB102 802.11a+b Dual Band Wireless Access Point Note: We suggest you first install the WAB102 with the default settings. Optionally, you can then customize your settings and enable encryption if it is required. 1. Position and mount the WAB102 Dual Band Wireless Access Point. The best location is elevated, such as wall mounted or on the top of a cubicle, at the center of your wireless coverage area, and within line of sight of all the mobile devices. Note: If you are planning to mount your WAB102 on a wall or in a remote location, we suggest you configure and verify your WAB102's operations first. 2. Connect the Ethernet cable. Use the Category 5 Ethernet cable included with the product to connect the Ethernet port on the rear panel of WAB102 to a 10 Base-T or 100 Base-Tx network hub, switch, or router. 3. Connect the power cable. Connect the power cord of the WAB102 power adapter to the 5V DC power socket on the rear panel of the access point. Then, plug the power adapter into an A/C power outlet. Warning: Use only the power adapter that came with the WAB102. 4. Configure the wireless adapter settings. To access the WAB102, you need to configure your 802.11a or 802.11b wireless adapter to use the WAB102 factory default settings as follows: SSID: Wireless Network Mode: Infrastructure WEP: Disabled or Off For a full listing of factory defaults, refer to "Default Factory Settings" on page 13. Setting Up Basic Wireless Connectivity 11
-
 1
1 -
2
-
3
-
4
-
5
-
6
-
7
-
8
-
 9
9 -
 10
10 -
 11
11 -
 12
12 -
 13
13 -
 14
14 -
 15
15 -
 16
16 -
 17
17 -
 18
18 -
 19
19 -
20
-
21
-
22
-
23
-
24
-
25
-
26
-
27
-
28
-
29
-
30
-
31
-
32
-
33
-
34
-
35
-
36
-
37
-
38
-
39
-
40
-
41
-
42
-
43
-
44
-
45
-
46
-
47
-
48
-
49
 |
 |
