Netgear WAC120 Reference Manual
Netgear WAC120 Manual
 |
View all Netgear WAC120 manuals
Add to My Manuals
Save this manual to your list of manuals |
Netgear WAC120 manual content summary:
- Netgear WAC120 | Reference Manual - Page 1
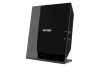
WiFi On/Off WPS 802.11ac Wireless Access Point Model WAC120 Reference Manual August 2014 202-11353-01 350 East Plumeria Drive San Jose, CA 95134 USA - Netgear WAC120 | Reference Manual - Page 2
your product through the NETGEAR website. For product updates and web support, visit http://support.netgear.com. Phone (US & Canada only): 1-888-NETGEAR. Phone (Other Countries): Check the list of phone numbers at http://support.netgear.com/general/contact/default.aspx. Compliance For regulatory - Netgear WAC120 | Reference Manual - Page 3
Settings 34 Advanced QoS Settings 37 Wireless Bridging and Repeating 39 Wireless Point-to-Point Bridge Mode 41 Wireless Point-to-Multi-Point Bridge Mode 43 Client Mode 46 Chapter 4 Manage the Access Point Change the admin Password 49 Upgrade the Firmware 49 Manage the Configuration File 51 - Netgear WAC120 | Reference Manual - Page 4
and Debugging Troubleshooting with the LEDs 62 All LEDs Are Off 62 LAN LED Is Off 62 WLAN LED Is Off 62 Cannot Connect to the Access Point to Configure It 63 Wireless Access to the Network 63 Time-Out Error for URL or IP Address 63 Appendix A Supplemental Information Factory Settings 66 - Netgear WAC120 | Reference Manual - Page 5
topics covered in this manual, visit the support website at http://support.netgear.com. Firmware updates with new features and bug fixes are made available from time to time at http://downloadcenter.netgear.com. Some products can regularly check the site and download new firmware, or you can check - Netgear WAC120 | Reference Manual - Page 6
following items: • 802.11ac Wireless Access Point Model WAC120 • AC power adapter (plug varies by region) • Category 5 (Cat 5) Ethernet cable • Installation guide with cabling and access point setup instructions If any parts are incorrect, missing, or damaged, contact your NETGEAR dealer. Hardware - Netgear WAC120 | Reference Manual - Page 7
Wireless Access Point Model WAC120 Front and Side View The status LEDs and icons on the front and side panels are shown in the following figure. WiFi On/Off WiFi On/Off button WPS button WPS LEDs Figure 2. Front and side view LEDs and Buttons The LEDs on the wireless detected. Hardware Setup 7 - Netgear WAC120 | Reference Manual - Page 8
wireless network. The WiFi LED blinks slowly, green for three seconds, then off for three seconds, when the access point is trying to add the wireless device or computer. Rear View The buttons and connections on the back panel are shown in the following figure. Power connector LAN port Reset - Netgear WAC120 | Reference Manual - Page 9
.11ac Wireless Access Point Model WAC120 Label The label on the access point shows the login information, MAC address, and serial number. Default access information Preset WiFi password Serial number and MAC address Figure 4. The label shows unique information about your router Hardware Setup 9 - Netgear WAC120 | Reference Manual - Page 10
2. Initial Setup This chapter covers the following topics: • Install the Access Point • Connect to the Access Point and Log In • Specify the Access Point Name and Location • Set the Time • Configure the Basic IP Settings • Set Up and Test Wireless Connectivity • QoS Settings • Deploy the Access - Netgear WAC120 | Reference Manual - Page 11
802.11ac Wireless Access Point Model WAC120 Install the Access Point Make sure that your Internet service is active before you install your access point. To install your access point: 1. Prepare your network. Make sure that your modem is cabled only to the wall jack for your Internet service. 2. - Netgear WAC120 | Reference Manual - Page 12
802.11ac Wireless Access Point Model WAC120 3. Add power to the access point: 1 2 3 4 a. Connect the power adapter to the access point and plug the power adapter into lit, press the Power On/Off button on the rear panel of the access point. 4. Connect a computer. 1 2 3 4 Initial Setup 12 - Netgear WAC120 | Reference Manual - Page 13
interface to view or change its LAN and wireless access settings. To connect to the access point: 1. Configure a computer with a static IP address of 192.168.0.210 and a subnet mask of 255.255.255.0. For help configuring a static IP address on your computer, check the instructions or online help - Netgear WAC120 | Reference Manual - Page 14
the United States this setting cannot be changed. If your country or region is not listed, check with NETGEAR support for the correct selection. 6. Click the Apply button. Your settings are saved. Set the Time You must use a computer that is configured with a static IP address of 192.168.0.210 and - Netgear WAC120 | Reference Manual - Page 15
name or the IP address of the custom NTP server. The default is time-b.netgear.com. 6. Click the Apply button. Your settings are saved. Configure the Basic IP Settings The default settings work in most cases. However, if your access point is part of a more complex LAN network, modify these settings - Netgear WAC120 | Reference Manual - Page 16
settings automatically from the DHCP server on your network when you connect the access point to your LAN. • IP Address. The IP address of your access point. The default IP address is 192.168.0.100. To change it, enter an unused IP address from the address range used on your LAN, or enable DHCP - Netgear WAC120 | Reference Manual - Page 17
a computer that is configured with a static IP address of 192.168.0.210 and a subnet mask of 255.255.255.0. During initial setup, use a wired Ethernet connection from the computer to the access point. Basic Wireless Settings To configure the basic wireless settings: 1. Launch a web browser on the - Netgear WAC120 | Reference Manual - Page 18
802.11ac Wireless Access Point Model WAC120 7. Select Configuration > Wireless. Change any of the default settings that you want to change. 8. Select a Wireless Mode radio button: • 11b. All 802.11b wireless stations can be used. (The 802.11g wireless stations can still be used if they can operate - Netgear WAC120 | Reference Manual - Page 19
the wireless network. Depending on the band selected, the set of rates varies. (When the auto channel is enabled in the 802.11ng mode, then the default channel width mode is 20 MHz. In this case, you cannot modify this parameter unless you change to a static channel.) For the possible supported data - Netgear WAC120 | Reference Manual - Page 20
default is Full. The transmit power might vary depending on the local regulatory regulations. 17. Click the Apply button. Your settings are saved. 18. Configure and test your remaining wireless clients for wireless connectivity. Check that they are connected wirelessly and can obtain an IP address - Netgear WAC120 | Reference Manual - Page 21
receive authorization to connect to your network. Several types of encryption are available: Wi-Fi Protected Access II (WPA2), WPA, and Wired Equivalent Privacy (WEP). - WPA2 is the latest and most secure. NETGEAR recommends that you use this option if your equipment supports it. Initial Setup 21 - Netgear WAC120 | Reference Manual - Page 22
in to the management interface of the access point and change the settings. For more information, see Change the admin Password on page 49. Note: For additional wireless security, you can change the default network key regularly. But whenever you change the network key, you must reconnect all of the - Netgear WAC120 | Reference Manual - Page 23
802.11ac Wireless Access Point Model WAC120 To edit the security profile settings: 1. Launch a web browser on the computer that is connected to the access point. 2. Enter http://192.168.0.100 in the address field of the browser. A login prompt displays. 3. Enter the user name and password. The - Netgear WAC120 | Reference Manual - Page 24
802.11ac Wireless Access Point Model WAC120 The fields that display depend on the settings. 6. To change the wireless network name, in the WIreless Network Name (SSID) field, enter the new wireless network name. 7. To broadcast the wireless network name, select the Broadcast Wireless Network Name ( - Netgear WAC120 | Reference Manual - Page 25
802.11ac Wireless Access Point Model WAC120 2. Enter http://192.168.0.100 in the address field of the browser. A login prompt displays. 3. Enter the user name and password. The user name is admin and the default password is password. The General screen displays. 4. Select Configuration > Security > - Netgear WAC120 | Reference Manual - Page 26
. You can connect these WiFi devices either manually or using the WPS (Wi-Fi Protected Setup) method. Manual Method To connect WiFi devices manually to your access point: 1. From your wireless device, view the available wireless networks. For more information, see the manual that came with your - Netgear WAC120 | Reference Manual - Page 27
to the access point. 2. Enter http://192.168.0.100 in the address field of the browser. A login prompt displays. 3. Enter the user name and password. The user name is admin and the default password is password. The General screen displays. 4. Select Configuration > WPS. 5. To enable WPS, select - Netgear WAC120 | Reference Manual - Page 28
11ac Wireless Access Point Model WAC120 A login prompt displays. 3. Enter the user name and password. The user name is admin and the default password is password. Within two minutes, go to the wireless client and press its WPS button to join the network without entering a password. Initial Setup 28 - Netgear WAC120 | Reference Manual - Page 29
. For WMM to function correctly, wireless clients must support WMM. Wi-Fi Multimedia (WMM) is enabled by default in the access point. You must use a computer that is configured with a static IP address of 192.168.0.210 and a subnet mask of 255.255.255.0. During initial setup, use a wired Ethernet - Netgear WAC120 | Reference Manual - Page 30
the Access Point Before mounting the access point in a high location, first set up and test the access point to verify wireless network connectivity. By default, the DHCP client is disabled in the access point. If your network uses dynamic IP addresses, you must change this setting. To connect - Netgear WAC120 | Reference Manual - Page 31
Wireless access points are access points, repeaters, WiFi range extenders, or any other device that emits a wireless signal for network • Place the access point away from large metal surfaces, large glass surfaces, insulated walls, and items such as these: - Solid metal doors - Aluminum studs - Fish - Netgear WAC120 | Reference Manual - Page 32
3. Network Settings This chapter covers the following topics: • Set Up an 802.1Q VLAN • Advanced Wireless Settings • Advanced QoS Settings • Wireless Bridging and Repeating 3 32 - Netgear WAC120 | Reference Manual - Page 33
known VLAN IDs. Note: You lose IP connectivity when the hubs and switches on your network are not yet configured with the corresponding VLANs. Use untagged VLANs only when the hubs and switches on your LAN support the 802.1Q VLAN standard. Change the default untagged VLAN value only when the hubs - Netgear WAC120 | Reference Manual - Page 34
advanced wireless settings: 1. Launch a web browser on the computer that is connected to the access point. 2. Enter http://192.168.0.100 in the address field of the browser. A login prompt displays. 3. Enter the user name and password. The user name is admin and the default password is password. The - Netgear WAC120 | Reference Manual - Page 35
Wireless Access Point Model WAC120 4. To configure the advanced wireless settings for the 2.4 GHz band, select Configuration > Wireless > Advanced > Wireless Settings > 802.11b/bg/ng. 5. To change the default access point to synchronize the wireless network. The default is 100. • Aggregation Length - Netgear WAC120 | Reference Manual - Page 36
802.11ac Wireless Access Point Model WAC120 • Preamble Type. A long transmit preamble can provide a more reliable connection or a slightly longer range. A short transmit preamble gives better performance. The Auto setting automatically handles both long and short preambles. The default is Auto. • - Netgear WAC120 | Reference Manual - Page 37
a range of priorities, depending on the type of data. Time-dependent information, such as video or audio, receive a higher priority than normal traffic. For WMM to function correctly, wireless stations and clients must support WMM. For most networks, the default QoS (Quality of Service) queue - Netgear WAC120 | Reference Manual - Page 38
Wireless Access Point Model WAC120 The General screen displays. 4. Select Configuration > Wireless > Advanced > QoS Settings. The QoS Setting fields are the same for the 2.4 GHz and 5 GHz bands. 5. To change the default upper limit (in milliseconds) of a range from which the initial random back-off - Netgear WAC120 | Reference Manual - Page 39
Wireless Access Point Model WAC120 Decreasing this value increases the priority of the queue. Valid values for maximum burst length are 0.0 through 999.9. 6. To change the default range Wireless Bridging and Repeating You can use the access point as a component to build large bridged wireless networks - Netgear WAC120 | Reference Manual - Page 40
Access Point Model WAC120 • Wireless point-to-point bridge mode. The access point communicates with one other bridge-mode wireless station. You can associate wireless clients with this access point. AP1 and AP2 in point-to-point bridge mode with each other AP 1 AP 2 WiFi On/Off WiFi On/Off WPS - Netgear WAC120 | Reference Manual - Page 41
wirelessly. Client mode supports MAC cloning. For more information, see Client Mode on page 46. Wireless Point-to-Point Bridge Mode Coordinate the following information ahead of time for each access point: • MAC addresses. You must know the MAC address of each access point in the bridge network - Netgear WAC120 | Reference Manual - Page 42
configured to operate in the same LAN network address range as the LAN devices. • DHCP. If you are using DHCP, all access points must be set to obtain an IP address automatically. See Configure the Basic IP Settings on page 15. When the wireless bridge is completed, a computer on either LAN segment - Netgear WAC120 | Reference Manual - Page 43
. • Authentication settings. You must specify the same wireless authentication settings for each access point in the bridge network. Each access point must use the same ESSID, channel, authentication mode, if any, and security settings. • LAN address range. Each access point must be configured to - Netgear WAC120 | Reference Manual - Page 44
. 2. Enter http://192.168.0.100 in the address field of the browser. A login prompt displays. 3. Enter the user name and password. The user name is admin and the default password is password. The General screen displays. 4. Select Configuration > Wireless Bridge. 5. Select the band that you want to - Netgear WAC120 | Reference Manual - Page 45
the base station and click the Edit button. 10. In the Remote MAC Address field, enter the MAC address of the other access point. 11. Under Authentication Settings, specify the authentication settings for your bridge network. 12. Click the Apply button. Your settings are saved. 13. Select the radio - Netgear WAC120 | Reference Manual - Page 46
access points are in wireless point-to-point bridge mode. • For all point-to-point access point, the MAC address of the base station access point must be specified in their Remote AP MAC Address fields. • All access points are configured to operate in the same LAN network address range as the LAN - Netgear WAC120 | Reference Manual - Page 47
the Enable Wireless Bridging check box. 7. Select the Client radio button. 8. Enable the MAC clone feature. The Disable radio button is selected by default. If you enable the MAC clone feature, enter the MAC clone address. 9. Click the Apply button. Your settings are saved. Network Settings 47 - Netgear WAC120 | Reference Manual - Page 48
4. Manage the Access Point This chapter covers the following topics: • Change the admin Password • Upgrade the Firmware • Manage the Configuration File • Enable a Syslog Server 4 48 - Netgear WAC120 | Reference Manual - Page 49
802.11ac Wireless Access Point Model WAC120 Change the admin Password The default password for admin is password. NETGEAR recommends that you change this to a more secure password. To change the admin password: 1. Launch a web browser on the computer that is connected to the access point. 2. Enter - Netgear WAC120 | Reference Manual - Page 50
. To upgrade the firmware: 1. Download the new software file from the NETGEAR website, save it to your hard disk, and unzip it. Visit http://www.netgear.com. 2. Launch a web browser on the computer that is connected to the access point. 3. Enter http://192.168.0.100 in the address field of the - Netgear WAC120 | Reference Manual - Page 51
802.11ac Wireless Access Point Model WAC120 When the upload is completed, your access point ://192.168.0.100 in the address field of the browser. A login prompt displays. 3. Enter the user name and password. The user name is admin and the default password is password. The General screen displays. - Netgear WAC120 | Reference Manual - Page 52
the Reset button. To restore the factory settings: 1. Launch a web browser on the computer that is connected to the access point. 2. Enter http://192.168.0.100 in the address field of the browser. A login prompt displays. 3. Enter the user name and password. The user name is admin and the default - Netgear WAC120 | Reference Manual - Page 53
802.11ac Wireless Access Point Model WAC120 The General screen displays. 4. Select Maintenance > Reset > Restore Defaults. 5. Select the Yes radio button. 6. Click the Apply button. The access point password is password, the access point DHCP client is disabled, the default LAN IP address is 192.168 - Netgear WAC120 | Reference Manual - Page 54
802.11ac Wireless Access Point Model WAC120 4. Select Configuration > System > Advanced > SysLog. 5. If your LAN includes a syslog server, select the Enable Syslog check box. 6. In the Syslog Server IP Address field, type the IP address of your syslog server. The access point sends all the syslog - Netgear WAC120 | Reference Manual - Page 55
5. Monitoring This chapter covers the following topics: • View System Information • View Available Wireless Stations • Activity Log • View Network Traffic Statistics 5 55 - Netgear WAC120 | Reference Manual - Page 56
default password is password. The General screen displays. 4. Select Monitoring > System. The following access point information displays: • Access Point Name. The NetBIOS name. The default name can be changed. • Ethernet MAC Address. The MAC address of the access point's Ethernet port. • Wireless - Netgear WAC120 | Reference Manual - Page 57
the access point. • Default Gateway. The default gateway for the access point communication. • DHCP Client. Enabled indicates that the current IP address was obtained from a DHCP server on your network. Disabled indicates a static IP configuration. The following current wireless settings for each - Netgear WAC120 | Reference Manual - Page 58
Access Point Model WAC120 The General screen displays. 4. Select Monitoring > Wireless Stations. You can view the MAC address, IP address, BSSID, SSID, channel rate, state, type, AID, mode, and status (whether the station is allowed to communicate with the access point). 5. To update the list, click - Netgear WAC120 | Reference Manual - Page 59
and wireless (WLAN) interface network traffic. To view the network traffic statistics: 1. Launch a web browser on the computer that is connected to the access point. 2. Enter http://192.168.0.100 in the address field of the browser. A login prompt displays. 3. Enter the user name and password. The - Netgear WAC120 | Reference Manual - Page 60
802.11ac Wireless Access Point Model WAC120 The General screen displays. 4. Select Monitoring > Statistics. The following information .11ac Radio. The number of associated clients on the 5 GHz band. 5. To update the statistics information for each interface, click the Refresh button. Monitoring 60 - Netgear WAC120 | Reference Manual - Page 61
the following topics: • Troubleshooting with the LEDs • Cannot Connect to the Access Point to Configure It • Wireless Access to the Network • Time-Out Error for URL or IP Address Note: For up-to-date WAC120 installation details and troubleshooting guidance, visit http://support.netgear.com. 61 - Netgear WAC120 | Reference Manual - Page 62
the WLAN LED stays off when the wireless radio is on, disconnect the adapter from its power source, and then plug it in again. • Make sure that the antennas are securely connected to the access point. • Contact NETGEAR technical support if the WLAN LED remains off. Troubleshooting and Debugging 62 - Netgear WAC120 | Reference Manual - Page 63
address in the range of the access point. The default IP address is 192.168.0.100, and the default subnet mask is 255.255.255.0. Wireless Access to the Network If you cannot connect wirelessly, the wireless radio might be turned off (see Basic Wireless Settings on page 17) or a configuration problem - Netgear WAC120 | Reference Manual - Page 64
802.11ac Wireless Access Point Model WAC120 • If the access point is configured correctly, check your Internet connection (DSL or cable modem, and so on) to make sure that it is working correctly. • Try again. Troubleshooting and Debugging 64 - Netgear WAC120 | Reference Manual - Page 65
A. Supplemental Information This appendix covers the following topics: • Factory Settings • Technical Specifications A 65 - Netgear WAC120 | Reference Manual - Page 66
at least seven seconds. The access point resets and returns to the factory configuration settings shown in the following table. Table 2. Factory default settings Feature Description Login for Management and Configuration LAN IPv4 management address 192.168.0.100 Subnet mask for IPv4 management - Netgear WAC120 | Reference Manual - Page 67
802.11ac Wireless Access Point Model WAC120 Table 2. Factory default settings (continued) Feature Wireless modes Wireless network names (SSIDs) Broadcast network names (SSIDs) Radio frequency channels MCS index/data rate (transmission speed) Channel width Guard interval Output power Wireless on/ - Netgear WAC120 | Reference Manual - Page 68
Wireless Access Point Model WAC120 Table 2. Factory default (in milliseconds) of a range from which the initial random the wireless network. wireless medium (WM). Decreasing this value increases the priority of the queue. Valid values for maximum burst length are 0.0 through 999.9. Wireless bridging - Netgear WAC120 | Reference Manual - Page 69
Point Model WAC120 Table 2. Factory default settings (continued) Feature Description Default Wireless Profile and Profile Security Profile name NETGEAR Wireless network names (SSIDs) NETGEAR_11ng NETGEAR_11ac Broadcast wireless network names (SSIDs) Enabled Network authentication Open - Netgear WAC120 | Reference Manual - Page 70
802.11ac Wireless Access Point Model WAC120 Technical Specifications Table 3. WAC120 access point specifications Feature Description 802.11b/bg/ng Wireless Specifications 802.11b data rates 1, 2, 5.5, and 11 Mbps, and auto-rate capable 802.11bg data rates 1, 2, 5.5, 6, 9, 11, 12, 18, 24, 36 - Netgear WAC120 | Reference Manual - Page 71
802.11ac Wireless Access Point Model WAC120 Table 3. (continued)WAC120 access point specifications (continued) Feature Description 802.11na data rates wireless network traffic generated by each node; a maximum of 64 clients is supported. Status LEDs • Power LED • Activity LED • LAN LED • WiFi - Netgear WAC120 | Reference Manual - Page 72
802.11ac Wireless Access Point Model WAC120 Table 3. (continued)WAC120 access point specifications (continued) Feature Physical specifications Environmental specifications Electromagnetic compliance Description • Dimensions (h x w x d): 178.6 x 169.4 x 57 mm (7.0 x 6.7 x 2.24 in.) • Weight: 322g
-
 1
1 -
 2
2 -
 3
3 -
 4
4 -
 5
5 -
 6
6 -
 7
7 -
8
-
9
-
10
-
11
-
12
-
13
-
14
-
15
-
16
-
17
-
18
-
19
-
20
-
21
-
22
-
23
-
24
-
25
-
26
-
27
-
28
-
29
-
30
-
31
-
32
-
33
-
34
-
35
-
36
-
37
-
38
-
39
-
40
-
41
-
42
-
43
-
44
-
45
-
46
-
47
-
48
-
49
-
50
-
51
-
52
-
53
-
54
-
55
-
56
-
57
-
58
-
59
-
60
-
61
-
62
-
63
-
64
-
65
-
66
-
67
-
68
-
69
-
70
-
71
-
72
 |
 |

350 East Plumeria Drive
San Jose, CA 95134
USA
August 2014
202-11353-01
802.11ac Wireless Access Point
Model WAC120
Reference Manual
WPS
WiFi On/Off