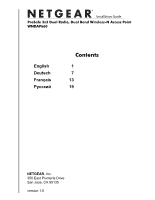
Netgear WNDAP660 WNDAP660 IG for US, DU, RU, FR - Page 2
Package Contents, Set Up the Access Point - manual
 |
View all Netgear WNDAP660 manuals
Add to My Manuals
Save this manual to your list of manuals |
Page 2 highlights
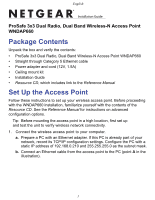
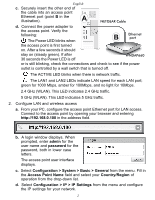
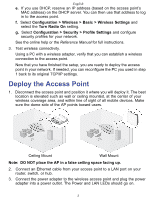
English )NSTALLATION'UIDE ProSafe 3x3 Dual Radio, Dual Band Wireless-N Access Point WNDAP660 Package Contents Unpack the box and verify the contents: • ProSafe 3x3 Dual Radio, Dual Band Wireless-N Access Point WNDAP660 • Straight through Category 5 Ethernet cable • Power adapter and cord (12V, 1.5A) • Ceiling mount kit • Installation Guide • Resource CD, which includes link to the Reference Manual Set Up the Access Point Follow these instructions to set up your wireless access point. Before proceeding with the WNDAP660 installation, familiarize yourself with the contents of the Resource CD. See the Reference Manual for instructions on advanced configuration options. Tip: Before mounting the access point in a high location, first set up and test the unit to verify wireless network connectivity. 1. Connect the wireless access point to your computer. a. Prepare a PC with an Ethernet adapter. If this PC is already part of your network, record its TCP/IP configuration settings. Configure the PC with a static IP address of 192.168.0.210 and 255.255.255.0 as the subnet mask. b. Connect an Ethernet cable from the access point to the PC (point A in the illustration). 1
-
 1
1 -
 2
2 -
 3
3 -
 4
4 -
 5
5 -
 6
6 -
 7
7 -
 8
8 -
9
-
10
-
11
-
12
-
13
-
14
-
15
-
16
-
17
-
18
-
19
-
20
-
21
-
22
-
23
-
24
-
25
-
26
-
27
-
28
 |
 |