Netgear WNDAP660 WNDAP660 IG for US, DU, RU, FR - Page 4
Deploy the Access Point - setup
 |
View all Netgear WNDAP660 manuals
Add to My Manuals
Save this manual to your list of manuals |
Page 4 highlights
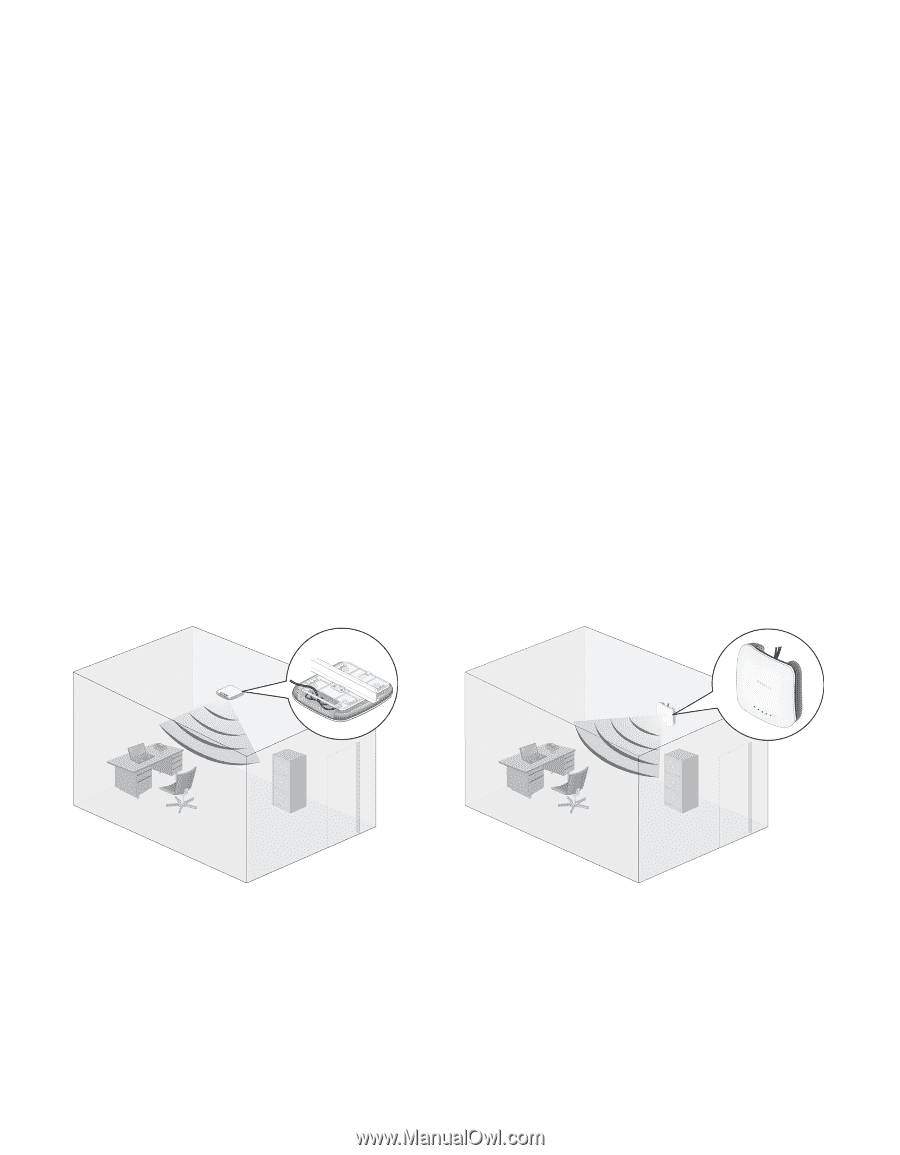
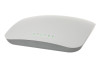
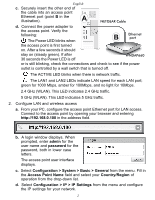
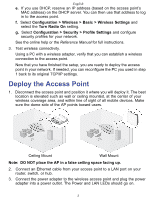
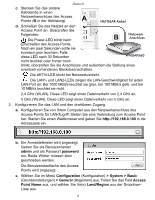
English e. If you use DHCP, reserve an IP address (based on the access point's MAC address) on the DHCP server. You can then use that address to log in to the access point. f. Select Configuration > Wireless > Basic > Wireless Settings and select the Turn Radio On setting. g. Select Configuration > Security > Profile Settings and configure security profiles for your network. See the online help or the Reference Manual for full instructions. 3. Test wireless connectivity. Using a PC with a wireless adapter, verify that you can establish a wireless connection to the access point. Now that you have finished the setup, you are ready to deploy the access point in your network. If needed, you can reconfigure the PC you used in step 1 back to its original TCP/IP settings. Deploy the Access Point 1. Disconnect the access point and position it where you will deploy it. The best location is elevated such as wall or ceiling mounted, at the center of your wireless coverage area, and within line of sight of all mobile devices. Make sure the dome side of the AP points toward users. Ceiling Mount Wall Mount Note: DO NOT place the AP in a false ceiling space facing up. 2. Connect an Ethernet cable from your access point to a LAN port on your router, switch, or hub. 3. Connect the power adapter to the wireless access point and plug the power adapter into a power outlet. The Power and LAN LEDs should go on. 3
-
 1
1 -
 2
2 -
 3
3 -
 4
4 -
 5
5 -
 6
6 -
 7
7 -
 8
8 -
 9
9 -
 10
10 -
11
-
12
-
13
-
14
-
15
-
16
-
17
-
18
-
19
-
20
-
21
-
22
-
23
-
24
-
25
-
26
-
27
-
28
 |
 |