Nikon 25547 User Manual
Nikon 25547 - Coolpix S6 Digital Camera Manual
 |
UPC - 018208255474
View all Nikon 25547 manuals
Add to My Manuals
Save this manual to your list of manuals |
Nikon 25547 manual content summary:
- Nikon 25547 | User Manual - Page 1
%N 4HE - Nikon 25547 | User Manual - Page 2
is a trademark. D-Lighting technology is provided by Apical Limited. Facepriority AF technology is provided by Identix®. All other trade names mentioned in this manual or the other documentation provided with your Nikon product are trademarks or registered trademarks of their respective holders. - Nikon 25547 | User Manual - Page 3
available elsewhere in this manual or in the Quick Start Guide. Memory Cards Pictures taken with this camera can be stored in the camera's internal memory or on Camera Operations Basic Photography and Playback Scene and Scene Assist Modes Movies Voice Recordings Viewing Pictures on the Camera - Nikon 25547 | User Manual - Page 4
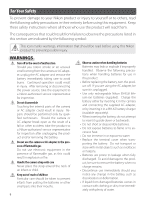
Nikon product or injury to yourself or to others, read the following safety precautions in their entirety before using this equipment. Keep these safety instructions Nikon-authorized service representative for inspection after unplugging the product and/or removing the battery. Do not use the camera - Nikon 25547 | User Manual - Page 5
to a Nikonauthorized service representative for inspection. Failure to observe these precautions could result in fire or electric shock. • Do not handle the plug or battery charger with wet hands. Failure to observe this precaution could result in electric shock. Follow the instructions of hospital - Nikon 25547 | User Manual - Page 6
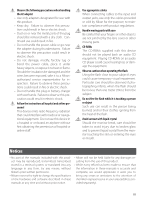
in accordance with the instructions, may cause harmful cables sold or provided by Nikon for your equipment. Using other evidence does not show that any health problems are associated with using low power wireless by additional research. This digital camera (the COOLPIX S6) has been tested and - Nikon 25547 | User Manual - Page 7
gc.ca/rpb. Notice for customers in Europe Hereby, Nikon, declares that this digital camera is in compliance with the essential requirements and other such as books, music, paintings, woodcut prints, maps, drawings, movies, and photographs is governed by national and international copyright laws. - Nikon 25547 | User Manual - Page 8
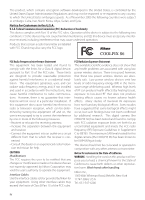
and Scene Assist Modes 26 Scene Mode ...26 Scene Assist Mode...32 Movies 35 Recording Movies ...35 The Movie Menu ...36 Movie Playback...38 Voice Recordings 39 Viewing Pictures on the Camera 43 Viewing Multiple Pictures: Thumbnail Playback 43 Deleting Pictures...43 Taking a Closer - Nikon 25547 | User Manual - Page 9
a Wireless Network ...63 Wireless Transfer...71 Wireless Printing...73 Menu Guide 74 Shooting Options: The Shooting Menu 74 Image Mode ...74 ...81 Protect ...81 Transfer Marking...81 Small Pic...82 Copy ...82 Basic Camera Setup: The Setup Menu 83 Menus ...83 Quick Startup...83 Welcome Screen - Nikon 25547 | User Manual - Page 10
Accessories Nikon COOLPIX cameras are designed to the highest standards and include complex electronic circuitry. Only Nikon brand electronic accessories (including battery chargers, batteries, and AC adapters) certified by Nikon specifically for use with this Nikon digital camera are engineered - Nikon 25547 | User Manual - Page 11
Nikon COOLPIX S6 digital camera. This manual has been written to help you enjoy taking pictures with your Nikon digital camera. Please be sure to read all instructions thoroughly to get the most from the camera -nikon.com/support • For users in Asia, Oceania, and the Middle East: http://www.nikon- - Nikon 25547 | User Manual - Page 12
Introduction Parts of the Camera Built-in flash ( 20) Self-timer lamp ( 22) AF-assist illuminator (LED; 21) Lens ( 92) Lens cover closed Antenna ( 63) Wireless LED ( 72) Lens cover - Nikon 25547 | User Manual - Page 13
58, 62, 65) (shooting/playback) button ( 19, 43) (mode) button ( 5, 17) Indicator lamp ( 11, 16, 36, 39, 77) Flash lamp ( 20) Eyelet for camera strap (delete) button ( 19, 43, 44) Rotary multi selector ( 4, 17) (center) button ( 4, 17) (transfer) button ( 55) Memory card slot ( 12) Battery chamber - Nikon 25547 | User Manual - Page 14
Introduction The Rotary Multi Selector The rotary multi selector is used to navigate the camera menus. Rotate in either direction to highlight items and press the center ( ) to select. To cancel and return to the previous menu, press the rotary - Nikon 25547 | User Manual - Page 15
) Button Pressing the button during shooting or playback displays a mode-selection menu ( 17). Shooting Modes Auto ( 18) Wireless ( 70) Scene ( 26) Movie ( 35) Voice recording ( 39) Playback Modes Playback ( 43) Scene assist ( 32) Voice playback ( 41) Pictmotion ( 50) List by date ( 48 - Nikon 25547 | User Manual - Page 16
The Monitor The following indicators may appear in the monitor during shooting and playback (actual display varies with current camera settings): Shooting Introduction Playback 18 01.01.2006 17 00:00 16 15 14 11 9 12 13 10 Start 100NIKON 1 9999.JPG 2 4 9999/9999 8 0h00m00s 3 5 6 7 6 - Nikon 25547 | User Manual - Page 17
, 23 5 Focus indicator 16 6 Flash mode 20 7 Camera shake icon 21 8 Internal memory/memory card indicator 14 9 guide 46 7 Voice memo playback guide 46 8 Current frame number/ total number of frames Movie length 38 9 D-Lighting icon 45 10 Movie playback indicator 38 11 Image mode 74 12 Movie - Nikon 25547 | User Manual - Page 18
a television ( 54) • Print pictures via direct USB connec- tion ( 57) DC-IN connector ( 9) Camera connector USB connector ( 55, 58) Audio/video connector (A/V out; 54) Placing the Camera in the COOL-STATION Removing the Camera The multi connector should be fully inserted in the COOL-STATION - Nikon 25547 | User Manual - Page 19
; failure to observe this precaution could result in fire or product malfunction). Connect the power cord (ቢ) and plug the adapter into the COOL-STATION or camera (ባ), making sure the plugs are in the correct orientation. Plug the adapter in (ቤ) and check that the power lamp is lit (ብ). COOL-STATION - Nikon 25547 | User Manual - Page 20
the Battery Inserting the battery upside down or backwards could damage the camera. Check to be sure the battery is in the correct orientation. and cautions on pages ii-iii and 92 of this manual. Removing the Battery Turn the camera off before removing or inserting batteries. To eject the - Nikon 25547 | User Manual - Page 21
the battery.) Charging is complete when the indicator lamp stops blinking (a fully exhausted battery will recharge in about two hours). Remove the camera from the COOL-STATION and unplug the AC adapter. The MH-62 Battery Charger The battery can also be charged using the optional MH-62 battery - Nikon 25547 | User Manual - Page 22
First Steps Inserting Memory Cards Pictures are stored in the camera's internal memory (approximately 20 MB) or on removable Secure Digital (SD) memory cards ( 90). Internal memory is used for recording and deleting pictures only if no memory card is inserted. To insert a memory card: 1 Turn - Nikon 25547 | User Manual - Page 23
Removing Memory Cards Before removing memory cards, turn the camera off and confirm that the power-on and indicator lamps are off. Open the battery-chamber/memory card slot cover and press the card in to - Nikon 25547 | User Manual - Page 24
monitor will dim to reduce the drain on the battery if no operations are performed for about five seconds. The monitor will brighten when camera controls are used. At default settings, the monitor will turn off altogether if no operations are performed for about a minute during shooting and playback - Nikon 25547 | User Manual - Page 25
, allowing the subject to be magnified up to 4 × more, for a total of magnification of 12 ×. Camera Operation Digital Zoom Unlike optical zoom, digital zoom does not increase the amount of detail visible in the picture. Instead, details visible at 3 × zoom are simply enlarged, producing a slightly - Nikon 25547 | User Manual - Page 26
was unable to focus. Change the composition and try again. 2 Shoot: Gently press the shutter release button the rest of the way down (moving the camera when releasing the shutter may result in blurred pictures). The flash may fire if the subject is poorly lit. During Recording While pictures are being - Nikon 25547 | User Manual - Page 27
Camera Operation Using Menus To make a selection from the shooting or playback menus, press the follow the steps below: button and 1 2 Highlight menu item. 3 Display sub- - Nikon 25547 | User Manual - Page 28
in (auto) mode, an automatic, "pointand-shoot" mode recommended for first-time users of digital cameras. 1 2 Turn the camera on. * Display shooting mode menu. * If is displayed in monitor, camera is already in mode. Proceed to Step 5. 3 4 Highlight . 5 Select and exit to mode. 6 Frame - Nikon 25547 | User Manual - Page 29
Erase image (s)? No Confirm Yes Basic Photography and Playback Deleting the Last Shot To delete the most recent picture, press the button while the camera is in shooting mode. A confirmation dialog will be displayed; highlight Yes and press to delete the last shot taken. The Rotary Multi Selector - Nikon 25547 | User Manual - Page 30
(to exit without changing mode, wait five seconds). Selection is shown by icon in display. Selection for mode is stored in memory even when camera is off. Basic Photography and Playback The Flash Lamp The flash lamp shows flash status when the shutter-release button is pressed halfway. • On (red - Nikon 25547 | User Manual - Page 31
3 in. (W) to 1.1 m/3 ft. 7 in. (T). The AF-assist illuminator is not available in some modes ( 26-34) and can also be turned off manually ( 88), although in this case the camera may not focus when lighting is poor. ባ A blur warning may be displayed If the flash is off, a icon will be displayed to warn - Nikon 25547 | User Manual - Page 32
is equipped with a ten- and three-second timers for self-portraits and to reduce blur. When using the self-timer, mount the camera on a tripod (recommended) or rest it on a flat, level surface. 1 Display self-timer menu. Self-timer Confirm 2 Highlight option. 3 s: Use to reduce blur. Self - Nikon 25547 | User Manual - Page 33
Frame picture. Minimum focus distance varies with zoom position; if zoom is adjusted to ▲ position and icon turns green, camera can focus at distance of 4 cm (1.6 in.). Camera focuses continuously until shutter-release button is pressed halfway to lock focus. 5 Focus and shoot. Note that flash - Nikon 25547 | User Manual - Page 34
shooting mode, press the button again. 1 2 Press button. icon is displayed. Frame picture using icon as guide.* * When camera detects face, will change to double yellow border. If camera detects multiple faces, it will focus on closest subject; other subjects are indicated by single border. If - Nikon 25547 | User Manual - Page 35
Display setup menu ( 83) Image mode Choose image size and quality ( 74). Exp. +/- Alter exposure from the value selected by the camera. Choose from values between -2.0 EV and +2.0 EV. Negative values produce darker pictures, positive values brighter pictures. Portrait effect Choose from Normal - Nikon 25547 | User Manual - Page 36
offers a choice of eleven "scene" and four "assist" options. Camera settings are automatically optimized for the selected subject type. Scene mode: The following scenes are available. Party/Indoor Night Landscape Beach/Snow Close Up Sunset - Nikon 25547 | User Manual - Page 37
; note, however, that foreground objects may not always be in focus. The following icons indicate the precautions that may be needed to avoid blur: Hold camera steady Use tripod A icon indicates that pictures may be processed to reduce noise, resulting in increased recording times. 27 - Nikon 25547 | User Manual - Page 38
zooms to macro close-up position. Macro close-up icon ( ) turns green, indicating that camera can focus as close as 4 cm (1.6 in.) to lens. Camera focuses continuously until shutter-release button is pressed halfway to lock focus. Museum OFF OFF ON OFF Use indoors where flash photography - Nikon 25547 | User Manual - Page 39
displayed. 3 Right to left Bottom Select how pictures will be joined together to top in completed panorama. This is the direc- tion in which camera will be panned after Top to Left to each shot. bottom right 4 Make selection (to return to step 3, press button again). Pan direction - Nikon 25547 | User Manual - Page 40
all ous picture. shots in series have been taken. 8 End series. Shooting will also end if a new mode is selected or camera enters standby mode ( 14). The camera focuses on the subject in the center of the frame. Use a tripod for better results. Scene and Scene Assist Modes Panorama Assist - Nikon 25547 | User Manual - Page 41
Using Exposure Compensation in Scene Mode Exposure compensation is used to alter exposure from the value selected by the camera. Choose from values between -2.0 EV and +2.0 EV. Negative values produce darker pictures, positive values brighter pictures. To choose a value for exposure compensation, - Nikon 25547 | User Manual - Page 42
framing assist menu. 6 Highlight composition type.* Select and return to shooting mode. * : camera setup ( 83); : select image-mode ( 74); : adjust exposure ( 31) 7 Take pictures. If framing guides are displayed, position subject in guides before shooting. Scene and Scene Assist Modes 32 - Nikon 25547 | User Manual - Page 43
two subjects side-byside.† Portrait Figure Compose shot in "tall" orientation.† * AF-assist available in PORTRAIT mode. † Camera sets focus and exposure for subject in framing guides. Landscape Assist: Use for vivid landscapes or portraits that feature a landmark in the background. * OFF OFF OFF - Nikon 25547 | User Manual - Page 44
series of high-speed shots. OFF OFF OFF OFF No framing guides are displayed. Focus, exposure, and white balance for all pictures are determined by the first shot in each series. While shutter-release button is held down, camera shoots about 2.2 frames SPORTS per second (fps) until icon is displayed - Nikon 25547 | User Manual - Page 45
The flash ( 20) turns off in all modes except Time-lapse movie. The self-timer ( 22) can not be used. Optical zoom can not be adjusted during recording; digital zoom is available to a maximum of 2× ( 15). If the camera is pointed at the sun or other bright light source during recording, vertical - Nikon 25547 | User Manual - Page 46
Description SET UP Display setup menu ( 83). Movie options Choose type of movie that will be recorded (see below). Auto-focus mode Choose how camera focuses in movie mode ( 37). Electronic VR Reduce effects of camera shake ( 37). Movie Options The following options are available: Option Size - Nikon 25547 | User Manual - Page 47
during shooting, preventing sound of camera focusing from interfering with recording. Camera constantly adjusts focus, even when shutter-release button is not pressed. Electronic VR Choose On to reduce the effects of camera shake in all movie modes except Timelapse movie. An electronic VR indicator - Nikon 25547 | User Manual - Page 48
when the zoom control is pressed. Select W to lower volume, T to increase. Rotate the rotary multi selector to fast forward or rewind while the movie is playing. To delete a movie, display it in full-frame playback or select it in the thumbnail list and press the button. A confirmation dialog will be - Nikon 25547 | User Manual - Page 49
-timer and indicator lamps will blink. Press again to resume. † To create index, press rotary multi selector up, down, left, or right during recording. Camera can skip to any index during playback. Start of recording is index number 01; other numbers are assigned in ascending order, to maximum of 98 - Nikon 25547 | User Manual - Page 50
Mass storage for USB, copy the files manually, and then play them back using QuickTime or any other WAV-compatible audio player. Note that index points created with the camera can not be used when voice recordings are played back on another device. The COOLPIX S6 may be unable play or copy sound files - Nikon 25547 | User Manual - Page 51
Playing Voice Recordings To play voice recordings back, select playback mode and follow these steps. 1 2 Display playback mode menu. Highlight . 3 4 Display list of voice recordings. Select recording. 5 1 Control icons * 2 16 2 File number 6 Date of recording 7 Length of recording 3 - Nikon 25547 | User Manual - Page 52
Copying Voice Recordings To copy voice recordings between internal memory and a memory card, display the voice recording list shown in Step 3 on the preceding page and press the button. This option is available only when a memory card is inserted. 1 Highlight option: • : Copy recordings from - Nikon 25547 | User Manual - Page 53
will turn the camera on in playback mode). The following operations can be performed: To View other pictures Delete picture Zoom picture in View thumbnails View playback mode menu Press To View playback menu 19 Record/play voice memo T( ) W( ) - 44 - Enhance contrast Movie: Play movie Exit to - Nikon 25547 | User Manual - Page 54
536 ( ), 1,600 × 1,200 ( ), 1,280 × 960 ( ), 1,024 × 768 ( ), 640 × 480 ( ), 320 × 240 ( ), or 160 × 120 ( ) pixels in size. Viewing Pictures on the Camera Cropped Copies See the Appendix for more information on cropped copies ( 103). Auto Power off (Stand-by Mode) At default settings, the monitor - Nikon 25547 | User Manual - Page 55
subjects. Before After 1 2 Confirmation dialog displayed. 3 Create copy. Highlight OK. During playback, copies created with D-Lighting are indicated by a icon ( 6-7). Viewing Pictures on the Camera D-Lighting See the Appendix for more information on D-Lighting copies ( 103). 45 - Nikon 25547 | User Manual - Page 56
Erase image (s)? No Confirm Yes Viewing Pictures on the Camera Voice Memos Voice memos can not be added to pictures created with other types of camera. Voice memos recorded using other types of camera can not be played back on the COOLPIX S6. See the Appendix for more information on voice memos - Nikon 25547 | User Manual - Page 57
pictures taken on date 43 View playback mode menu 5 View playback menu 48 Exit to shooting mode - Viewing Pictures on the Camera Calendar/List by Date The camera lists a maximum of 9,000 pictures for each date. Dates with more than 9,000 pictures are indicated by an asterisk ("*"). Pictures - Nikon 25547 | User Manual - Page 58
playback mode menu ( 5). Highlight List By Date ( ). 3 View dates for which pictures exist. The following operations can be performed: To Press Highlight date - * Camera lists up to 30 dates. If pictures ex- View pictures taken on date 49 ist for more than 30 dates, all pictures recorded - Nikon 25547 | User Manual - Page 59
19 Record/play voice memo Shutter button 46 Delete picture 43 Enhance contrast Zoom picture in T ( ) 44 Movie: Play movie View playback mode menu 5 Return to date list Exit to shooting mode 45 38 W( ) - - Protect 81 Transfer marking 81 Small pic. 82 Viewing Pictures on the Camera 49 - Nikon 25547 | User Manual - Page 60
with custom transitions and background music. It is only available when a memory card is inserted in the camera. Creating a Pictmotion Movie To create a simple movie using the ten most recent pictures during full-frame or thumbnail playback: 1 2 Display playback mode menu ( 5). 3 Highlight - Nikon 25547 | User Manual - Page 61
in Pictmotion settings dialog ( 52). Press when done. All images (Confirm on) Choose date Confirm on Viewing Pictures on the Camera To select pictures for movie, highlight Confirm and press to turn check box on. All images (Confirm off ) View Pictmotion.* Press Adjust settings ( 52). Rotate rotary - Nikon 25547 | User Manual - Page 62
instructions in Step 4 to change selection. Viewing Pictures on the Camera Pictmotion If the current memory card holds twenty Pictmotion movies, no additional movies can be created until an existing movie the camera; see the PictureProject reference manual (on CD) for details. Pictmotion movies can - Nikon 25547 | User Manual - Page 63
and press . ‡ Zoom control controls volume. To pause playback, press . 5 6 End Restart Highlight End.** Confirm **To resume playback, highlight Restart and press . Exit to movie list. Viewing Pictures on the Camera Pictmotion See the Appendix for information on how Pictmotion - Nikon 25547 | User Manual - Page 64
Printers By connecting the camera to another device using the supplied A/V or USB cables, you can: • View pictures on TV and record movies to video (see below installing and using PictureProject, see reference CD and Quick Start Guide. To transfer pictures to a computer: 1 Start a computer to - Nikon 25547 | User Manual - Page 65
) and then turn the camera off. 3 Connect COOL-STATION to the computer using the supplied USB cable. 4 Place the camera in the COOL-STATION and Transfer button (see below). Pictmotion movies can be transferred in PictureProject ( Guide or PictureProject reference manual (on CD) for details. 55 - Nikon 25547 | User Manual - Page 66
is selected for USB and no memory card is inserted. Use PictureProject Transfer button. Pictmotion movies can be transferred in PictureProject ( 52). † Do NOT select PTP. If PTP is selected when the camera is connected, wait until the Windows hardware wizard is displayed, then click Cancel and - Nikon 25547 | User Manual - Page 67
Print set option can be used to select pictures for printing ( 61). See the printer manual for details. • Taking memory cards to a digital print service: If the service supports DPOF, the camera Print set option can be used to select pictures for printing ( 61). • Transferring pictures to a computer - Nikon 25547 | User Manual - Page 68
89). 2 Connect COOL-STATION to the printer using the supplied USB cable. 3 Turn the printer on. 4 Place the camera in the COOL-STATION and turn it on. A PictBridge start-up screen will be displayed. The camera will then enter full-frame playback with the PictBridge logo displayed in the monitor. 58 - Nikon 25547 | User Manual - Page 69
x 6 in., 8 x 10 in., Letter, A4, and A3. Only sizes supported by the current printer will be displayed. Paper Size Paper size can not be selected from the camera if the printer does not support the page sizes used by the camera or the printer automatically selects the page size. Use the printer to - Nikon 25547 | User Manual - Page 70
Connecting to Televisions, Computers, and Printers Printing Multiple Pictures To print multiple pictures, press the button while the PictBridge playback screen is displayed ( 58). The menu shown at right will be displayed; highlight an option and press the button. Option Description Print - Nikon 25547 | User Manual - Page 71
Order: Print Set The Print set option in the playback menu ( 80) is used to create digital "print orders" for printing on DPOF-compatible devices ( 100). Selecting Print set displays the menu shown shown Step 4 is displayed. Info is not printed when the camera is connected directly to the printer. 61 - Nikon 25547 | User Manual - Page 72
printer ( 100). See the printer manual for details. 1 Attach the sduopcpklinesdeprtritnotethr camera is connected to an ImageLink printer. If no operations are performed for another seven minutes, the camera will turn off. If the printer does not support the language selected in the camera - Nikon 25547 | User Manual - Page 73
Professional Service Pack 1 or later (Service Pack 2 or later recommended) or Mac OS X version 10.3 or later. To configure the camera Camera Setup Utility, which is installed with Picture Project; see the Quick Start Guide and the PictureProject Reference Manual (on CD) for installation instructions - Nikon 25547 | User Manual - Page 74
by the AC adapter or the battery is fully charged. 4 Check that the computer supports wireless LAN. Wireless Transfer and Printing 5 Connect the COOL-STATION to the computer using the supplied USB cable and turn the camera on. 6 Choose one of the following options. Create an Create an Ad-hoc - Nikon 25547 | User Manual - Page 75
Nikon > Wireless Camera Setup Utility. • Macintosh: Open the "Applications : Nikon Software :Wireless Camera Setup Utility" folder and double-click the Wireless Camera the Quick Start Guide. In the "Install Center" window, click Wireless Camera Setup Utility. The Wireless Camera Setup Utility will - Nikon 25547 | User Manual - Page 76
LAN, uses fixed IP addressing, or is running Windows XP Service Pack 1, the dialog Varies with setup type shown in Step 7 Camera to Computer) network profiles: Connect to an ad-hoc network in one location and infrastructure networks in others. • Create Profile manually: Adjust settings manually - Nikon 25547 | User Manual - Page 77
(Access Point) network profile or Create Infrastructure (Access Point) and Ad-hoc (Camera to Computer) network profiles was selected in Step 6, enter the name (SSID) of the infrastructure network. If Create Profile manually was selected or the dialog shown in Step 6 was not displayed, supply any - Nikon 25547 | User Manual - Page 78
pull-down down menu. • Macintosh: Click Select Printer... and select a printer, print quality, and so on. Click Print to return to the Wireless Camera Setup Utility. Click Next to proceed. 11 Click Close. 12 Turn the camera off and remove it from the COOLSTATION. 68 Wireless Transfer and Printing - Nikon 25547 | User Manual - Page 79
of authentication used by the computer or access point. The Authentication camera supports WPA-PSK (infrastructure mode only), open system, and shared key or manually. IP address If the network is configured for manual IP addresses, enter the IP address that will be assigned to the camera. - Nikon 25547 | User Manual - Page 80
these settings to make sure they match those used on the network. If the last session with the selected device did not terminate normally, the camera will briefly display a message stating that the session is now complete. 5 WIRELESS MENU Easy Transfer (PM) 1/2 Select profile.† If network profile is - Nikon 25547 | User Manual - Page 81
file name)" will be displayed while the camera connects. To exit before a connection is movies (Windows only). Some (default) time may be required to transfer Pictmotion movies. Easy Trans. (no PM) Transfer all new pictures. Pictmotion movies described in PictureProject reference manual (on CD). If - Nikon 25547 | User Manual - Page 82
, varying from "strong" (four bars) to "no signal" (antenna icon turns red). For maximum signal strength, ensure a clear line of sight between the camera antenna and the wireless LAN adapter or access point. To cancel transfer, press the button. Transferring images to computer 0002/0006 Cancel If - Nikon 25547 | User Manual - Page 83
message "Connecting to wireless printer adapter" will be displayed. Set up profiles on the camera and PD-10 as described in the PD-10 instruction manual, starting from Step 3. Once the profile is stored in the camera, pictures can be printed by selecting the PD-10 in the profile list ( 70 - Nikon 25547 | User Manual - Page 84
Menu Guide This section describes the menus available for shooting, playback, and camera setup. See page 17 for information on on restrictions that may apply to these settings ( 102). Image Mode Pictures taken with a digital camera are recorded as image files. The size of the files, and with it the - Nikon 25547 | User Manual - Page 85
1 Place white or gray reference object under lighting that will be used during shooting. 2 3 The Shooting Menu Highlight White bal. preset. 4 Camera zooms in. 5 Frame reference object here Highlight Measure.* Frame reference object. * To restore most recent value for preset white balance - Nikon 25547 | User Manual - Page 86
16 shots at about 2 fps and arranges them in a single picture as shown at right. Image mode set to Normal (2816). Intvl timer shooting Camera takes pictures automatically at specified interval ( 77). Except at Single, the current setting is shown by an icon in the display ( 6-7). The Shooting - Nikon 25547 | User Manual - Page 87
button to make selection, then press button to return to shooting mode. 2 Press shutter-release button all the way down to start recording. Camera will take pictures at specified interval until shutter- release button is pressed again, memory is full, or 1800 frames have been recorded. Monitor - Nikon 25547 | User Manual - Page 88
set exposure correctly. At settings other than Off, the current BSS setting appears in the display ( 6-7). Sensitivity Sensitivity is a measure of how quickly the camera reacts to light. The higher the sensitivity, the less light needed to make an exposure. Much as film with a high ISO rating tends - Nikon 25547 | User Manual - Page 89
focuses. Option Description Center Camera focuses on subject at center of frame. Press rotary multi selector up, down, left, or right to se- lect from 99 focus areas in large frame shown at right. Pictures can be taken while focus area selection screen Manual is displayed. To end focus area - Nikon 25547 | User Manual - Page 90
1-2 to select additional pictures. To deselect picture, highlight and press rotary multi selector down. Complete operation. Confirmation message may be displayed. Print Set Create digital "print orders" for PictBridge printers and devices that support DPOF ( 61). The Playback Menu 80 - Nikon 25547 | User Manual - Page 91
for transfer ( 80). Pictures selected for transfer are identified by a icon ( 6-7). The Playback Menu Slide Shows Movies ( 38) appear as still images showing the movie's first frame. The camera will turn off automatically ( 88) if no operations are performed for 30 minutes during the show, even if - Nikon 25547 | User Manual - Page 92
but voice recordings ( 39) will not. See "Copying Voice Recordings" for information on copying voice recordings ( 42). The camera may be unable to copy pictures that were created with another make of camera or that have been modified on a computer. See page 103 for more information on how copies are - Nikon 25547 | User Manual - Page 93
Basic Camera Setup: The Setup Menu To display the setup menu, select SET UP or from the shooting ( 74), playback ( 80), scene ( 26), movie ( 36), one-touch portrait On to disable the welcome screen ( 84) and start-up sound. The camera will be ready for shooting as soon as it is turned on. Default - Nikon 25547 | User Manual - Page 94
Welcome Screen Choose the welcome screen displayed when the camera is turned on. This option is only available when Off is selected for Quick Startup. Option Description Nikon COOLPIX logo displayed at start-up. Animation Animation displayed at start-up. Select an image Select picture from - Nikon 25547 | User Manual - Page 95
travel time zone. 4 Display map of world time zones. Highlight travel destination time zone. 5 Set clock to time in new time zone. is displayed when camera is in shooting mode. To reset clock to home time zone, select in time zone menu (Step 1). To turn daylight saving time in selected zone - Nikon 25547 | User Manual - Page 96
Monitor Settings The following options are available: Option Description Photo info Choose information displayed in monitor. Brightness Choose from five settings for monitor brightness (default is 4). Photo Info The following display options are available: Option Description Display Shooting - Nikon 25547 | User Manual - Page 97
Date Imprint Imprint date information on pictures as they are taken. Option Off Date Date and time Date counter Description Time and date do not appear on pictures. Date or date and time are imprinted on pictures taken while this option is in effect. Time stamp shows number of days between date of - Nikon 25547 | User Manual - Page 98
the subject is poorly lit (AF-assist illumination is unavailable in some modes; 26-34). Choose Off to disable AF-assist illumination (note that the camera may be unable to focus if lighting is poor). Sound Settings Adjust the following sound settings: Option Description Button When On is selected - Nikon 25547 | User Manual - Page 99
the card on which data are stored) and Format (formats entire card). Format is not available when batteries are low. Format Do not turn the camera off, disconnect the AC adapter, or remove the battery or memory card during formatting. Use the Format option to format memory cards before first use and - Nikon 25547 | User Manual - Page 100
camera. Contact your local retailer or Nikon representative for details. Rechargeable battery Rechargeable EN-EL8 Li-ion batteries Battery charger MH-62 battery charger COOLPIX S6: Digital (SD) memory cards. • Format memory cards before first use ( 89). • Do not eject the memory card, turn the camera - Nikon 25547 | User Manual - Page 101
Camera To ensure continued enjoyment of this Nikon sources for extended periods when using or storing the camera. Intense light may cause deterioration in the image final photograph and does not indicate a malfunction. Some smear may appear in movies. • Images in the monitor may be difficult to see in a - Nikon 25547 | User Manual - Page 102
is fully charged before heading outside to take pictures in cold weather. Keep spare batteries in a warm place and exchange as camera from functioning. • When the battery is not in use, remove it from the camera or battery charger and replace the terminal cover. The camera and battery charger - Nikon 25547 | User Manual - Page 103
the monitor and how to deal with them. Display (blinks) WARNING ! ! BATTERY EXHAUSTED (● blinks red) (blinks) WARNING ! ! PLEASE WAIT FOR CAMERA TO FINISH RECORDING Problem Clock not set. Battery running low. Solution Set clock. 84 Prepare to charge or change battery. 10-11 Battery exhausted - Nikon 25547 | User Manual - Page 104
not created with View file on computer or other de- COOLPIX S6. vice. - ALL IMAGES ARE HIDDEN No pictures available for welcome screen or slide show. - PICTMOTION CANNOT BE CREATED No pictures selected Pictmotion movie. for Select pictures. 51 PICTMOTION CANNOT BE PLAYED BACK Pictmotion - Nikon 25547 | User Manual - Page 105
off and then on again. If LENS ERROR Lens error. error persists, contact retailer or Nikon 14 representative. LENS COVER ERROR Finger or other obstruction prevents lens cover from opening. Turn tion. camera off and remove obstruc- 2, 14 Profile not registered. Set up profile. No wireless - Nikon 25547 | User Manual - Page 106
error. Check printer. To resume, highlight Resume (if available) and press . - Troubleshooting If the camera fails to function as expected, check the list of common problems below before consulting your retailer or Nikon representative. Refer to the page numbers in the right-most column for more - Nikon 25547 | User Manual - Page 107
Problem Solution Camera clock is not Check camera clock regularly against more accurate time- correct pieces and reset as required. 84 Clock battery exhausted: recharge clock battery. Pictures Camera 0000 00:00"; movies will be dated "01.01.2006 00:00." No picture taken • Camera is in playback - Nikon 25547 | User Manual - Page 108
options picture that supports crop, D-lighting, or small picture. Camera may be unable to create Pictmotion movies using Cannot create new pictures recorded with other cameras. Other cameras may Pictmotion movie be unable to play Pictmotion movies created with COOLPIX 50 S6. Custom Pictmotion - Nikon 25547 | User Manual - Page 109
Problem Solution Transfer marking does Pictures were marked for transfer using another model of not appear camera. Mark pictures for transfer using S6. 81 • Camera not support - Pictmotion transfer. Cannot transfer • button can not be used to transfer Pictmotion movies. - Pictmotion movies - Nikon 25547 | User Manual - Page 110
standard allows pictures taken with a digital camera to be printed directly on a household printer, without using a computer. The camera can be connected directly to any ImageLink-compatible printer for one-touch picture printing. Time Zones ( 84-85) The camera supports the time zones listed below - Nikon 25547 | User Manual - Page 111
mode framing assist PORTRAIT mode framing assist LANDSCAPE mode framing assist SPORTS mode framing assist NIGHT PORTRAIT Exposure compensation 0 Movie menu ( 36-37) Movie options Set interval time Small size 320 30 s Auto-focus mode Electronic VR Single AF Off Pictmotion settings ( Music - Nikon 25547 | User Manual - Page 112
screen (1024) 85 1045 9 × 7 / 3½ × 2½ TV screen (640) 182 2245 5 × 4 / 2 × 1½ TV movie 640★ 18 s 3 min. 40 s - Small size 320★ 35 s 7 min. 20 s - Small size 320 1 min. exposure count display will show 9999. Restrictions on Camera Settings ( 74) Restrictions apply to the following - Nikon 25547 | User Manual - Page 113
: a four letter identifier, a four-digit file number assigned automatically by the camera in ascending order, and a three-letter extension (e.g., "DSCN0001.JPG"). Originals Identifier Extension Still picture DSCN .JPG Movie DSCN .MOV Time-lapse movie INTN .MOV Voice recording DSCN .WAV - Nikon 25547 | User Manual - Page 114
Specifications Nikon COOLPIX S6 Digital Camera Type Compact digital camera Effective pixels 6.0 million CCD in.)-∞ (middle zoom position) Center; manual with 99 focus areas Class 1 LED product Digital) memory cards DCF, Exif 2.2, and DPOF compliant Compressed: JPEG-baseline-compliant Movies - Nikon 25547 | User Manual - Page 115
bit (104/40-bit) WEP Infrastructure / ad-hoc Supported languages Chinese (Simplified and Traditional), Czech, Danish, camera with fully-charged EN-EL8 battery operated at an ambient temperature of 25 °C (77 °F). Technical Notes Specifications Nikon will not be held liable for any errors this manual - Nikon 25547 | User Manual - Page 116
MV-15 COOL-STATION Supported cameras Nikon S6 digital cameras I/O terminals DC in, USB, audio-video out, camera connector Interface USB Operating temperature 0-40 °C (32-104 °F) Approximate dimensions 111.5 × 28 × 50.5 mm/4.4 × 1.1 × 2.0 in. (W × H × D, excluding projections) Approximate - Nikon 25547 | User Manual - Page 117
, 48 (MENU) button, 3, 17 (mode) button, 3, 5, 17 (movie) mode, 35 (One-touch portrait) button, 2, 24 (Pictmotion) mode, 81 Design rule for Camera File system, 100 Digital Print Order Format, 60-61, cards, see Format card Framing, 16, 18, 24, 32 guides, 32 Full-time AF, see Focus, mode H Help, - Nikon 25547 | User Manual - Page 118
list by date, 48-49 menu, 80-82 movies, 38 on TV, 54 Pictmotion, 53 thumbnail, also Date and time, printing; Date imprint; Digital Print Order Format; PictBridge; Print set Print settings, 88 Standby mode, see Auto off Strap, camera, 2-3 Support information, 1 T Telephoto, see Zoom 108 Television, - Nikon 25547 | User Manual - Page 119
.O
-
 1
1 -
 2
2 -
 3
3 -
 4
4 -
 5
5 -
 6
6 -
 7
7 -
8
-
9
-
10
-
11
-
12
-
13
-
14
-
15
-
16
-
17
-
18
-
19
-
20
-
21
-
22
-
23
-
24
-
25
-
26
-
27
-
28
-
29
-
30
-
31
-
32
-
33
-
34
-
35
-
36
-
37
-
38
-
39
-
40
-
41
-
42
-
43
-
44
-
45
-
46
-
47
-
48
-
49
-
50
-
51
-
52
-
53
-
54
-
55
-
56
-
57
-
58
-
59
-
60
-
61
-
62
-
63
-
64
-
65
-
66
-
67
-
68
-
69
-
70
-
71
-
72
-
73
-
74
-
75
-
76
-
77
-
78
-
79
-
80
-
81
-
82
-
83
-
84
-
85
-
86
-
87
-
88
-
89
-
90
-
91
-
92
-
93
-
94
-
95
-
96
-
97
-
98
-
99
-
100
-
101
-
102
-
103
-
104
-
105
-
106
-
107
-
108
-
109
-
110
-
111
-
112
-
113
-
114
-
115
-
116
-
117
-
118
-
119
 |
 |