Nikon 9437 User Manual - Page 81
Menu Guide / Shooting Options: The Shooting Menu, Customizing Image Enhancement Options: Custom - user guide
 |
View all Nikon 9437 manuals
Add to My Manuals
Save this manual to your list of manuals |
Page 81 highlights
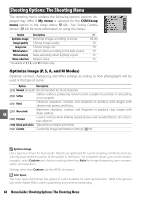
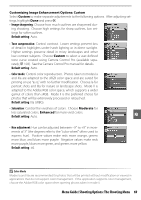
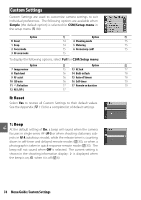
Customizing Image Enhancement Options: Custom Select Custom to make separate adjustments to the following options. After adjusting settings, highlight Done and press OK. • Image sharpening: Choose how much outlines are sharpened dur- ing shooting. Choose high settings for sharp outlines, low settings for softer outlines. Default setting: Auto. • Tone compensation: Control contrast. Lower settings prevent loss of detail in highlights under harsh lighting or in direct sunlight. Higher settings preserve detail in misty landscapes and other low-contrast subjects. Choose Custom to select a user-defined tone curve created using Camera Control Pro (available separately; 103). See the Camera Control Pro manual for details. Default setting: Auto. • Color mode: Control color reproduction. Photos taken in modes Ia and IIIa are adapted to the sRGB color space and are suited for printing or use "as is," with no further modification. Choose Ia for portrait shots and IIIa for nature or landscape shots. Mode II is adapted to the Adobe RGB color space, which supports a wider gamut of colors than sRGB. Mode II is the preferred choice for photos that will be extensively processed or retouched. Default setting: IIIa (sRBG). • Saturation: Control the vividness of colors. Choose Moderate for less saturated colors, Enhanced for more vivid colors. Default setting: Auto. • Hue adjustment: Hue can be adjusted between -9° to +9° in increments of 3° (the degrees refer to the "color wheel" often used to express hue). Positive values make reds more orange, greens more blue, and blues more purple. Negative values make reds more purple, blues more green, and greens more yellow. Default setting: ±0. Color Mode Modes Ia and IIIa are recommended for photos that will be printed without modification or viewed in applications that do not support color management. If the application supports color management, choose the Adobe RGB color space when opening photos taken in mode II. Menu Guide/Shooting Options: The Shooting Menu 69
-
 1
1 -
2
-
3
-
4
-
5
-
6
-
7
-
8
-
9
-
10
-
11
-
12
-
13
-
14
-
15
-
16
-
17
-
18
-
19
-
20
-
21
-
22
-
23
-
24
-
25
-
26
-
27
-
28
-
29
-
30
-
31
-
32
-
33
-
34
-
35
-
36
-
37
-
38
-
39
-
40
-
41
-
42
-
43
-
44
-
45
-
46
-
47
-
48
-
49
-
50
-
51
-
52
-
53
-
54
-
55
-
56
-
57
-
58
-
59
-
60
-
61
-
62
-
63
-
64
-
65
-
66
-
67
-
68
-
69
-
70
-
71
-
72
-
73
-
74
-
75
-
 76
76 -
 77
77 -
 78
78 -
 79
79 -
 80
80 -
 81
81 -
 82
82 -
 83
83 -
 84
84 -
 85
85 -
 86
86 -
87
-
88
-
89
-
90
-
91
-
92
-
93
-
94
-
95
-
96
-
97
-
98
-
99
-
100
-
101
-
102
-
103
-
104
-
105
-
106
-
107
-
108
-
109
-
110
-
111
-
112
-
113
-
114
-
115
-
116
-
117
-
118
-
119
-
120
-
121
-
122
-
123
-
124
-
125
-
126
-
127
-
128
-
129
-
130
-
131
-
132
-
133
-
134
-
135
-
136
-
137
-
138
-
139
 |
 |
