Nikon 9437 User Manual - Page 95
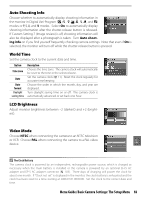
Auto Shooting Info, World Time, LCD Brightness, Video Mode, Auto shoot, ing info
 |
View all Nikon 9437 manuals
Add to My Manuals
Save this manual to your list of manuals |
Page 95 highlights
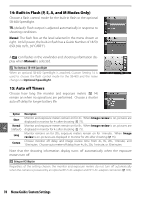
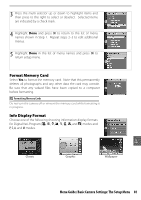
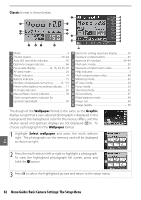
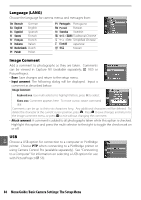
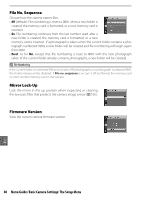
Auto Shooting Info Choose whether to automatically display shooting information in the monitor in Digital Vari-Program and ) modes or P, S, A, and M modes. Select On to automatically display shooting information after the shutter-release button is released. If Custom Setting 7 (Image review) is off, shooting information will also be displayed after a photograph is taken. Turn Auto shooting info on if you find yourself frequently checking camera settings. Note that even if On is selected, the monitor will turn off while the shutter-release button is pressed. World Time Set the camera clock to the current date and time. Option Time zone Date Date format Daylight saving time Description Choose the time zone. The camera clock will automatically be reset to the time in the selected zone. Set the camera clock ( 11). Reset the clock regularly for accurate time keeping. Choose the order in which the month, day, and year are displayed. Turn daylight saving time on or off. The camera clock is automatically advanced or set back one hour. LCD Brightness Adjust monitor brightness between -2 (darkest) and +2 (brightest). Video Mode Choose NTSC when connecting the camera to an NTSC television or VCR. Choose PAL when connecting the camera to a PAL video device. The Clock Battery The camera clock is powered by an independent, rechargeable power source, which is charged as necessary when the main battery is installed or the camera is powered by an optional EH-5 AC adapter and EP-5 AC adapter connector ( 103). Three days of charging will power the clock for about one month. If "Clock not set" is displayed in the monitor, the clock battery is exhausted and the clock has been reset to a time starting at 2006.01.01.00:00:00. Set the clock to the correct date and time. Menu Guide/Basic Camera Settings: The Setup Menu 83
-
 1
1 -
2
-
3
-
4
-
5
-
6
-
7
-
8
-
9
-
10
-
11
-
12
-
13
-
14
-
15
-
16
-
17
-
18
-
19
-
20
-
21
-
22
-
23
-
24
-
25
-
26
-
27
-
28
-
29
-
30
-
31
-
32
-
33
-
34
-
35
-
36
-
37
-
38
-
39
-
40
-
41
-
42
-
43
-
44
-
45
-
46
-
47
-
48
-
49
-
50
-
51
-
52
-
53
-
54
-
55
-
56
-
57
-
58
-
59
-
60
-
61
-
62
-
63
-
64
-
65
-
66
-
67
-
68
-
69
-
70
-
71
-
72
-
73
-
74
-
75
-
76
-
77
-
78
-
79
-
80
-
81
-
82
-
83
-
84
-
85
-
86
-
87
-
88
-
89
-
 90
90 -
 91
91 -
 92
92 -
 93
93 -
 94
94 -
 95
95 -
 96
96 -
 97
97 -
 98
98 -
 99
99 -
 100
100 -
101
-
102
-
103
-
104
-
105
-
106
-
107
-
108
-
109
-
110
-
111
-
112
-
113
-
114
-
115
-
116
-
117
-
118
-
119
-
120
-
121
-
122
-
123
-
124
-
125
-
126
-
127
-
128
-
129
-
130
-
131
-
132
-
133
-
134
-
135
-
136
-
137
-
138
-
139
 |
 |
