Nikon Coolpix L16 L18 / L16 User's Manual - Page 65
For Users of Windows 2000 Professional, Found New Hardware Wizard, Cancel - sdhc
 |
UPC - 018208096046
View all Nikon Coolpix L16 manuals
Add to My Manuals
Save this manual to your list of manuals |
Page 65 highlights
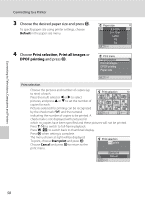
Connecting to a Computer For Users of Windows 2000 Professional Use a card reader or similar device to transfer the pictures stored on the memory card to the computer. If the memory card has a capacity greater than 2 GB, or is SDHC-compliant, the intended device must support these features of the memory card. • At the Nikon Transfer default settings, Nikon Transfer will start automatically when a memory card is inserted into the card reader or similar device. See step 5 above to transfer pictures. • Do not connect the camera to the computer. If the camera is connected to the computer, the Found New Hardware Wizard dialog will be displayed. Select Cancel, close the dialog, and disconnect the camera from the computer. • To transfer pictures stored in the camera's internal memory to the computer, the pictures must first be copied to a memory card using the camera (A 89). Connecting to Televisions, Computers and Printers D Using Standard OS Operations to Open Camera Files Navigate to the folder on the computer's hard disk to which pictures were saved and open a picture in the viewer supplied with your operating system. D Panorama Creation with Panorama Maker • Use a series of pictures taken using the Panorama assist option in scene mode (A 38) to create a single panorama photo with Panorama Maker. • Panorama Maker can be installed to a computer using the supplied Software Suite CD. • After installation is complete, follow the procedure described below to start Panorama Maker. Windows Open All Programs (Programs under Windows 2000) from the Start menu > ArcSoft Panorama Maker 4 > Panorama Maker 4. Macintosh Open Applications by selecting Applications from the Go menu, and double-click the Panorama Maker 4 icon. • For more information on using Panorama Maker, refer to the on-screen instructions and help information contained in Panorama Maker. D Image File Names and Folder Names See, "Image File and Folder Names" (A 92) for more information. 53
-
 1
1 -
2
-
3
-
4
-
5
-
6
-
7
-
8
-
9
-
10
-
11
-
12
-
13
-
14
-
15
-
16
-
17
-
18
-
19
-
20
-
21
-
22
-
23
-
24
-
25
-
26
-
27
-
28
-
29
-
30
-
31
-
32
-
33
-
34
-
35
-
36
-
37
-
38
-
39
-
40
-
41
-
42
-
43
-
44
-
45
-
46
-
47
-
48
-
49
-
50
-
51
-
52
-
53
-
54
-
55
-
56
-
57
-
58
-
59
-
 60
60 -
 61
61 -
 62
62 -
 63
63 -
 64
64 -
 65
65 -
 66
66 -
 67
67 -
 68
68 -
 69
69 -
 70
70 -
71
-
72
-
73
-
74
-
75
-
76
-
77
-
78
-
79
-
80
-
81
-
82
-
83
-
84
-
85
-
86
-
87
-
88
-
89
-
90
-
91
-
92
-
93
-
94
-
95
-
96
-
97
-
98
-
99
-
100
-
101
-
102
-
103
-
104
-
105
-
106
-
107
-
108
-
109
-
110
-
111
-
112
-
113
-
114
-
115
-
116
-
117
-
118
-
119
-
120
-
121
-
122
-
123
-
124
 |
 |
