Nokia 2320 Nokia 2320 User Guide in US English and in Spanish - Page 18
Multimedia messages, Create a text or multimedia message
 |
View all Nokia 2320 manuals
Add to My Manuals
Save this manual to your list of manuals |
Page 18 highlights
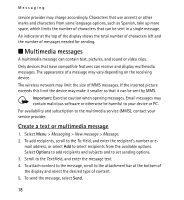
Messaging service provider may charge accordingly. Characters that use accents or other marks and characters from some language options, such as Spanish, take up more space, which limits the number of characters that can be sent in a single message. An indicator at the top of the display shows the total number of characters left and the number of messages needed for sending. ■ Multimedia messages A multimedia message can contain text, pictures, and sound or video clips. Only devices that have compatible features can receive and display multimedia messages. The appearance of a message may vary depending on the receiving device. The wireless network may limit the size of MMS messages. If the inserted picture exceeds this limit the device may make it smaller so that it can be sent by MMS. Important: Exercise caution when opening messages. Email messages may contain malicious software or otherwise be harmful to your device or PC. For availability and subscription to the multimedia service (MMS), contact your service provider. Create a text or multimedia message 1. Select Menu > Messaging > New message > Message. 2. To add recipients, scroll to the To: field, and enter the recipient's number or e- mail address, or select Add to select recipients from the available options. Select Options to add recipients and subjects and to set sending options. 3. Scroll to the Text:field, and enter the message text. 4. To attach content to the message, scroll to the attachment bar at the bottom of the display and select the desired type of content. 5. To send the message, select Send. 18
-
 1
1 -
2
-
3
-
4
-
5
-
6
-
7
-
8
-
9
-
10
-
11
-
12
-
 13
13 -
 14
14 -
 15
15 -
 16
16 -
 17
17 -
 18
18 -
 19
19 -
 20
20 -
 21
21 -
 22
22 -
 23
23 -
24
-
25
-
26
-
27
-
28
-
29
-
30
-
31
-
32
-
33
-
34
-
35
-
36
-
37
-
38
-
39
-
40
-
41
-
42
-
43
-
44
-
45
-
46
-
47
-
48
-
49
-
50
-
51
-
52
-
53
-
54
-
55
-
56
-
57
-
58
-
59
-
60
-
61
-
62
-
63
-
64
-
65
-
66
-
67
-
68
-
69
-
70
-
71
-
72
-
73
-
74
-
75
-
76
-
77
-
78
-
79
-
80
-
81
-
82
-
83
-
84
-
85
-
86
-
87
-
88
-
89
-
90
-
91
-
92
-
93
-
94
-
95
-
96
-
97
-
98
-
99
-
100
-
101
-
102
-
103
-
104
-
105
-
106
-
107
-
108
-
109
-
110
-
111
-
112
 |
 |