Nokia 9000il Nokia 9000il User Guide in English - Page 41
Fax settings
 |
View all Nokia 9000il manuals
Add to My Manuals
Save this manual to your list of manuals |
Page 41 highlights
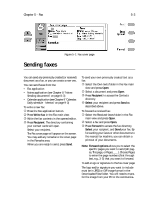
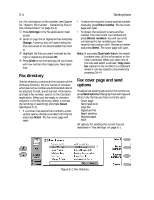
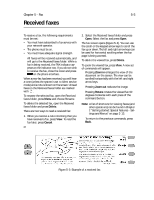
Chapter 5 - Fax 5-1 5. Fax Activate the Fax application by pressing the button labeled "Fax" on the communicator interface keyboard. To send and receive faxes the following requirements must be met: • The phone interface must be on. • The network you are using must support fax calls. • Your SIM card must be activated for fax service. Contact your network operator for details. When sending or receiving a fax, the FAX indicator appears in the display's indicator row. The Fax application main view shows: • Own texts folder - Includes created faxes, short messages, memos, notes and e-mail stored on the communicator. • Received faxes folder - Contains received faxes. • Document outbox - See Chapter 12 "Document outbox" on page 12-1. Fax settings To view the Fax application settings: Press Settings in the Fax main view. A list of settings will open. These are the default sending options for your faxes. To change the settings: Select a setting and press Change to open it. The fax settings are: Cover page - Header (default) / Separate page / None. Header - The cover page contents (To/From, Fax numbers, etc.) will be included at the top of the first page of the fax. Separate page - The first page of the fax will contain only the cover page contents. None - No cover page information will be attached to the fax. The first page of the document will be the first page of your fax. Begin sending - Immediately (default) / At [time] Lets you choose when the fax is sent. Immediately - The fax is sent right away. At [time] - You can determine the time when the fax is sent. This option may enable you to take advantage of cheaper calling times. Receive resolution - Standard / Fine (default). Standard - The fax will be received using 200 (width) x 100 (height) dots per inch resolution. Fine - The fax will be received using 200 x 200 dpi resolution. Receiving faxes with fine resolution will take longer and requires approximately twice as much memory as with standard resolution. Send resolution - Standard / Fine (default). Sending faxes with fine resolution takes longer and temporarily requires more free memory than when using standard resolution Logo file - None (default) / [File name]. Enables you to add your company's logo to the fax cover page. Although the logo is not shown when viewing the Cover page, it will appear on the sent fax. None - No logo is attached to the fax.
-
 1
1 -
2
-
3
-
4
-
5
-
6
-
7
-
8
-
9
-
10
-
11
-
12
-
13
-
14
-
15
-
16
-
17
-
18
-
19
-
20
-
21
-
22
-
23
-
24
-
25
-
26
-
27
-
28
-
29
-
30
-
31
-
32
-
33
-
34
-
35
-
 36
36 -
 37
37 -
 38
38 -
 39
39 -
 40
40 -
 41
41 -
 42
42 -
 43
43 -
 44
44 -
 45
45 -
 46
46 -
47
-
48
-
49
-
50
-
51
-
52
-
53
-
54
-
55
-
56
-
57
-
58
-
59
-
60
-
61
-
62
-
63
-
64
-
65
-
66
-
67
-
68
-
69
-
70
-
71
-
72
-
73
-
74
-
75
-
76
-
77
-
78
-
79
-
80
-
81
-
82
-
83
-
84
-
85
-
86
-
87
-
88
-
89
-
90
-
91
-
92
-
93
-
94
-
95
-
96
-
97
-
98
-
99
-
100
-
101
-
102
-
103
-
104
-
105
-
106
-
107
-
108
-
109
-
110
-
111
-
112
-
113
-
114
-
115
-
116
-
117
-
118
-
119
-
120
-
121
-
122
-
123
-
124
-
125
-
126
-
127
-
128
-
129
-
130
 |
 |