Nokia 9000il Nokia 9000il User Guide in English - Page 43
Sending faxes
 |
View all Nokia 9000il manuals
Add to My Manuals
Save this manual to your list of manuals |
Page 43 highlights
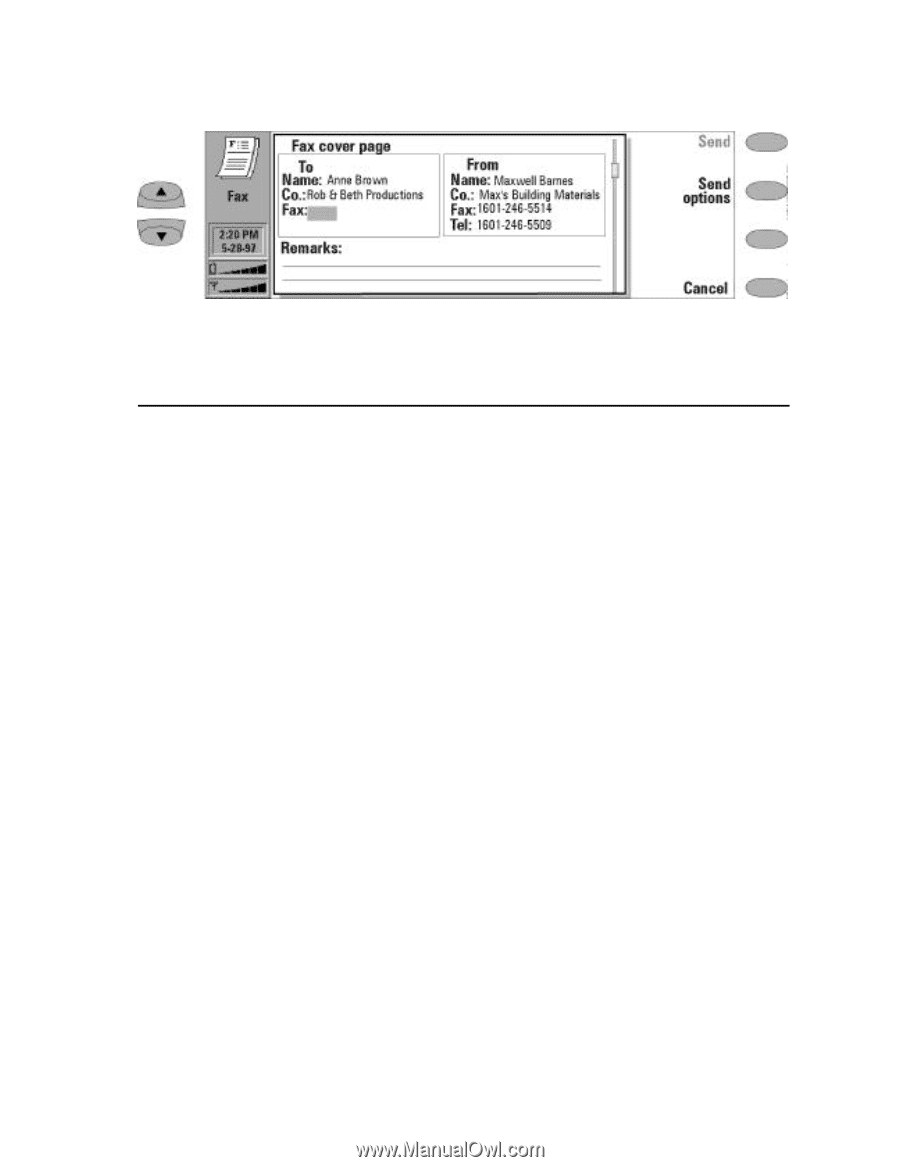
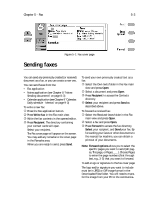
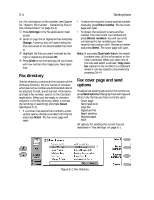
Chapter 5 - Fax 5-3 Sending faxes Figure 5-1: Fax cover page You can send any previously created (or received) document as a fax, or you can create a new one. You can send faxes from the: • Fax application • Notes application (see Chapter 8 "Notes: Sending documents" on page 8-3) • Calendar application (see Chapter 9 "Calendar: Daily schedule - Memos" on page 9-3) To write a new fax: • Press the Fax application button. , Press Write fax in the Fax main view. ƒ Write the fax contents in the opened editor. „ Press Recipient. The directory containing your contact cards will open. Select your recipient. The Fax cover page will appear on the screen. You may add any remarks to the cover page in the Remarks area. When you are ready to send, press Send. To send your own previously created text as a fax: • Select the Own texts folder in the Fax main view and press Open. , Select a document and press Open. ƒ Press Recipient to access the Contacts directory. „ Select your recipient and press Send as described above. To forward a received fax: • Select the Received faxes folder in the Fax main view and press Open. , Select a fax and press Open. ƒ Press Forward to access the fax directory, Select your recipient, and Send your fax. By forwarding your faxes or other documents to the nearest fax machine, you can obtain a printout of your documents. Note: Forward options allows you to select the specific pages you want to send (All pages, This page, or Pages ___ ). Choose Pages to enter the page numbers (first through last, e.g., 3-5) that you want to forward. To add a logo or signature to the fax cover page: The logo and/or signature you want to include must be in JPEG or GIF image format in the Downloaded files folder. You will need to transfer the image from your PC to the communica-
-
 1
1 -
2
-
3
-
4
-
5
-
6
-
7
-
8
-
9
-
10
-
11
-
12
-
13
-
14
-
15
-
16
-
17
-
18
-
19
-
20
-
21
-
22
-
23
-
24
-
25
-
26
-
27
-
28
-
29
-
30
-
31
-
32
-
33
-
34
-
35
-
36
-
37
-
 38
38 -
 39
39 -
 40
40 -
 41
41 -
 42
42 -
 43
43 -
 44
44 -
 45
45 -
 46
46 -
 47
47 -
 48
48 -
49
-
50
-
51
-
52
-
53
-
54
-
55
-
56
-
57
-
58
-
59
-
60
-
61
-
62
-
63
-
64
-
65
-
66
-
67
-
68
-
69
-
70
-
71
-
72
-
73
-
74
-
75
-
76
-
77
-
78
-
79
-
80
-
81
-
82
-
83
-
84
-
85
-
86
-
87
-
88
-
89
-
90
-
91
-
92
-
93
-
94
-
95
-
96
-
97
-
98
-
99
-
100
-
101
-
102
-
103
-
104
-
105
-
106
-
107
-
108
-
109
-
110
-
111
-
112
-
113
-
114
-
115
-
116
-
117
-
118
-
119
-
120
-
121
-
122
-
123
-
124
-
125
-
126
-
127
-
128
-
129
-
130
 |
 |