NordicTrack Audio Rider R400 Bike English Manual - Page 12
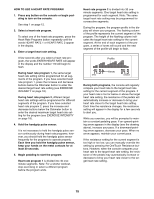
How To Use The Manual Mode
 |
View all NordicTrack Audio Rider R400 Bike manuals
Add to My Manuals
Save this manual to your list of manuals |
Page 12 highlights
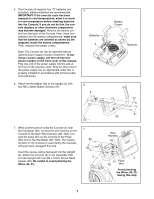
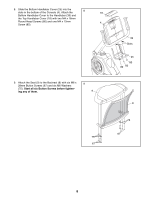
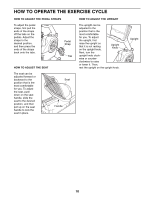
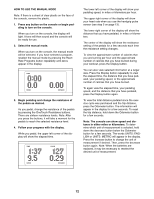
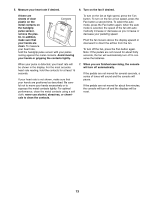
HOW TO USE THE MANUAL MODE Note: If there is a sheet of clear plastic on the face of the console, remove the plastic. 1. Press any button on the console or begin ped- aling to turn on the console. When you turn on the console, the display will light. A tone will then sound and the console will be ready for use. 2. Select the manual mode. When you turn on the console, the manual mode will be selected. If you have selected a program, reselect the manual mode by pressing the Heart Rate Programs button repeatedly until zeros appear in the display. 3. Begin pedaling and change the resistance of the pedals as desired. As you pedal, change the resistance of the pedals by pressing the OneTouch Resistance buttons. There are sixteen resistance levels. Note: After you press the buttons, it will take a moment for the pedals to reach the selected resistance level. 4. Follow your progress with the display. While you pedal, the upper left corner of the display will show the elapsed time. The lower left corner of the display will show your pedaling speed, in miles or kilometers per hour. The upper right corner of the display will show your heart rate when you use the handgrip pulse sensor (see step 5 on page 13). The lower right corner of the display will show the distance that you have pedaled, in miles or kilometers. The center of the display will show the resistance setting of the pedals for a few seconds each time the resistance setting changes. To view the approximate number of calories that you are burning per hour and the approximate number of calories that you have burned during your workout, press the Display button. You can also view selected information at a larger size. Press the Display button repeatedly to view the elapsed time, the distance that you have pedaled, your pedaling speed, or the approximate number of calories that you have burned. To again view the elapsed time, your pedaling speed, and the distance that you have pedaled, press the Display button again. To view the total distance pedaled since the exercise cycle was purchased and the trip distance, press the Odometer button. The information will appear in the display for a few seconds. To reset the trip distance, hold down the Odometer button for a few seconds. Note: The console can show speed and distance in either miles or kilometers. To determine which unit of measurement is selected, hold down the decrease button below the Odometer button for a few seconds. The words UNITS: ENGLISH or UNITS: METRIC will appear in the display. Press the increase button to change the unit of measurement if desired. Then, press the decrease button again. Note: When the batteries are replaced, it may be necessary to reselect the desired unit of measurement. 12
-
 1
1 -
2
-
3
-
4
-
5
-
6
-
 7
7 -
 8
8 -
 9
9 -
 10
10 -
 11
11 -
 12
12 -
 13
13 -
 14
14 -
 15
15 -
 16
16 -
 17
17 -
18
-
19
-
20
-
21
-
22
-
23
-
24
 |
 |
