Olympus SP 510 SP-510UZ Advanced Manual (English) - Page 49
Setting the number of prints and data to be printed, How to make print reservations
 |
UPC - 050332158252
View all Olympus SP 510 manuals
Add to My Manuals
Save this manual to your list of manuals |
Page 49 highlights
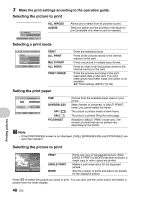
Setting the number of prints and data to be printed PRINT INFO
-
 1
1 -
2
-
3
-
4
-
5
-
6
-
7
-
8
-
9
-
10
-
11
-
12
-
13
-
14
-
15
-
16
-
17
-
18
-
19
-
20
-
21
-
22
-
23
-
24
-
25
-
26
-
27
-
28
-
29
-
30
-
31
-
32
-
33
-
34
-
35
-
36
-
37
-
38
-
39
-
40
-
41
-
42
-
43
-
 44
44 -
 45
45 -
 46
46 -
 47
47 -
 48
48 -
 49
49 -
 50
50 -
 51
51 -
 52
52 -
 53
53 -
 54
54 -
55
-
56
-
57
-
58
-
59
-
60
-
61
-
62
-
63
-
64
-
65
-
66
-
67
-
68
-
69
-
70
-
71
-
72
-
73
-
74
-
75
-
76
-
77
-
78
-
79
-
80
-
81
-
82
-
83
-
84
-
85
-
86
-
87
-
88
-
89
-
90
-
91
-
92
-
93
-
94
-
95
-
96
 |
 |
EN
49
Printing pictures
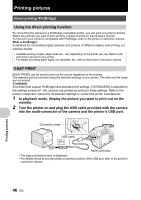
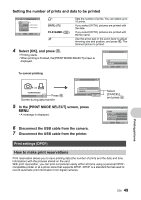
4
Select [OK], and press
o
.
•
Printing starts.
•
When printing is finished, the [PRINT MODE SELECT] screen is
displayed.
To cancel printing
5
In the [PRINT MODE SELECT] screen, press
m
.
•
A message is displayed.
6
Disconnect the USB cable from the camera.
7
Disconnect the USB cable from the printer.
Print reservation allows you to save printing data (the number of prints and the date and time
information) with the pictures stored on the card.
With print reservation, you can print out pictures easily either at home using a personal DPOF-
compatible printer or at a photo store that supports DPOF. DPOF is a standard format used to
record automatic print information from digital cameras.
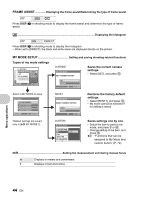
Setting the number of prints and data to be printed
Print settings (DPOF)
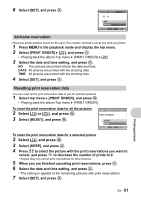
How to make print reservations
OK
SET
MENU
BACK
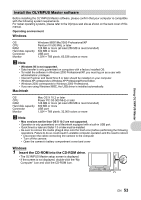
PRINT INFO
1
WITHOUT
WITHOUT
DATE
FILE NAME
P
<
x
[IN]
<
×
Sets the number of prints. You can select up to
10 prints.
DATE (
If you select [WITH], pictures are printed with
the date.
FILE NAME (
If you select [WITH], pictures are printed with
the file name.
P
Use the arrow pad or the zoom lever to adjust
trimming size and position, and press
o
. The
trimmed picture is printed.
OK
SET
MENU
BACK
PRINT
[IN]
OK
CANCEL
OK
CANCEL
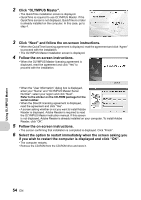
TRANSFERRING
Screen during data transfer
OK
[IN]
SET
PRINT
CANCEL
Press
o
.
Select
[CANCEL],
and press
o
.
OK
MENU
EXIT
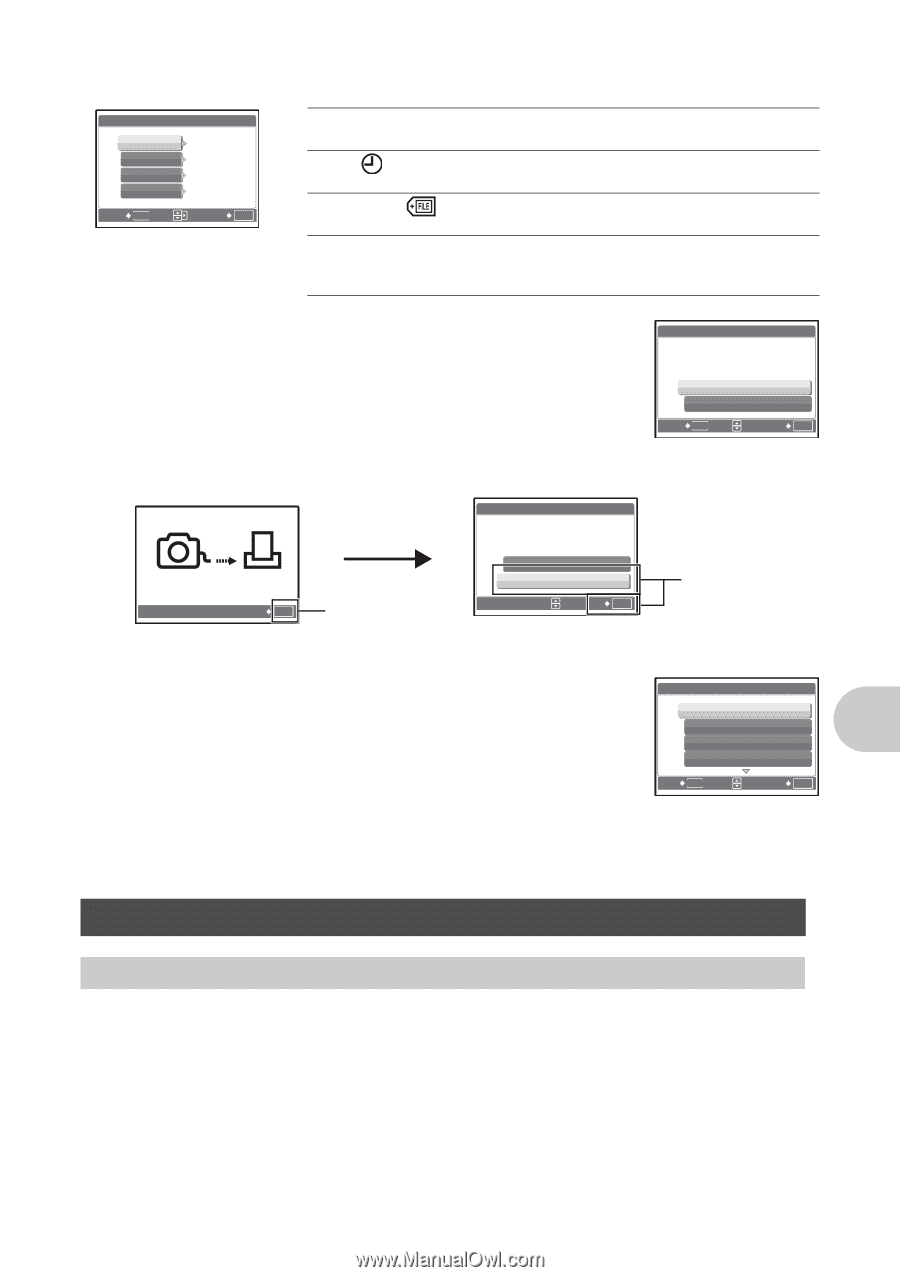
SET
PRINT MODE SELECT
[IN]
PRINT
ALL PRINT
MULTI PRINT
ALL INDEX