Olympus SZ-20 SZ-20 Instruction Manual (English) - Page 31
Taking pictures with [Manual], When shooting with [Auto] SZ-10
 |
View all Olympus SZ-20 manuals
Add to My Manuals
Save this manual to your list of manuals |
Page 31 highlights
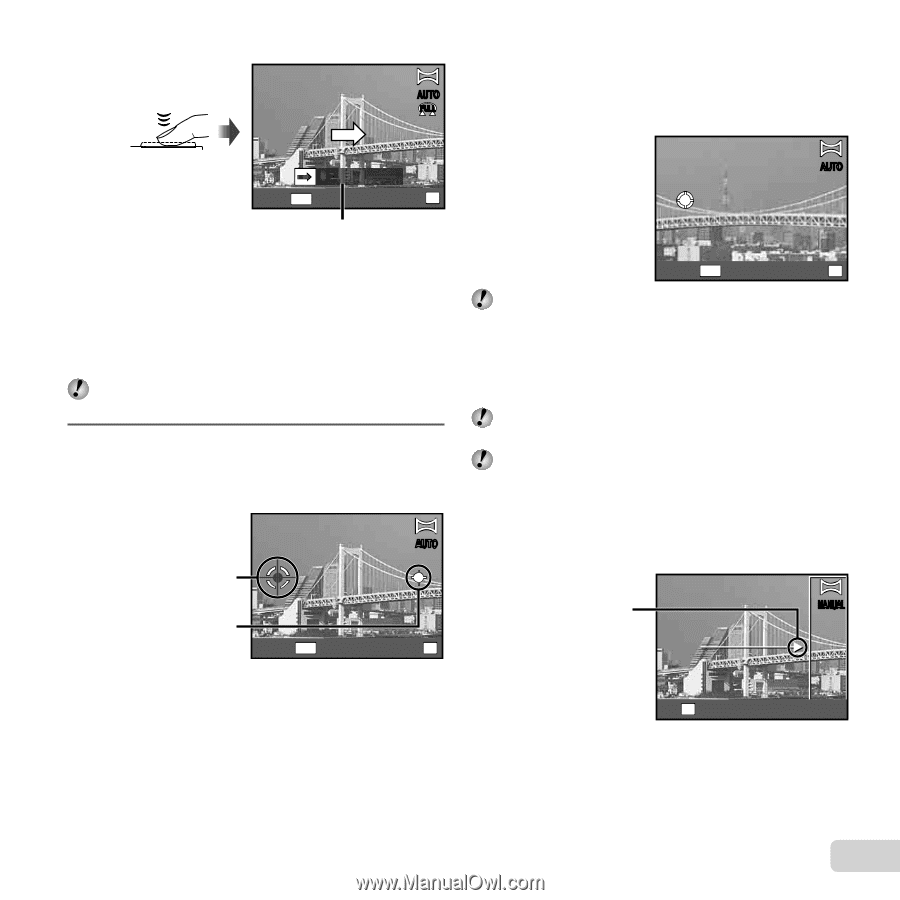
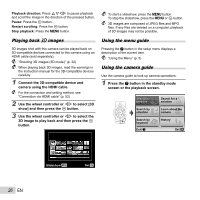
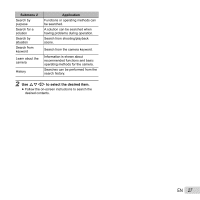
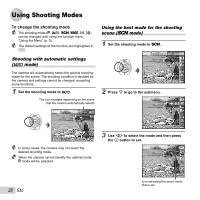
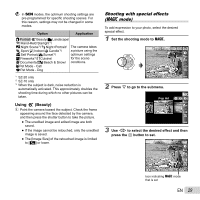
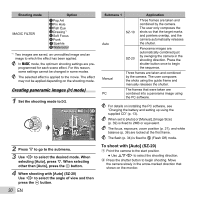
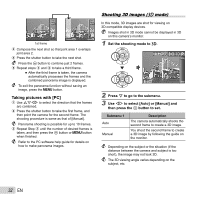
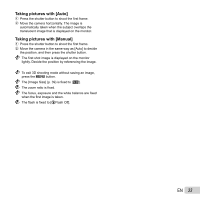
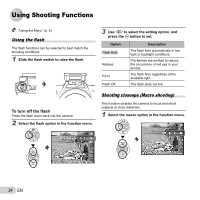
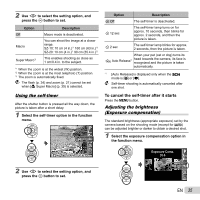
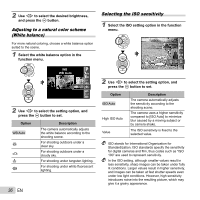
3 Move the camera slowly while keeping it straight, and stop the camera where the pointer and target mark AUTO overlap. FULL ● The camera releases the shutter automatically. Cancel MENU Save OK Guide 3 When shooting reaches the end of the guide on the monitor, it finishes automatically. ● The camera automatically processes the images and the combined panorama image is displayed. ● To stop shooting in the middle, press the shutter button or A button. If the camera pauses for a while, shooting automatically finishes. If the message "Image was not created." is displayed, shoot again. 4 When shooting with [Auto] (SZ-10) 1 Press the shutter button to take the first frame. 2 Move the camera slightly in the direction of the second frame. AUTO Target mark Pointer Cancel MENU Save OK Screen when combining images from left to right AUTO Cancel MENU Save OK To combine only two pictures, press the A button before taking a third frame. 4 Repeat Step 3 to take a third frame. ● After the third frame is taken, the camera automatically processes the frames and the combined panorama image is displayed. To exit the panorama function without saving an image, press the m button. If the shutter does not automatically release, try [Manual] or [PC]. Taking pictures with [Manual] 1 Use FGHI to specify at which edge the next picture is to be connected. Direction for combining the next frame MANUAL Set OK 2 Press the shutter button to take the first frame. The white-boxed part of the first frame is displayed on joint area 1. EN 31
-
 1
1 -
2
-
3
-
4
-
5
-
6
-
7
-
8
-
9
-
10
-
11
-
12
-
13
-
14
-
15
-
16
-
17
-
18
-
19
-
20
-
21
-
22
-
23
-
24
-
25
-
 26
26 -
 27
27 -
 28
28 -
 29
29 -
 30
30 -
 31
31 -
 32
32 -
 33
33 -
 34
34 -
 35
35 -
 36
36 -
37
-
38
-
39
-
40
-
41
-
42
-
43
-
44
-
45
-
46
-
47
-
48
-
49
-
50
-
51
-
52
-
53
-
54
-
55
-
56
-
57
-
58
-
59
-
60
-
61
-
62
-
63
-
64
-
65
-
66
-
67
-
68
-
69
-
70
-
71
-
72
-
73
-
74
-
75
-
76
-
77
-
78
-
79
-
80
-
81
-
82
-
83
-
84
 |
 |