Olympus Stylus 1050 SW Stylus 1050 SW Instruction Manual (English) - Page 36
Menus for Playback, Editing, and, Printing Functions
 |
UPC - 050332166554
View all Olympus Stylus 1050 SW manuals
Add to My Manuals
Save this manual to your list of manuals |
Page 36 highlights
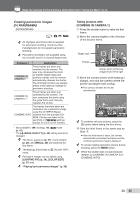
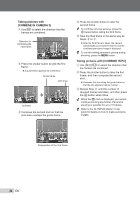
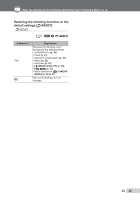
Menus for Playback, Editing, and Printing Functions When the mode dial is set to the q position, settings can be made. Playing back automatically [m SLIDESHOW] m SLIDESHOW Submenu 1 Submenu 2 Submenu 3 ALL/STILL NORMAL*1/ PICTURE/MOVIE/ FADER*1/SLIDE*1/ OFF/1/2 CALENDAR ZOOM*1/date*2 Application Selects the range of images for the slideshow, the type of transition effect ([TYPE]) used between images, and the background music ([BGM]). *1 Only when [STILL PICTURE] is selected in submenu 1. *2 Only when [CALENDAR] is selected in submenu 1. To start a slideshow After pressing the o button to make the [BGM] settings, the slideshow starts. To stop the slideshow, press the o button or the m button. [BGM] is not available when [jSILENT MODE] (p. 49) is set to [ON]. Retouching images [w PERFECT FIX] w PERFECT FIX Depending on the picture, the editing may not be effective. The retouching process may lower the image resolution. Submenu 1 ALL LIGHTING FIX REDEYE FIX Application [LIGHTING FIX] and [REDEYE FIX] are applied together. Only sections darkened by backlighting and dim lighting are brightened. Eyes that are reddened by the flash are corrected. 1 Use 12 to select a correction method and press the o button. 2 Use 34 to select an image for retouching, and press the o button. ● The retouched image is saved as a separate image. Registering images to the internal memory as My Favorite images [5 ADD FAVORITE] 5 ADD FAVORITE Up to 9 images can be registered. "Playing back My Favorite images" (p. 26) The registered My Favorite images can be used for the background image on the startup screen. [PW ON SETUP] (p. 42) To register images as My Favorite images 1 Use 34 to select an image to register, and then press the o button. ● The selected image is registered to the internal memory as a separate My Favorite image. ADD FAVORITE EXIT MENU SET OK 36 EN
-
 1
1 -
2
-
3
-
4
-
5
-
6
-
7
-
8
-
9
-
10
-
11
-
12
-
13
-
14
-
15
-
16
-
17
-
18
-
19
-
20
-
21
-
22
-
23
-
24
-
25
-
26
-
27
-
28
-
29
-
30
-
 31
31 -
 32
32 -
 33
33 -
 34
34 -
 35
35 -
 36
36 -
 37
37 -
 38
38 -
 39
39 -
 40
40 -
 41
41 -
42
-
43
-
44
-
45
-
46
-
47
-
48
-
49
-
50
-
51
-
52
-
53
-
54
-
55
-
56
-
57
-
58
-
59
-
60
-
61
-
62
-
63
-
64
-
65
-
66
-
67
-
68
-
69
-
70
-
71
-
72
-
73
-
74
-
75
-
76
-
77
-
78
-
79
-
80
-
81
-
82
-
83
-
84
-
85
-
86
 |
 |
