Onkyo HT-RC360 Owner Manual - Page 17
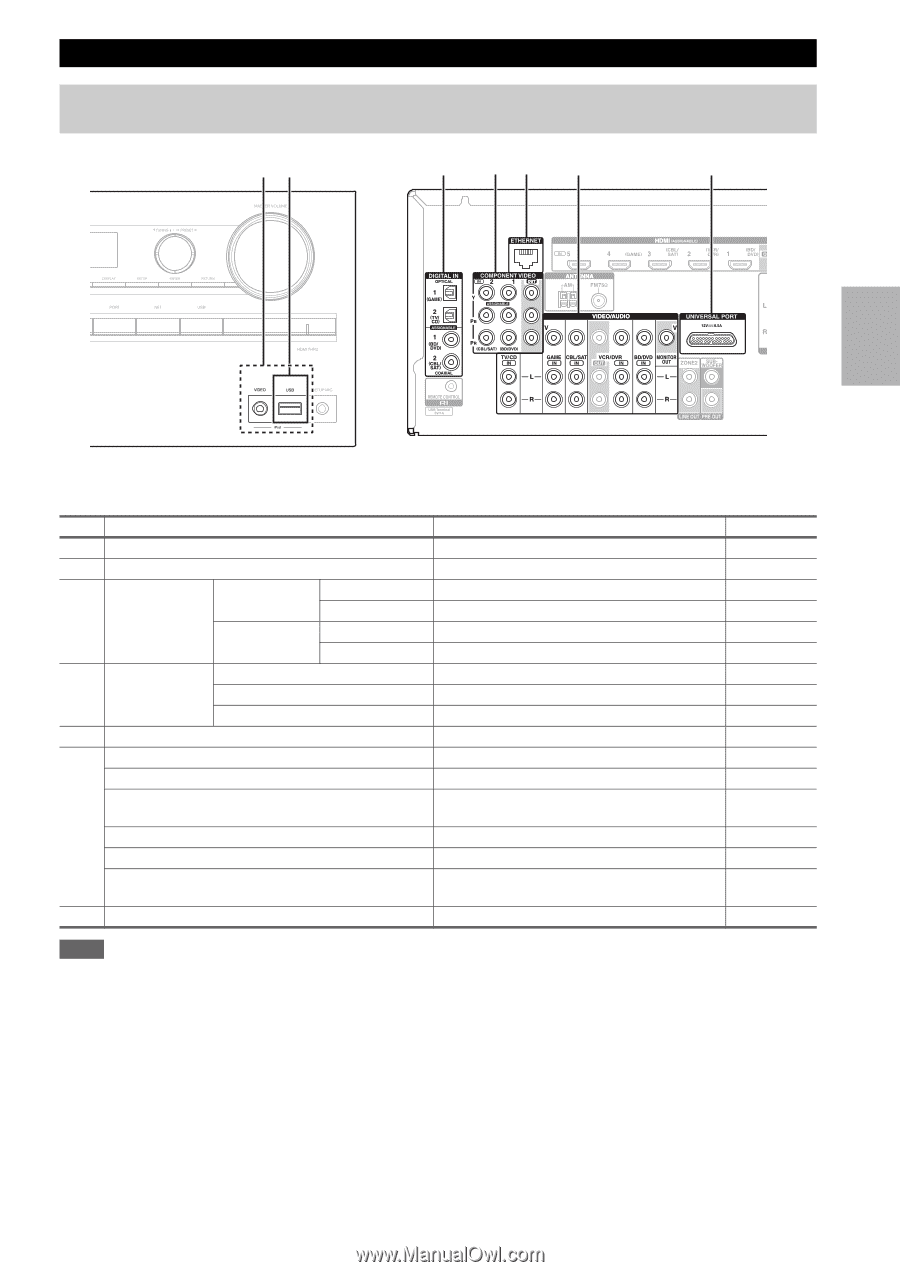
Connecting Your Components, How to record a video source, HDMI OUT, MONITOR OUT V - play to
 |
View all Onkyo HT-RC360 manuals
Add to My Manuals
Save this manual to your list of manuals |
Page 17 highlights
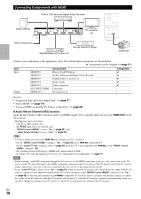
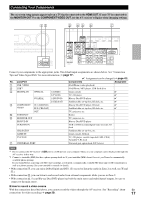
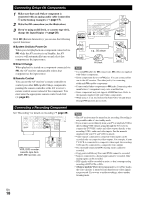
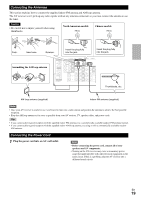
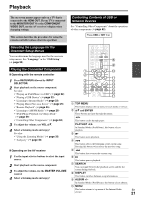
Connecting Your Components The on-screen setup menus appear only on a TV that is connected to the HDMI OUT. If your TV is connected to the MONITOR OUT V or the COMPONENT VIDEO OUT, use the AV receiver's display when changing settings. "# $ %& ' ( Connect your components to the appropriate jacks. The default input assignments are shown below. See "Connection Tips and Video Signal Path" for more information (➔ page 77). ✔: Assignment can be changed (➔ page 42). No. Jack/Port Components Assignable " USB, VIDEO iPod/iPhone (video playback) # USB*1 iPod/iPhone, MP3 player, USB flash drive $ DIGITAL IN OPTICAL 1 (GAME) Game console ✔ 2 (TV/CD) TV, CD player ✔ COAXIAL 1 (BD/DVD) Blu-ray Disc/DVD player ✔ 2 (CBL/SAT) Satellite/cable set-top box, RI dock, etc. ✔ % COMPONENT IN 1 (BD/DVD) VIDEO IN 2 (CBL/SAT) Blu-ray Disc/DVD player, RI dock ✔ Satellite/cable set-top box, RI dock, etc. ✔ OUT TV, projector, etc. & ETHERNET Router ' MONITOR OUT TV, projector, etc. BD/DVD IN Blu-ray Disc/DVD player VCR/DVR IN VCR or DVD recorder/digital video recorder, RI dock CBL/SAT IN Satellite/cable set-top box, etc. GAME IN Game console, RI dock TV/CD IN TV, CD player, cassette tape deck, MD, CD-R, Turntable*2, RI dock ( UNIVERSAL PORT Universal port option dock (UP-A1 etc.) Note *1 Do not connect the AV receiver's USB port to a USB port on your computer. Music on your computer cannot be played through the AV receiver in this way. *2 Connect a turntable (MM) that has a phono preamp built-in. If your turntable (MM) doesn't have it, you'll need a commercially available phono preamp. If your turntable has a moving coil (MC) type cartridge, you'll need a commercially available MC head amp or MC transformer as well as a phono preamp. See your turntable's manual for details. • With connection $, you can enjoy Dolby Digital and DTS. (To record or listen the audio in Zone 2 as well, use $ and '.) • With connection ', you can listen to and record audio from external components while you are in Zone 2. • With connection ', if your Blu-ray Disc/DVD player has both the main stereo and multichannel outputs, be sure to connect to the main stereo. ■ How to record a video source With the connections described above, you cannot record the videos through the AV receiver. See "Recording" about En connections for video recording (➔ page 39). 17
-
 1
1 -
2
-
3
-
4
-
5
-
6
-
7
-
8
-
9
-
10
-
11
-
 12
12 -
 13
13 -
 14
14 -
 15
15 -
 16
16 -
 17
17 -
 18
18 -
 19
19 -
 20
20 -
 21
21 -
 22
22 -
23
-
24
-
25
-
26
-
27
-
28
-
29
-
30
-
31
-
32
-
33
-
34
-
35
-
36
-
37
-
38
-
39
-
40
-
41
-
42
-
43
-
44
-
45
-
46
-
47
-
48
-
49
-
50
-
51
-
52
-
53
-
54
-
55
-
56
-
57
-
58
-
59
-
60
-
61
-
62
-
63
-
64
-
65
-
66
-
67
-
68
-
69
-
70
-
71
-
72
-
73
-
74
-
75
-
76
-
77
-
78
-
79
-
80
-
81
-
82
-
83
-
84
 |
 |