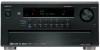
Onkyo TX-NR1000 Owner Manual - Page 37
Connecting a DBS Tuner, DBS TV, or BS/CS Tuner
 |
View all Onkyo TX-NR1000 manuals
Add to My Manuals
Save this manual to your list of manuals |
Page 37 highlights
Connecting AV Components-Continued Connecting a DBS Tuner, DBS TV, or BS/CS Tuner • When connecting a DBS tuner, DBS TV, or BS/CS tuner to the TX-NR1000/TX-NR5000E, make connections for video and audio signals using digital and analog terminals. Before making connections, refer to page 30 for correct connections. • This section shows the connection example when you use the VIDEO 4 or VIDEO 5 as an input. In this case, you do not need additional configurations. When connecting to other terminals within the same terminal section on the TX-NR1000/TX-NR5000E, remember to configure the audio input assignment in the Audio Assign sub-menu (See page 94) and the video input assignment in the Video Assign sub-menu (See page 95). When you use the S VIDEO terminal for connection, you should configure the Video Assign sub-menu. • You can change the display name for the input source to represent the actual connected device (See page 97). • For a model without a slot for the HDMI terminal, when you connect a BS/CS tuner or LD player to the COMPO- NENT terminals, be sure to use the COMPONENT terminals to connect a TV or projector. *For more information on the HDMI interface, see page 43. *For more information on the i.LINK (AUDIO) interface, see page 40. Example for connecting with the VIDEO 4 as input When connecting to other audio terminals within the same terminal section, configure the audio input settings accordingly using the Audio Assign sub-menu (See page 94). AUDIO OUT DIGITAL OPTICAL AUDIO OUT ANALOG RL When connecting to other video ter- minals within the same terminal sec- VIDEO OUT tion, configure the video input settings accordingly using the Video Assign sub-menu (See page 95). C DIGITAL IN OPTICAL 1 D DIGITAL IN COAXIAL 1 E FR MULTI F - CH FL IN 1 R PH SUB C AUDIO IN G L R 4 L H S VIDEO IN VIDEO IN I IN 1 COMPONENT VIDEO IN 2 J COMPONENT VIDEO K ANTENNA IN 4 1 Y Y L HDMI IN 1 RS232 2 2 5 2 PB GND SR SL R L PB "Net -Tune" is a trademark of 3 3 1 6 3 PR Onkyo Corporation. SBR SBL OUT 1 IN 3 FM 75 HDMI, the HDMI logo is a trademark or registered trademarks of HDMI REMOTE CONTROL 12V TRIGGER OUT Licensing LLC. A PR 200mA MAX. 4 4 2 7 4 Y IN 2 B 100mA MAX. FR FL OUT 2 C 100mA MAX. ETHERNET 5 5 (Net -Tune) 3 8 5 SUB C PB Y AM D 100mA MAX. E 100mA MAX. 6 6 1 9 6 SR SL PR PB MAIN 1 1 2 4 1 3 SBR SBL PR 2 2 3 5 2 4 OUT A B C D R L OUT R L MULTI G - CH IN 2 F OUT S VIDEO VIDEO H OUT VIDEO S VIDEO I J K SURR R SURR BACK R (ASSIGNABLE) FRONT R CENTER FRONT L SURR BACK L (ASSIGNABLE) SURR L ZONE 2 OUT ZONE 3 IN OUT L IR AUDIO OUT DIGITAL COAXIAL RL AUDIO OUT VIDEO OUT When connecting to other audio terminals within the same terminal section, configure the audio input settings accordingly using the Audio Assign sub-menu (See page 94). When connecting to other video terminals within the same terminal section, configure the video input settings accordingly using the Video Assign sub-menu (See page 95). Example for connecting with the VIDEO 5 as input 37
-
 1
1 -
2
-
3
-
4
-
5
-
6
-
7
-
8
-
9
-
10
-
11
-
12
-
13
-
14
-
15
-
16
-
17
-
18
-
19
-
20
-
21
-
22
-
23
-
24
-
25
-
26
-
27
-
28
-
29
-
30
-
31
-
 32
32 -
 33
33 -
 34
34 -
 35
35 -
 36
36 -
 37
37 -
 38
38 -
 39
39 -
 40
40 -
 41
41 -
 42
42 -
43
-
44
-
45
-
46
-
47
-
48
-
49
-
50
-
51
-
52
-
53
-
54
-
55
-
56
-
57
-
58
-
59
-
60
-
61
-
62
-
63
-
64
-
65
-
66
-
67
-
68
-
69
-
70
-
71
-
72
-
73
-
74
-
75
-
76
-
77
-
78
-
79
-
80
-
81
-
82
-
83
-
84
-
85
-
86
-
87
-
88
-
89
-
90
-
91
-
92
-
93
-
94
-
95
-
96
-
97
-
98
-
99
-
100
-
101
-
102
-
103
-
104
-
105
-
106
-
107
-
108
-
109
-
110
-
111
-
112
-
113
-
114
-
115
-
116
-
117
-
118
-
119
-
120
-
121
-
122
-
123
-
124
-
125
-
126
-
127
-
128
-
129
-
130
-
131
-
132
-
133
-
134
-
135
-
136
-
137
-
138
-
139
-
140
-
141
-
142
-
143
-
144
-
145
-
146
-
147
-
148
-
149
-
150
-
151
-
152
 |
 |
