Onkyo TX-NR801 Owner Manual - Page 26
Connecting, compatible AV Components - remote
 |
UPC - 751398005411
View all Onkyo TX-NR801 manuals
Add to My Manuals
Save this manual to your list of manuals |
Page 26 highlights
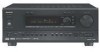
Connecting -compatible AV Components The terminal on the TX-NR801/TX-NR801E is for connecting other Onkyo components equipped with the same terminal. When a component is connected to the terminal, it can be operated by the remote controller supplied with the TX-NR801/TX-NR801E. In addition, when you connect a component to the terminal, you can also perform the system operations given below. Power on/ready function When the TX-NR801/TX-NR801E is in the standby state, if an -connected component is turned on, the TX-NR801/TX-NR801E also turns on and the input source selected at the TX-NR801/TX-NR801E automatically switches to that component. Be aware that this function will not work if the power cord for the -connected component is connected to the AC OUTLET on the TX-NR801/TX-NR801E, or if the TX-NR801/TX-NR801E has already been turned on. Direct change function When the play button is pressed on an -connected component, the input source selected at the TX-NR801/ TX-NR801E automatically changes to that component. Power off function When the TX-NR801/TX-NR801E is placed in the standby state, all -connected components are also automatically put into the standby state. Also, if you press the ON button on the TX-NR801/ TX-NR801E remote controller while the TX-NR801/ TX-NR801E is turned on, all -connected components (DVD players, CD players, MD recorders, tuners, etc.) are also turned on. Onkyo DVD player REMOTE CONTROL DIGITAL OUT OPTICAL L R ANALOG OUTPUT Remote control cable Connections for Remote Control ( ) To connect components using the terminal, simply connect a remote control cable from this terminal to the terminal of the other component. An remote control cable with a 1/8 inch (3.5 mm) miniature twoconductor plug comes with every cassette tape deck, compact disc player, MD recorder, and DVD player that has an terminal. • When performing operations with -connected components using the system, do not use the remote zone (Zone 2). • For remote control operation, the audio connection cables must also be connected. • If a component has two terminals, you can use either one to connect to the TX-NR801/TX-NR801E. The other one can be used to daisy chain with another component. • With Onkyo DVD players, you can enter the preprogram code so that you can operate the DVD player directly with the remote controller without connecting the terminals (See page 82). TX-NR801/ TX-NR801E REMOTE CONTROL connector Ex: Onkyo CD player connector Ex: Onkyo cassette tape deck Remote control cable DIGITAL IN OPT 1 AUDIO R L IN REMOTE CONTROL DIGITAL IN COAX 1 PRE OUT R L FRONT ANTENNA AUDIO VIDEO S VIDEO MONITOR OUT 2 3 OPT 1 SUB SURR SURR BACK / R ZONE 2 FRONT 2 R SUB 3 DIGITAL OUT OPT 1 2 SURR R SURR BACK GND CENTER AM OUT ZONE 2 R L L FM 75 MULTI CH INPUT L AUDIO R L CENTER PHONO IN CD IN L OUT TAPE IN R L AUDIO IN DVD OUT IN VIDEO 1 OUT IN VIDEO 2 IN VIDEO 3 R L AUDIO IN VIDEO 4 VIDEO S VIDEO COMPONENT VIDEO OUTPUT Y FRONT SPEAKERS R L PB PR INPUT 1 Y PB ETHERNET (Net-Tune) CENTER SPEAKER PR INPUT 2 Y PB PR CAUTION: SPEAKER IMPEDANCE 4 OHMS MIN. OR 6 OHMS MIN. / SPEAKER SEE INSTRUCTION MANUAL FOR CORRECT SETTINGS. I R IN OUT SURR SPEAKERS R L R L MO REMOTE CONTROL 26
-
 1
1 -
2
-
3
-
4
-
5
-
6
-
7
-
8
-
9
-
10
-
11
-
12
-
13
-
14
-
15
-
16
-
17
-
18
-
19
-
20
-
 21
21 -
 22
22 -
 23
23 -
 24
24 -
 25
25 -
 26
26 -
 27
27 -
 28
28 -
 29
29 -
 30
30 -
 31
31 -
32
-
33
-
34
-
35
-
36
-
37
-
38
-
39
-
40
-
41
-
42
-
43
-
44
-
45
-
46
-
47
-
48
-
49
-
50
-
51
-
52
-
53
-
54
-
55
-
56
-
57
-
58
-
59
-
60
-
61
-
62
-
63
-
64
-
65
-
66
-
67
-
68
-
69
-
70
-
71
-
72
-
73
-
74
-
75
-
76
-
77
-
78
-
79
-
80
-
81
-
82
-
83
-
84
-
85
-
86
-
87
-
88
-
89
-
90
-
91
-
92
-
93
-
94
-
95
-
96
-
97
-
98
 |
 |
