Onkyo TX-NR801 Owner Manual - Page 98
Net Audio Quick Setup Guide - serial number
 |
UPC - 751398005411
View all Onkyo TX-NR801 manuals
Add to My Manuals
Save this manual to your list of manuals |
Page 98 highlights
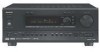
Net Audio Quick Setup Guide Before connecting the AV Receiver AV Receiver Before connecting the AV Receiver, connect the cable/DSL modem, broadband router and PC according to the figure on the right, and make sure that you can browse Web pages through your broadband connection. Note: • Some cable/DSL modems incorporate the broadband router function. • Set to "On" the DHCP function on the broadband router (Usually, the DHCP function is set to "On" by default). • For details on settings, refer to individual manuals for the PC, cable/DSL modem, and broadband router. And also refer to the Net Audio pages in the AV receiver's instruction manual. Internet ETHERNET (Net -Tune) Modem Router To the WAN side PC LAN port/ Ethernet, etc. To the LAN side port To the LAN side port Receiving the Internet radio 1. Connect the AV Receiver to the broadband router through Ethernet cable (See the figure above). 2. Press the NET A button on the remote controller to select the Internet Radio mode. 3. Press the DISPLAY button on the remote controller. 4. Use the / button to select your favorite mode. 5. Press the ENTER button to confirm your selection. 6. Repeat steps 4 and 5 to select your favorite radio station as required. "Buffering" appears in the display. After the buffering status comes to "100%," playback of the station starts. Note: • Depending on network environment, selecting an Internet radio station and starting playback may take longer. • For settings on Internet Radio, refer to the Net Audio pages in the AV receiver's instruction manual. • If your network is configured with proxy server, the settings on proxy server will be required. In such case, contact your network administrator (Refer to the Proxy Setup section on the Net Audio pages in the AV receiver's instruction manual). Setting up the PC and Net-Tune server 1. Make sure that you can browse Web pages through Internet connection according to the instructions of "Before connecting the AV Receiver" above. 2. Download the Net-Tune Central music server software from ONKYO Web site (http://www.onkyousa.com/net-tune/). On the download page, you are required to enter the product serial number written on the rear panel of the unit. Before setting up the product, be sure to write down the product serial number. 3. Execute SETUP.EXE contained in the downloaded file to install the Net-Tune Central software. Playing the music stored on the Net-Tune server 1. Start Net-Tune Central on your PC. 2. Turn on the AV Receiver. 3. Press the NET A button on the remote controller. 4. Press the button on the remote controller to play the music file. SN 29343595
-
 1
1 -
2
-
3
-
4
-
5
-
6
-
7
-
8
-
9
-
10
-
11
-
12
-
13
-
14
-
15
-
16
-
17
-
18
-
19
-
20
-
21
-
22
-
23
-
24
-
25
-
26
-
27
-
28
-
29
-
30
-
31
-
32
-
33
-
34
-
35
-
36
-
37
-
38
-
39
-
40
-
41
-
42
-
43
-
44
-
45
-
46
-
47
-
48
-
49
-
50
-
51
-
52
-
53
-
54
-
55
-
56
-
57
-
58
-
59
-
60
-
61
-
62
-
63
-
64
-
65
-
66
-
67
-
68
-
69
-
70
-
71
-
72
-
73
-
74
-
75
-
76
-
77
-
78
-
79
-
80
-
81
-
82
-
83
-
84
-
85
-
86
-
87
-
88
-
89
-
90
-
91
-
92
-
 93
93 -
 94
94 -
 95
95 -
 96
96 -
 97
97 -
 98
98
 |
 |
