Onkyo TX SR501 Owner Manual - Page 19
Connecting, compatible AV Components
 |
UPC - 751398005213
View all Onkyo TX SR501 manuals
Add to My Manuals
Save this manual to your list of manuals |
Page 19 highlights
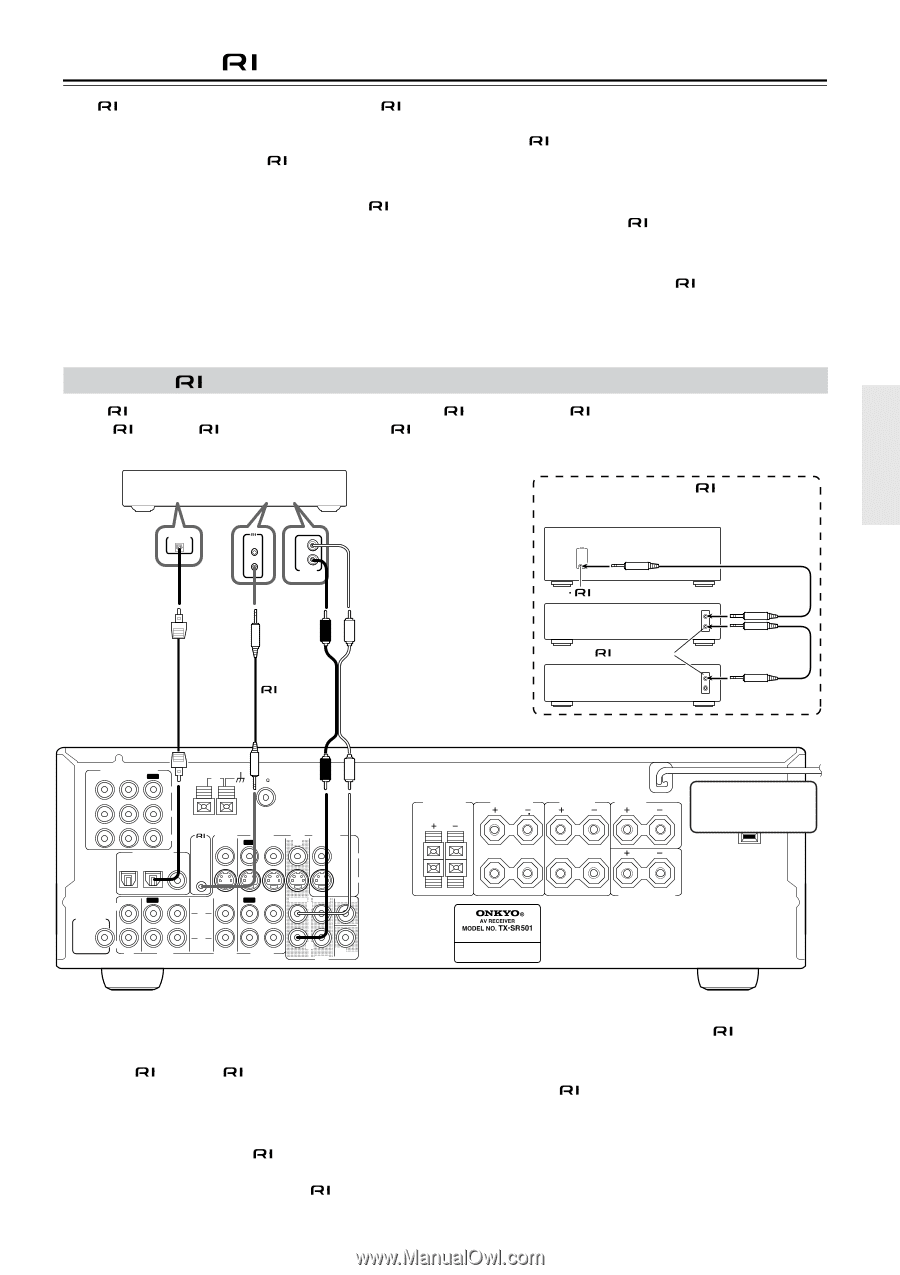
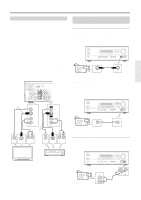
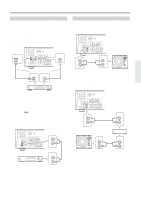
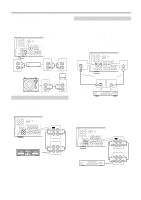
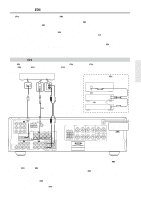
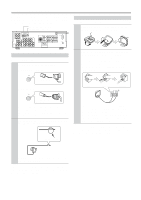
Connecting -compatible AV Components With (Remote Interactive) you can control your compatible Onkyo CD player, DVD player, or cassette recorder with the TX-SR501/TX-SR501E's remote controller, and use the following special functions: ■ Auto Power On When you turn on an AV component connected via while the TX-SR501/TX-SR501E is in Standby, the TX-SR501/ TX-SR501E automatically turns on and selects that AV component as the input source. This function will not work if the AV component's power cord is connected to the TX-SR501/TX-SR501E's AC OUTLET, or if the TX-SR501/TX-SR501E is already on. ■ Auto Source Select When you press the play button on an AV component connected via , the TX-SR501/TX-SR501E automatically selects that AV component as the input source. ■ Auto Power Off When you set the TX-SR501/TX-SR501E to Standby, all AV components connected via also enter Standby. See page 40 for information on using the remote controller to control the other functions of your -compatible AV components. Connecting -compatible Components To use , you need to connect the TX-SR501/TX-SR501E's connector to the connector on the other AV component with an cable. An cable is supplied with each -compatible CD player, DVD player, and cassette recorder. Example: Onkyo DVD player Connecting several -compatible Onkyo AV components DIGITAL OUT OPTICAL REMOTE CONTROL L R ANALOG OUTPUT TX-SR501/TX-SR501E REMOTE CONTROL connector Onkyo CD player cable You must make an analog RCA/phono connection between your TX-SR501/ TX-SR501E and AV component, even if they are connected digitally. connector Onkyo cassette recorder COMPONENT VIDEO ANTENNA VIDEO 1 / 2 / 3 DVD IN IN OUT AM FM 75 Y PB PR DIGITAL INPUT OPTICAL COAXIAL 2 1 REMOTE CONTROL VIDEO 2 IN VIDEO 1 OUT IN DVD MONITOR IN OUT VIDEO S VIDEO IN OUT IN L SUBWOOFER PRE OUT R CD TAPE IN OUT IN FRONT SURR CENTER L L R VIDEO 2 VIDEO 1 R DVD SUB WOOFER FRONT SPEAKERS B FRONT SPEAKERS A L SURROUND SPEAKERS L CENTER SPEAKER Disconnect AC OUTLET AC 120V 60 Hz the power cord before SWITCHED 120W 1 A MAX. making any connections! L R R R SURROUND BACK SPEAKER Notes: • Push the plugs in all the way to make a good connection. • Use only cables for connections. • You must make an analog RCA/phono connection between your TX-SR501/TX-SR501E and the other AV component, even if they are connected digitally. • If an AV component has two connectors, you can connect either one to the TX-SR501/TX-SR501E. The other connector is for connecting additional -compatible components. • Connect the TX-SR501/TX-SR501E's connector to only Onkyo AV components. Connecting to other manufacturer's AV components may cause them to malfunction. • Some Onkyo -compatible AV components may not support the special functions described above. 19
-
 1
1 -
2
-
3
-
4
-
5
-
6
-
7
-
8
-
9
-
10
-
11
-
12
-
13
-
 14
14 -
 15
15 -
 16
16 -
 17
17 -
 18
18 -
 19
19 -
 20
20 -
 21
21 -
 22
22 -
 23
23 -
 24
24 -
25
-
26
-
27
-
28
-
29
-
30
-
31
-
32
-
33
-
34
-
35
-
36
-
37
-
38
-
39
-
40
-
41
-
42
-
43
-
44
-
45
-
46
-
47
-
48
 |
 |