Onkyo TX SR501 Owner Manual - Page 24
Powering Up & Setting Up the TX-SR501/TX-SR501E - standby light
 |
UPC - 751398005213
View all Onkyo TX SR501 manuals
Add to My Manuals
Save this manual to your list of manuals |
Page 24 highlights
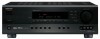
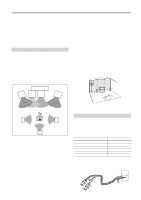
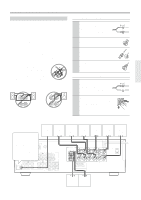
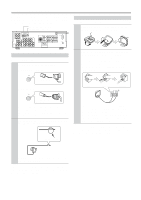
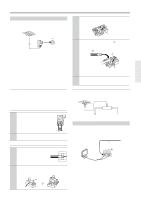
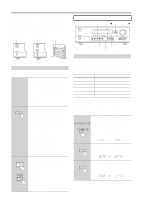
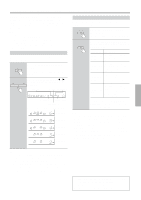
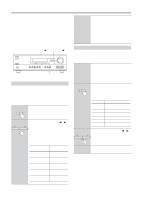
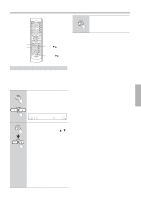
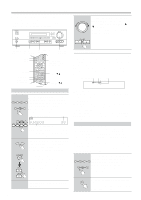
Powering Up & Setting Up the TX-SR501/TX-SR501E This chapter explains basic settings that you need to make in order to enjoy your TX-SR501/TX-SR501E after turning it on for the very first time. These include, assigning input sources to digital inputs, specifying the number of speakers, and setting the subwoofer mode, as explained on pages 24 and 25. • North American model • Other models STANDBY/ON STANDBY/ON STANDBY/ON Important-First Time Setup STANDBY/ON A SPEAKERS B PHONES DIGITAL INPUT TAPE PRESET/ADJUST STANDBY DISPLAY SUBWOOFER DIMMER DIGITAL INPUT MODE MEMORY FM MODE CLEAR AUDIO SELECTOR DVD VIDEO 1 VIDEO 2 VIDEO 3 VCR DIRECT STEREO SURROUND DSP PRESET/ADJUST TUNING SPEAKER ADJUST AUDIO ADJUST MASTER VOLUME TAPE TUNER C D VIDEO 3 INPUT S VIDEO VIDEO L AUDIO R STANDBY/ON A SPEAKERS B PHONES STANDBY/ON POWER ON OFF A SPEAKERS B PHONES CABLE/SAT CD/DVD POWER Powering Up the TX-SR501/TX-SR501E Before connecting the power cord, connect all your speakers and AV components (see page 10 to page 21). 1 Connect the power cord to a suit- able wall outlet. Turning on the TX-SR501/TX-SR501E may cause a momentary power surge that might interfere with other electrical equipment on the same circuit. If this is a problem, plug the TX-SR501/ TX-SR501E into a different branch circuit. 2 POWER ON OFF Press the [POWER] switch to turn on the power (does not apply to the North American model). The TX-SR501/TX-SR501E enters Standby mode, and the STANDBY indicator comes on. Notes: • The TX-SR501/TX-SR501E is shipped with the [POWER] switch in the ON position. • To completely shutdown the TX-SR501/TX-SR501E, press the [POWER] switch. • The remote controller has no effect while the [POWER] switch in the OFF position. 3 STANDBY/ON Remote controller Press the [STANDBY/ON] button. The TX-SR501/TX-SR501E comes on, the display lights up, and the STANDBY indicator goes off. To turn off the TX-SR501/TX-SR501E, press the [STANDBY/ON] button. The TX-SR501/TX-SR501E will enter Standby mode. To prevent any loud surprises the next time you turn on your TX-SR501/TX-SR501E, always turn down the volume before turning it off. 24 SUBWOOFER MODE SPEAKER ADJUST Input selector buttons Assigning Digital Inputs to Input Sources With this function you can assign AV components (i.e., input sources) with digital audio outputs to the TX-SR501/ TX-SR501E's digital inputs. You only need to change these assignments if your connections don't match the default assignments listed in the following table. Input source DVD VIDEO 1 VIDEO 2 VIDEO 3 TAPE CD DIGITAL INPUT OPTICAL 1 Not assigned OPTICAL 2 Not assigned Not assigned COAXIAL If, for example, you connect your DVD player's coaxial digital audio output to the TX-SR501/TX-SR501E's COAXIAL DIGITAL INPUT, you'll need to change the DVD input source assignment from OPTICAL 1 to COAXIAL. You can change the assignments as follows. 1 Press the input selector button for the source that you want to assign: DVD VIDEO 1 VIDEO 2 VIDEO 3 [DVD], [VIDEO 1], [VIDEO 2], VCR TAPE TUNER C D [VIDEO 3], [TAPE], or [CD]. The selected source appears on the dis- play. (The value next to the input source is the volume setting.) 2 DIGITAL INPUT Press the [DIGITAL INPUT] button. The current source assignment appears, as shown. 3 DIGITAL INPUT Use the [DIGITAL INPUT] button to select COAX (COAXIAL), OPT1 (OPTICAL 1), OPT2 (OPTICAL 2), or - - - - (no assignment).
-
 1
1 -
2
-
3
-
4
-
5
-
6
-
7
-
8
-
9
-
10
-
11
-
12
-
13
-
14
-
15
-
16
-
17
-
18
-
 19
19 -
 20
20 -
 21
21 -
 22
22 -
 23
23 -
 24
24 -
 25
25 -
 26
26 -
 27
27 -
 28
28 -
 29
29 -
30
-
31
-
32
-
33
-
34
-
35
-
36
-
37
-
38
-
39
-
40
-
41
-
42
-
43
-
44
-
45
-
46
-
47
-
48
 |
 |