Oregon Scientific WMR200 User Manual - Page 7
Getting Started, Set Up Base Station, Insert Batteries, Sensor Data Transmission, Clock, Clock - wmr200a
 |
View all Oregon Scientific WMR200 manuals
Add to My Manuals
Save this manual to your list of manuals |
Page 7 highlights
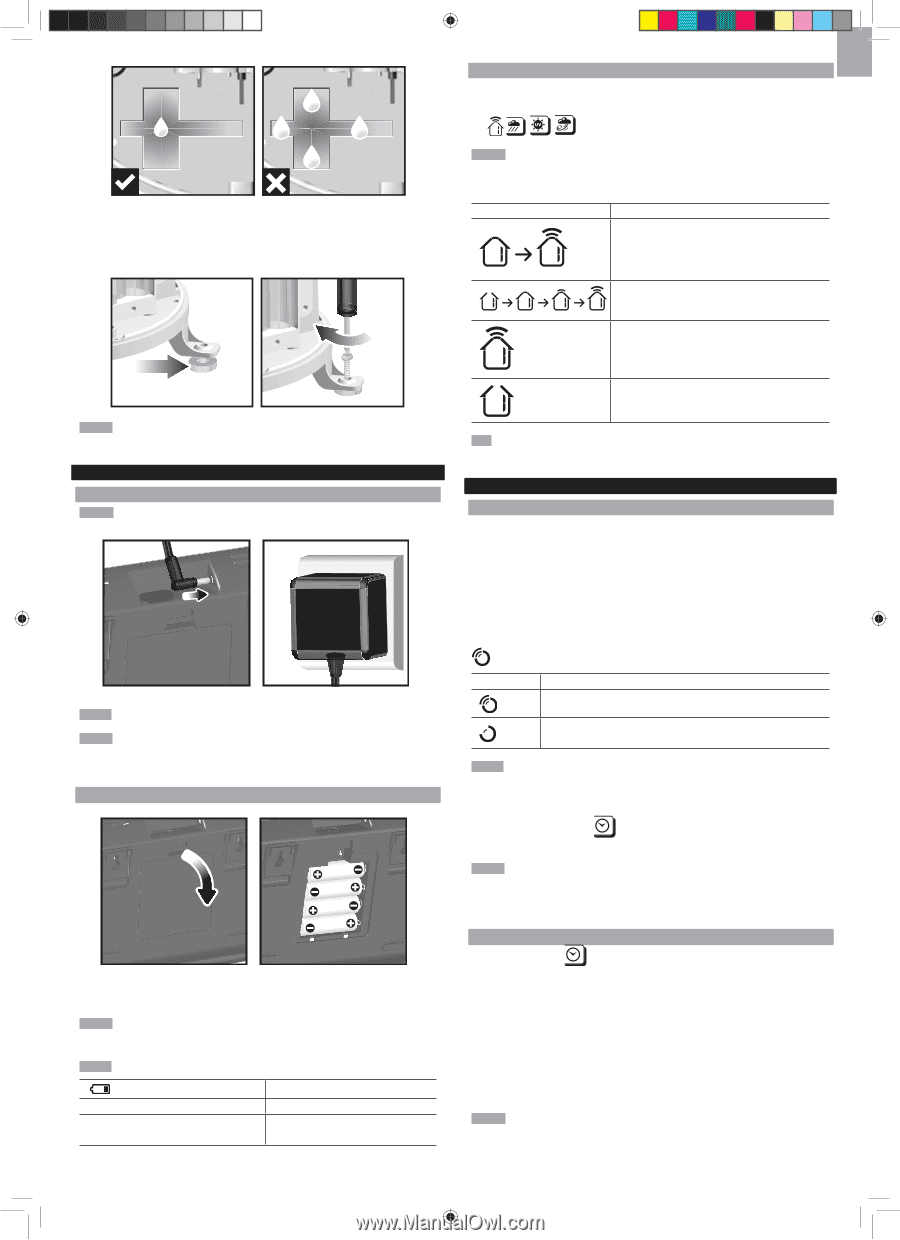
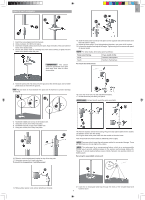
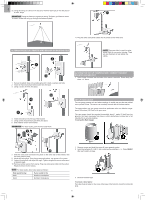
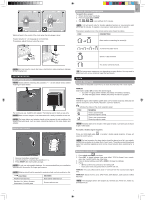
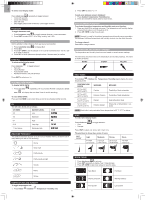
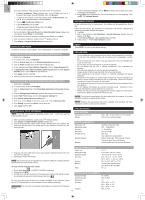
EN 1 3 2 4 Water will pool to the center of the cross when the rain gauge is level. If water remains on 1-4, the gauge is not horizontal. If necessary, adjust the level using the screw. SENSOR DATA TRANSMISSION To search for a sensor: 1. Select desired area to activate. 2. Press and hold CH and MEM. 3. icons will flash for 5 minutes. NOTE Unit will search only for already registered sensors or new sensors reset within last 30 minutes. To register a new sensor, reset sensor prior to search. The sensor reception icon in the remote sensor area shows the status: ICON DESCRIPTION Base station is searching for sensor(s) A channel has been found Sensor 1 data received NOTE For best results, ensure the base is horizontal to allow maximum drainage of any collected rain. GETTING STARTED SET UP BASE STATION NOTE Install batteries matching the polarities (+ / -) in the remote sensor before installing the base station. For continuous use, install the AC adapter. The batteries are for back-up use only. NOTE Make sure the adapter is not obstructed and is easily accessible to the unit. NOTE The base station and adapter should not be exposed to wet conditions. No objects filled with liquid, such as vases, should be placed on the base station and adapter. INSERT BATTERIES 1. Remove the battery compartment. 2. Insert the batteries, matching the polarities (+ / -). 3. Press RESET after each battery change. NOTE Do not use rechargeable batteries. It is recommended that you use alkaline batteries with this product for longer performance. NOTE Batteries should not be exposed to excessive heat such as sunshine or fire. LOCATION Weather forecast area Rainfall / UV / Wind / Outdoor temperature / humidity area MEANING Base station batteries low Sensor batteries low The sensor cannot be found. TIP The transmission range may vary depending on many factors. You may need to experiment with various locations to get the best results. CLOCK CLOCK RECEPTION This product is designed to synchronize its clock automatically with a clock signal. WMR200: Slide switch to EU / UK to select the desired signal. • EU: DCF-77 signal: within 1500km (932 miles) of Frankfurt, Germany. • UK: MSF-60 signal: within 1500km (932 miles) of Anthorn, England. WMR200A: WWVB-60 signal: within 3200km (2000 miles) of Fort Collins Colorado. Manually set clock to select time zone (Pacific, Mountain, Central or Eastern). indicates the status of the clock reception signal. ICON MEANING Time is synchronized Receiving signal is strong Time is not synchronized Receiving signal is weak NOTE Reception takes 2-10 minutes. If the signal is weak, it can take up to 24 hours to get a valid signal. To enable / disable signal reception: Press and hold clock area sound to confirm action. to enable / disable signal reception. A beep will NOTE For best reception, the base station should be placed on a flat, non-metallic surface near a window in an upper floor of your home. The antenna should be placed away from electrical appliances and not be moved around when searching for a signal. MANUALLY SET CLOCK 1. Press clock area to activate. 2. Press SET to toggle between time zone offset, 12/24 hr format, hour, minute, year, day / month, month, day, time zone. 3. Once in desired setting, press UP or DWN to change the settings. 4. Press: • SET to confirm and continue to next setting OR • touch panel area (except tool bar) to confirm and exit. WMR200: Time zone offset sets the clock +/- 23 hours from the received clock signal time. WMR200A: Select the time zone: (PA) Pacific, (EA) Eastern, (CE) Central or (MO) Mountain. NOTE The language options are English (E), German (D), French (F), Italian (I), and Spanish (S). 7
-
 1
1 -
 2
2 -
 3
3 -
 4
4 -
 5
5 -
 6
6 -
 7
7 -
 8
8 -
 9
9 -
 10
10 -
 11
11
 |
 |