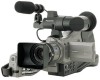
Panasonic AG-DVC7 Dv Camcorder
Panasonic AG-DVC7 - Pro MiniDV Proline Camcorder Manual
 |
UPC - 791871302330
View all Panasonic AG-DVC7 manuals
Add to My Manuals
Save this manual to your list of manuals |
Panasonic AG-DVC7 manual content summary:
- Panasonic AG-DVC7 | Dv Camcorder - Page 1
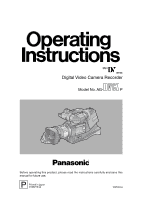
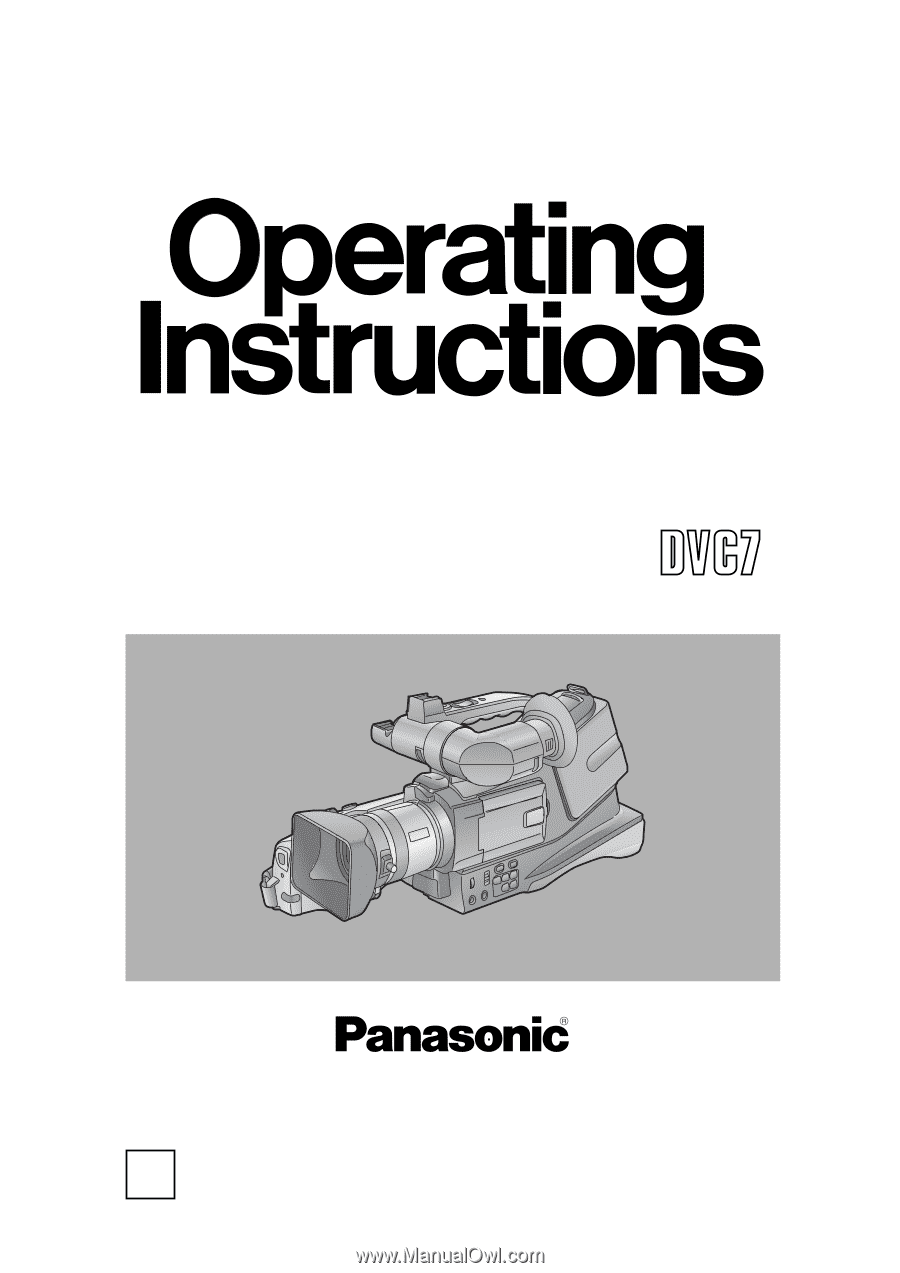
Ò NTSC Digital Video Camera Recorder Model No. AG- P Before operating this product, please read the instructions carefully and save this manual for future use. P Printed in Japan S1202Y0 @ VQT0C34 - Panasonic AG-DVC7 | Dv Camcorder - Page 2
and, if not installed and used in accordance with the instruction manual, may cause harmful interference to radio communications. Operation of this equipment in a residential area is likely to cause harmful interference in which case the user will be required to correct the interference at his own - Panasonic AG-DVC7 | Dv Camcorder - Page 3
your appliance dealer or local power company. For video units intended to be operated from battery power, or other sources, refer to the operating instructions. 11. Grounding or Polarization - This video unit may be equipped with either a polarized 2wire AC (Alternating Current) line plug (a plug - Panasonic AG-DVC7 | Dv Camcorder - Page 4
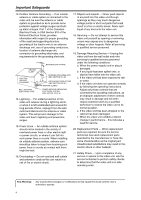
21) GROUND CLAMPS POWER SERVICE GROUNDING ELECTRODE SYSTEM (NEC ART 250, PART H) 14. Lightning - For added protection of this video unit receiver during completion of any service or repairs to this video unit, ask the service technician to perform safety checks to determine that the video unit is in - Panasonic AG-DVC7 | Dv Camcorder - Page 5
shock, do not remove the cover (or back); there are no user serviceable parts inside. Refer servicing to qualified service personnel. Use only the recommended accessories. $ Notes about Video Head Clogging OWhen the Camera Recorder's video heads have become clogged with dirt (dust and tape coating - Panasonic AG-DVC7 | Dv Camcorder - Page 6
Standard Accessories 7 Optional Accessories 7 Controls and Components 8 The Remote Controller 11 Power Supply 12 Charging Time and Available Recording Time . . . . .13 Lens Cap and Grip Belt 13 Attaching the Shoulder Strap 13 Inserting a Cassette 14 Turning on the Camera Recorder and - Panasonic AG-DVC7 | Dv Camcorder - Page 7
the Camera Recorder. 1) 2) 3) 4) Optional Accessories Before Use 1) AC Adaptor (AG-B15) 2) Stereo Microphone (AG-MC15) 3) Battery Pack (Lithium/CGR-D16/ CGR-D220/1600mAh) 4) Battery Pack (Lithium/CGP-D28/ CGP-D320/2800mAh) 5) Wide Conversion Lens (AG-LW4307) O Some optional accessories may - Panasonic AG-DVC7 | Dv Camcorder - Page 8
V S-VIDEO VIDEO IN/OUT IN/OUT L- AUDIO IN/OUT -R WX Y \ ]^ Z[ P Shoulder Strap Holders -13Q Sub Zoom Lever [W/T] -19R Sub Recording Start/Stop Button -19S Battery Eject Button [PUSH] -12T Battery Holder U DC Input Socket [DC IN] -12V DV Terminal [DV] -40- OConnect this to the digital video - Panasonic AG-DVC7 | Dv Camcorder - Page 9
Controls and Components $ Camera Recorder W S-Video Input/Output Socket [S-VIDEO IN/OUT] -37-, -39- X Video Input/Output Socket [VIDEO IN/OUT] -37-, -39- Y Audio Input/Output Sockets [AUDIO IN/OUT] -37-, -39- Z Headphone Socket [PHONES] -44[ Cassette Eject Lever [ - Panasonic AG-DVC7 | Dv Camcorder - Page 10
, most of the Camera Recorder functions can be operated from a distance. d e f g OSD START/ DATE/ PHOTO STOP TIME SHOT COUNTER RESET TITLE ZOOM MULTI/ P-IN-P REC A.DUB C/REW PLAY FF/ B STILL ADV PAUSE STILL ADV INDEX STOP INDEX SELECT STORE VAR. SEARCH OFF/ON P.B.DIGITAL PB. ZOOM MENU - Panasonic AG-DVC7 | Dv Camcorder - Page 11
batteries according to manufacturer's instructions under strong light, the Camera Recorder may not Camera Recorder. Selecting Remote Controller Modes When 2 Movie Cameras Camera Recorder and that of the Remote Controller do not match, [REMOTE] Indication is displayed. Setup on the Camera Recorder - Panasonic AG-DVC7 | Dv Camcorder - Page 12
distorted. Use the adapter at a distance of at least one meter from the radio. O Noise may be heard while the AC adapter is in use; however, this is normal and not indicative of any malfunctioning. O The battery cannot be charged while supplying power from the AC adapter to the camera recorder. 12 - Panasonic AG-DVC7 | Dv Camcorder - Page 13
time may be longer. Lens Cap and Grip Belt $ Attach the Lens Cap To protect the Lens surface, attach the Lens Cap. Attaching the Shoulder Strap We recommend that you attach the Shoulder Strap before going out of doors to record so as to avoid dropping the Camera Recorder. 1 Pull the end of - Panasonic AG-DVC7 | Dv Camcorder - Page 14
the cover. ] PUSH LOCK Turning on the Camera Recorder and Selecting Modes Turn on the power first and then select modes. $ How to Turn on the Power 1 Set the [OFF/ON] Switch b to [ON]. OThe [CAMERA] Lamp ` lights up. ` CAMERA VCR OFF ON b $ How to Turn off the Power 3 Set the [OFF/ON] Switch b to - Panasonic AG-DVC7 | Dv Camcorder - Page 15
2 Adjust the LCD Monitor angle according to the desired recording angle. 1 180° 2 90° OThe angular part of the Viewfinder can be turned upward by 80° and Forcefully rotating the LCD Monitor beyond these ranges will damage the Camera Recorder. OWhen you open the LCD Monitor, be sure that the LCD - Panasonic AG-DVC7 | Dv Camcorder - Page 16
the Menu Mode Setting The setting selected on the Menu will be retained even when the Camera Recorder is turned off. However, if the Battery or AC Adaptor is disconnected before turning off the Camera Recorder, the selected setup may not be retained. (But, the setups of [NEGA], [SEPIA], [MONO] or - Panasonic AG-DVC7 | Dv Camcorder - Page 17
-18[AUDIO REC] Audio Recording Mode -18[AUDIO LEVEL] Audio Level Setting -38[RETURN] Returning to the Main-Menu [4. AV IN/OUT SETUP] Audio-Video Input/Output Setup Sub-Menu [AV JACK] AV Socket -38[A.DUB INPUT] Audio Dubbing Input -38[DV OUT] Analog-Digital Conversion Output -45[RETURN] Returning - Panasonic AG-DVC7 | Dv Camcorder - Page 18
the operation of the clock. When the Date/Time Indication becomes [--], the internal lithium battery is exhausted. 1 Connect the AC Adaptor to the Camera Recorder with the power turned off and then connect to the AC Mains socket. PUSH MENU TO RETURN OYear will cycle in the order shown below - Panasonic AG-DVC7 | Dv Camcorder - Page 19
elbows on a table or other stable horizontal surface. Adjust the angle of the LCD Monitor according to the position in which the Camera Recorder is held. OIf the Camera Recorder is not held firmly in stable position, the picture in the LCD Monitor cannot be watched properly. OFor easier long-angle - Panasonic AG-DVC7 | Dv Camcorder - Page 20
white balance. In some cases, they cannot be adjusted automatically and need to be adjusted manually. (-27-, -29-) AUTO ? MANUAL PROG. AE 1 Set the [OFF/ON] Switch b to [ON]. OThe [CAMERA] Lamp ` lights up. ` CAMERA VCR OFF ON b $ To Pause the Recording Press the Recording Start/Stop Button a (or - Panasonic AG-DVC7 | Dv Camcorder - Page 21
, such as the Recording Indication [¥], Recording Pause Indication [¥;] and Remaining Battery Power Indication [ ], are displayed. OIf a general Warning/Alarm Indication [ ] appears, return the LCD Monitor to the original position in order to check the specific content of the Warning - Panasonic AG-DVC7 | Dv Camcorder - Page 22
, images become still pictures. When the button is pressed again, the Digital Still Picture Mode is cancelled. PHOTO SHOT M OThe Camera Recorder records a still picture for about 7 seconds and then switches back to the Recording Pause Mode. PHOTO PHOTO PHOTO H STILL OWe recommend that you press - Panasonic AG-DVC7 | Dv Camcorder - Page 23
Lens. With this, small subjects like insects can be recorded. $ To Use the Zoom Microphone Function Along with the zooming operation, the microphone's directional angle and sensitivity are varied for recording sounds. OSet [CAMERA FUNCTIONS] >> [RECORDING SETUP] >> [ZOOM MIC] >> [ON]. OThe [Z.MIC - Panasonic AG-DVC7 | Dv Camcorder - Page 24
Mode Image Stabilizer Function If the Camera Recorder might be shaken while recording, the camera shake in the image can be corrected. OIf the Camera Recorder shakes too much, this function may not be able to stabilize images. 1 Press the [DIG.E.] Button @ until the [AUTO EIS] Indication appears - Panasonic AG-DVC7 | Dv Camcorder - Page 25
Camera Mode This prevents a recording subject from being recorded darker in backlight. (Backlight is the light that shines from behind a recording subject.) 1 Press the [BLC] Button F. To Resume Normal Recording hitting the microphone when recording. 1 Set [CAMERA FUNCTIONS] >> [RECORDING SETUP] - Panasonic AG-DVC7 | Dv Camcorder - Page 26
Balance) Depending on the scene or light condition, the Automatic White Balance Adjustment Mode may not be able to bring out natural colors. In such a case, the white balance can be adjusted manually. When the Camera Recorder is turned on with the Lens Cap on, the Automatic White Balance Adjustment - Panasonic AG-DVC7 | Dv Camcorder - Page 27
Adjusting White Balance Manually Camera Mode PUSH White Balance Adjustment recognizes the color of light and makes adjustment so that the white color will become pure white. The Camera Recorder determines the hue of light that it receives through the Lens and White Balance Sensor, thereby judging - Panasonic AG-DVC7 | Dv Camcorder - Page 28
Camera Mode Manual Shutter Speed Adjustment It is useful for recording fast-moving subjects. 1 Set the [AUTO/MANUAL/PROG.AE] Switch ? to [MANUAL]. AUTO ? MANUAL PROG. AE OThe [MNL] Indication appears. 2 Press the [PUSH] Dial > until the Shutter Speed Indication appears. 3 Turn the [PUSH] Dial > to - Panasonic AG-DVC7 | Dv Camcorder - Page 29
Press the [FOCUS] Button C. OThe [1MF] Indication (Manual Focus Mode) appears. FOCUS C 7 In the following cases, the Focus Ring cannot be used. OWhen the Menu the [AUTO/MANUAL/PROG.AE] Switch to [AUTO] or press the [FOCUS] Button. MNL MF Picture Effect Functions This Camera Recorder is equipped - Panasonic AG-DVC7 | Dv Camcorder - Page 30
SETUP] >> [P.EFFECT] >> a desired Picture Effect. W.B/SHUTTER/IRIS > VOL/JOG MENU B OIf the Camera Recorder is turned off, this setting is cancelled. To Cancel the Picture Effect Set [CAMERA FUNCTIONS] >> [CAMERA SETUP] >> [P.EFFECT] >> [OFF]. OFor other notes concerning this item, see -44-. PUSH - Panasonic AG-DVC7 | Dv Camcorder - Page 31
the microphone sensitivity for recording. 1 Set [CAMERA FUNCTIONS] >> [RECORDING SETUP] >> [MIC LEVEL ADJ.] >> [YES]. W.B/SHUTTER/IRIS > VOL/JOG MENU B OThe [MIC LEVEL Bars of the [LEVEL (MIC)] will not light red. (Otherwise,the Sound is distorted.) OFor other notes concerning this item, see - - Panasonic AG-DVC7 | Dv Camcorder - Page 32
scene can be played back immediately after the recording. 1 Set the [OFF/ON] Switch b to [ON]. CAMERA VCR OFF ON b 2 Press the [MODE] Button _. OThe [VCR] Lamp ` lights up. _` MODE CAMERA VCR PUSH $ Adjusting the Sound Volume Until the [VOLUME] Indication appears, keep pressing the [PUSH - Panasonic AG-DVC7 | Dv Camcorder - Page 33
-moving images may show mosaic-pattern noise. OThe sound is muted during search even in the [a11] speed mode. Slow Motion Playback This Camera Recorder can play back at a slow speed. x k C/REW PLAY FF/ B STILL ADV PAUSE STILL ADV INDEX STOP INDEX k SELECT 1 Press the [1] Button x. 2 Press the - Panasonic AG-DVC7 | Dv Camcorder - Page 34
one frame at a time in the forward or backward direction. W.B/SHUTTER/IRIS > VOL/JOG ;! OIf the Camera Recorder is left in the Still Playback Mode for more than 5 minutes, the Camera Recorder switches to the Stop Mode to protect the video heads from excessive wear and tear. Finding the End of - Panasonic AG-DVC7 | Dv Camcorder - Page 35
Mode PUSH -V -V To facilitate searching of desired scene, this Camera Recorder automatically records index signals during recording, as explained in the following. Photoshot Index Signal These signals are automatically recorded whenever still pictures are taken in Photoshot Mode. (-22-) Photoshot - Panasonic AG-DVC7 | Dv Camcorder - Page 36
part of the image can be enlarged up to 10 times during playback. 1 During playback, press the [P.B. ZOOM] Button r on the Remote Controller. j SELECT STORE VAR. SEARCH OFF/ON P.B.DIGITAL Digital Effect Functions During playback, special digital effects can be added to the recorded is carried out - Panasonic AG-DVC7 | Dv Camcorder - Page 37
viewed on your TV screen. OBefore connecting them, turn off the power of both the Camera Recorder and TV. After connecting the Camera Recorder and the TV as illustrated, start playback. [S-VIDEO IN] 2 [VIDEO IN] [AUDIO IN] 1 S-VIDEO VIDEO IN/OUT IN/OUT L- AUDIO IN/OUT -R OUsing the AV Cable - Panasonic AG-DVC7 | Dv Camcorder - Page 38
/IRIS > VOL/JOG MENU B PUSH 2 Continuing the aforesaid setup, select [A.DUB INPUT] >> [MIC] or [AV IN]. OSet to [AV IN] when external device is used, and to [MIC] when an external or built-in microphone is used. 3 Switch the Camera Recorder over to the Still Playback Mode where you want to add new - Panasonic AG-DVC7 | Dv Camcorder - Page 39
setups (such as external input, tape speed, etc.) are required, please refer to the operating instructions of your VCR. Camera Recorder: 3 Press the [1] Button to start playback. VCR: 4 Start recording. 5 Press the Pause or Stop Button to stop recording. Camera Recorder: 6 Press the [$] Button - Panasonic AG-DVC7 | Dv Camcorder - Page 40
VCR Mode Using the DV Cable for Recording (Digital Dubbing) By connecting this Camera Recorder with other digital video equipment that has a DV Input/Output Terminal using a DV Cable VW-CD1E (optional) 1, dubbing can be done in the digital format. 1 Player/Recorder: 1 Insert the Cassette and set - Panasonic AG-DVC7 | Dv Camcorder - Page 41
Indications Others Various functions and the Camera Recorder status are shown on the screen. :Remaining Battery Power OWhen the battery power becomes low, the Indication changes. When the battery is discharged completely, the ( ) Indication flashes. R0:45: Remaining Tape Time ORemaining - Panasonic AG-DVC7 | Dv Camcorder - Page 42
Notes and Hints $ Concerning the Power Supply OWhen the Camera Recorder is used for a long time, the Camera body becomes warm, but this is not a malfunction. OIf the [CHARGE] Lamp does not light up although the Battery is attached to the AC Adapter, detach the Battery and reattach it. OBattery CGP - Panasonic AG-DVC7 | Dv Camcorder - Page 43
away from the Camera Recorder. OThe further you push the [W/T] Lever toward [W] or [T], the faster the zooming speed. But if you use the Sub Zoom Lever, the zooming speed cannot become faster. $ Zoom Microphone Function OIt does not work with an external microphone. OThe Zoom Microphone Function may - Panasonic AG-DVC7 | Dv Camcorder - Page 44
cannot be used. OUse the Camera Search Function OPress the [STILL] Button $ Adjusting the Microphone Sensitivity Level OWhen this setting is changed, the [AUDIO LEVEL] setting on the [RECORDING SETUP] Sub-Menu of the [VCR FUNCTIONS] Main-Menu will likewise be changed. OWhen [ZOOM MIC] is set to [ON - Panasonic AG-DVC7 | Dv Camcorder - Page 45
Equipment Analog-Digital Conversion OWhen the Camera Recorder is connected with other digital video equipment through its DV Terminal, images recorded in analog form from other external equipment can be output to the digital video equipment through the DV Terminal. OTo DV-output analog video signals - Panasonic AG-DVC7 | Dv Camcorder - Page 46
equipment and does not function properly, turn off the Camera Recorder power and detach the Battery or AC Adapter and then connect the Battery or AC Adapter again. Thereafter, turn on the Camera Recorder power. Do not use your Camera Recorder near radio transmitters or high-voltage lines. OIf you - Panasonic AG-DVC7 | Dv Camcorder - Page 47
performance deteriorates, and, in the worst case, the Camera Recorder cannot record at all. Causes of Dirty Heads OLarge quantity of dust in the air OHigh-temperature and high-humidity environment ODamaged tape OLong operating hours Using Mini-DV Format Digital Video Head Cleaner 1 Insert the Head - Panasonic AG-DVC7 | Dv Camcorder - Page 48
the Battery Clean Prevent the terminals from getting clogged with dirt, dust, or other substances. If you drop the Battery accidentally, check to see if the Battery body and terminals are deformed. Attaching a deformed Battery to the Camera Recorder or AC Adapter may damage the Camera Recorder or AC - Panasonic AG-DVC7 | Dv Camcorder - Page 49
the filter or conversion lens attached to the Camera Recorder, 4 corners of the image may become dark (vignetting). For details, please refer to the operating instructions of your accessories. OBe sure to keep the Lens Hood attached to the Camera Recorder so as to shut out unnecessary light. 49 - Panasonic AG-DVC7 | Dv Camcorder - Page 50
fully charged, the Battery has worn out. 2: The Battery cannot be charged. OIf the DC Input Lead is connected to the AC Adapter, charging cannot be performed. Disconnect the DC Input Lead. Normal Recording 1: Recording does not start although power is supplied to the Camera Recorder and the Cassette - Panasonic AG-DVC7 | Dv Camcorder - Page 51
Before Requesting Repair (Problems and Solutions) Playback (Sound) 1: Sound is not played back from the built-in speaker of the Camera Recorder or the headphones. OIs the volume too low? During playback, keep pressing the [PUSH] Dial until the [VOLUME] Indication appears. Then, turn the [PUSH] Dial - Panasonic AG-DVC7 | Dv Camcorder - Page 52
, the subject behind the glass will not be focused. 3) Recording a subject in dark surroundings OBecause the light information that comes through the lens decreases considerably, the Camera Recorder cannot focus correctly. 4) Recording a subject that is surrounded by objects with glossy surfaces or - Panasonic AG-DVC7 | Dv Camcorder - Page 53
Specifications [Digital Video Camera] Information for your safety Power Source: DC 7.2 V (Battery) DC 7.9 V (AC adapter) Power consumption: Recording 3.2 W (When using Viewfinder) 4.0 W (When using LCD Monitor) 6.5 W (Max.) indicates safety information. Recording Format: Mini DV (Consumer-use - Panasonic AG-DVC7 | Dv Camcorder - Page 54
800) 334-4881/24 Hr. Fax (800) 334-4880 Emergency after hour parts orders (800) 334-4881 TECHNICAL SUPPORT: Emergency 24 Hour Service (800) 222-0741 Panasonic Canada Inc. 5770 Ambler Drive, Mississauga, Ontario L4W 2T3 (905) 624-5010 Panasonic de Mexico S.A. de C.V. Av angel Urraza Num. 1209 Col. de
-
 1
1 -
 2
2 -
 3
3 -
 4
4 -
 5
5 -
 6
6 -
 7
7 -
8
-
9
-
10
-
11
-
12
-
13
-
14
-
15
-
16
-
17
-
18
-
19
-
20
-
21
-
22
-
23
-
24
-
25
-
26
-
27
-
28
-
29
-
30
-
31
-
32
-
33
-
34
-
35
-
36
-
37
-
38
-
39
-
40
-
41
-
42
-
43
-
44
-
45
-
46
-
47
-
48
-
49
-
50
-
51
-
52
-
53
-
54
 |
 |
Before operating this product, please read the instructions carefully and save this
manual for future use.
Model No. AG-
P
Digital Video Camera Recorder
Ò
NTSC
VQT0C34
Printed in Japan
S1202Y0
@
P