Panasonic AJPCD20P AJPCD20P User Guide - Page 11
To Mount the P2 drive in a Personal Computer 5-inch Bay
 |
View all Panasonic AJPCD20P manuals
Add to My Manuals
Save this manual to your list of manuals |
Page 11 highlights
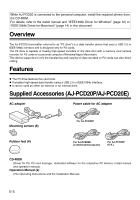
ENGLISH Installation (continue) To Mount the P2 drive in a Personal Computer 5-inch Bay 1 Turn OFF the personal computer's power. 2 Undo the six screws and remove the cover. 4 Plug a USB 2.0 cable B connector into the USB connector on the P2 drive. then plug the other end of the USB 2.0 cable into the USB 2.0 port on the personal computer. USB 2.0 IEEE 1394b DC IN 16V DC IN 12V USB 2.0 IEEE 1394b DC IN 16V DC IN 12V 3 Mount the P2 drive in a 5-inch bay on the personal computer. Use the screws supplied with the P2 drive for mounting. Please refer to your computer's instruction manual for guidance in mounting to 5-inch bay drives. USB 2.0 connector USB 2.0 connector pinouts vary according to the type of motherboard type. Check your computerís instruction manual before purchasing a commercially available USB 2.0 cable (shielded). 5 Connect the P2 drive to the internal power cable (4 pins) of the personal computer. Holes for securing the screws (the other side is the same.) z The P2 drive may not be able to be fastened securely in some types of personal computers. z If all 5-inch bays are occupied, you will need to remove one of the built-in drives to make room for the P2 drive. z The P2 drive should be used in a personal computer whose design allows the front panel of the Drive to be manipulated. USB 2.0 IEEE 1394b DC IN 16V DC IN 12V Power cable E-10
-
 1
1 -
2
-
3
-
4
-
5
-
 6
6 -
 7
7 -
 8
8 -
 9
9 -
 10
10 -
 11
11 -
 12
12 -
 13
13 -
 14
14 -
 15
15 -
 16
16 -
17
-
18
-
19
-
20
-
21
-
22
-
23
-
24
-
25
-
26
-
27
-
28
-
29
-
30
-
31
-
32
-
33
-
34
-
35
-
36
-
37
-
38
-
39
-
40
-
41
-
42
-
43
-
44
-
45
-
46
-
47
-
48
-
49
-
50
-
51
-
52
-
53
-
54
-
55
-
56
-
57
-
58
-
59
-
60
-
61
-
62
-
63
-
64
 |
 |
