Panasonic BL-C10E Installation Guide - Page 3
Prerequisites - bl c10 installation cd
 |
View all Panasonic BL-C10E manuals
Add to My Manuals
Save this manual to your list of manuals |
Page 3 highlights
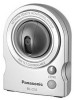
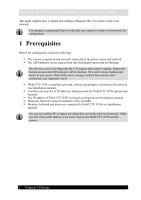
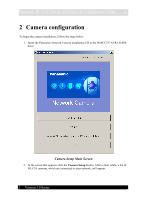
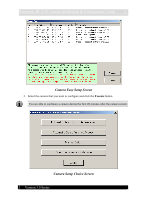
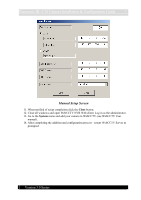
Panasonic BL-C10 Camera Installation & Configuration Guide 3 This guide explains how to install and configure Panasonic BL-C10 camera in the local network. It is strongly recommended that you add only one camera at a time to the network for configuration. 1 Prerequisites Before the configuration check the following: The camera is unpacked and correctly connected to the power source and network. The LED indicator on the camera front side should glow green and not flashing. The first boot cycle of a Panasonic BL-C10 camera takes about 1 minute. During the booting process the LED indicator will be flashing. Wait until it stops flashing and begins to glow green. If the LED color is orange, recheck the network cable connection. (see Appendix A p.8) WebCCTV NVR is installed, activated, running and properly connected to the network (see Installation manual). You have an exact list of IP addresses and passwords for WebCCTV NVR and network cameras. The IP address of WebCCTV NVR is properly configured (see Installation manual). Panasonic Network Camera installation CD is available. Monitor, keyboard and mouse are connected to WebCCTV NVR (see Installation manual). You can use another PC or laptop providing they are in the same local network. Make sure that it has an IP address in the same range as the WebCCTV NVR and the camera. Version 3.0 Series
-
 1
1 -
 2
2 -
 3
3 -
 4
4 -
 5
5 -
 6
6 -
 7
7 -
 8
8 -
 9
9 -
10
-
11
 |
 |