Panasonic BL-C10E Installation Guide - Page 6
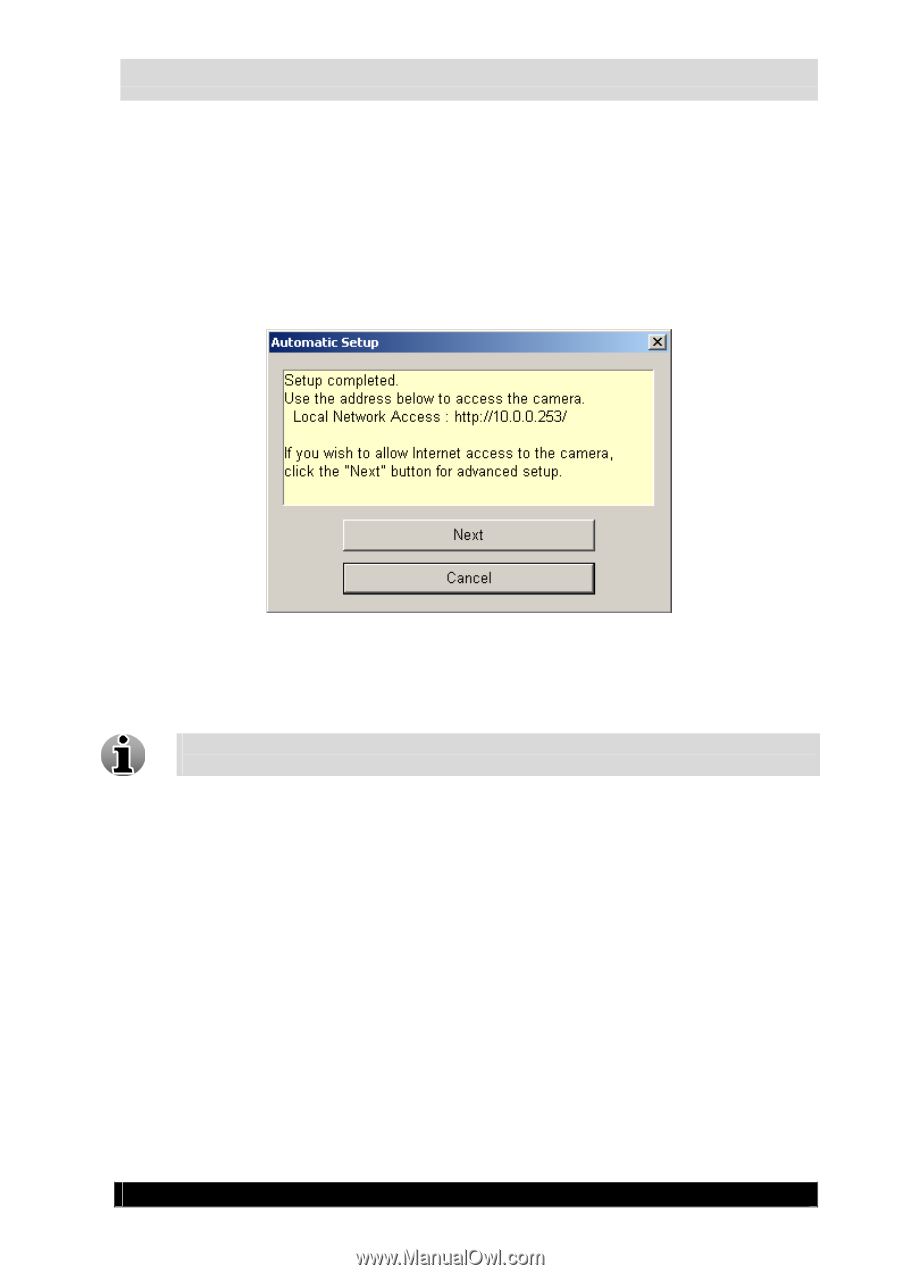
Automatic Setup Completion Screen, Version 3.0 Series - bl c10 manual
 |
View all Panasonic BL-C10E manuals
Add to My Manuals
Save this manual to your list of manuals |
Page 6 highlights
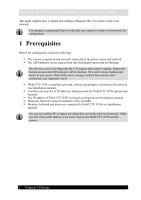
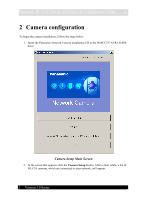
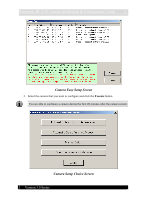
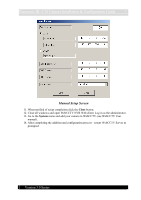
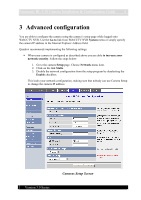
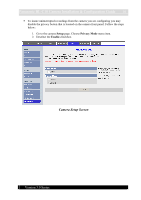
Panasonic BL-C10 Camera Installation & Configuration Guide 6 4. In the window that appears choose Automatic Setup (Local Access Only). 5. Wait until the automatic setup dialog window appears. Specify the correct IP address and subnet mask and click OK. 6. Wait until the web page appears. Specify User Name and Password and click the Save button. 7. Next, the logon window appears. Log into the camera under the credentials you have just specified. As a result you'll get to the camera web page. 8. A window will appear, that informs you about setup completion. Click Next to enter the advanced setup. Automatic Setup Completion Screen 9. In the Camera Setup Choice screen choose Manual Setup by clicking corresponding the button. Manual Setup is necessary to assign a static IP address to the camera. Quadrox strongly recommends such a configuration. 10. In the Manual Setup screen check settings and click the Save button. Version 3.0 Series
-
 1
1 -
 2
2 -
 3
3 -
 4
4 -
 5
5 -
 6
6 -
 7
7 -
 8
8 -
 9
9 -
 10
10 -
 11
11
 |
 |