Panasonic BL-C10E Installation Guide - Page 8
Advanced configuration - bl c10 camera
 |
View all Panasonic BL-C10E manuals
Add to My Manuals
Save this manual to your list of manuals |
Page 8 highlights
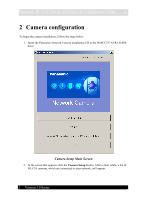
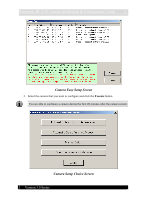
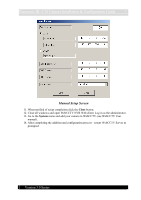
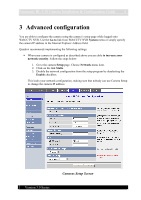
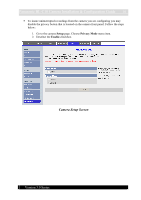
Panasonic BL-C10 Camera Installation & Configuration Guide 8 3 Advanced configuration You are able to configure the camera using the camera's setup page while logged onto WebCCTV NVR. Use the Go to link from WebCCTV NVR System menu or simply specify the camera IP address in the Internet Explorer Address field. Quadrox recommends implementing the following settings: When your camera is configured as described above you are able to increase your network security. Follow the steps below: 1. Go to the camera Setup page. Choose Network menu item. 2. Click on the link Static. 3. Disable the network configuration from the setup program by deselecting the Enable checkbox. This locks your network configuration, making sure that nobody can use Camera Setup to change the camera IP address. Version 3.0 Series Cameras Setup Screen
-
 1
1 -
2
-
 3
3 -
 4
4 -
 5
5 -
 6
6 -
 7
7 -
 8
8 -
 9
9 -
 10
10 -
 11
11
 |
 |
