Panasonic CF-73SCUTSBM Service Manual - Page 29
Test Selection, Parallel test, LAN Test, CD-ROM test
 |
UPC - 092281843346
View all Panasonic CF-73SCUTSBM manuals
Add to My Manuals
Save this manual to your list of manuals |
Page 29 highlights
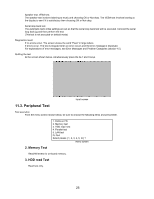
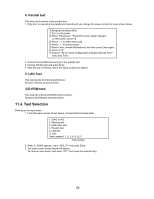
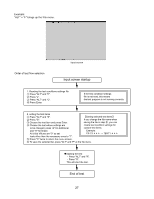
4. Parallel test This tests the functions of the parallel port. 1. Only prior to executing the parallel port test should you change the setup contents to those shown below. [Changing the setup utility] Turn on the power. When "Panasonic", "Press F2 to enter setup" appears on the screen, press F2. Press " " to select Advanced. Press " " to choose Mode. Press Enter, choose Bidirectional, and then press Enter again. Choose Yes for "Save Configuration changes and exit now?" and press Enter. 2. Connect the parallel loop back jig to the parallel port. 3. Choose Parallel test and press Enter. 4. After the test is finished, return the setup contents to default. 5. LAN Test This test checks for internal LAN device. Choose LAN test and press Enter. (CD-ROM test) This tests the internal CD-ROM drive functions. Choose CD-ROM test and press Enter. 11.4. Test Selection Starting up the input menu 1. From the menu screen shown below, choose Quit and press Enter. 1. DIAG on FD 2. Memory test 3. HDD read test 4. Parallel test 5. LAN test Q. Quit Select please [ 1, 2, 3, 4, 5, Q ] ? menu screen 2. When A: \DIAG appears, input "JDG_73" and press Enter. 3. The input screen shown below will appear. To choose menu items, hold down "ALT" and press the selection key. 26
-
 1
1 -
2
-
3
-
4
-
5
-
6
-
7
-
8
-
9
-
10
-
11
-
12
-
13
-
14
-
15
-
16
-
17
-
18
-
19
-
20
-
21
-
22
-
23
-
 24
24 -
 25
25 -
 26
26 -
 27
27 -
 28
28 -
 29
29 -
 30
30 -
 31
31 -
 32
32 -
 33
33 -
 34
34 -
35
-
36
-
37
-
38
-
39
-
40
-
41
-
42
-
43
-
44
-
45
-
46
-
47
-
48
-
49
-
50
-
51
-
52
-
53
-
54
-
55
-
56
-
57
-
58
-
59
-
60
-
61
-
62
-
63
-
64
-
65
-
66
-
67
-
68
-
69
-
70
-
71
-
72
-
73
-
74
-
75
-
76
-
77
-
78
-
79
-
80
-
81
-
82
-
83
-
84
-
85
-
86
-
87
-
88
-
89
-
90
-
91
-
92
-
93
-
94
-
95
-
96
-
97
-
98
-
99
-
100
-
101
-
102
-
103
-
104
-
105
-
106
-
107
-
108
-
109
-
110
-
111
-
112
-
113
-
114
-
115
-
116
-
117
-
118
 |
 |
