Panasonic CQ-C8401U Auto Radio/cd Deck - Page 7
PREPARATION, Using Subwoofer, Connecting XM tuner, Preparation Before Initial Use, Battery Replacement - cq face plate
 |
View all Panasonic CQ-C8401U manuals
Add to My Manuals
Save this manual to your list of manuals |
Page 7 highlights
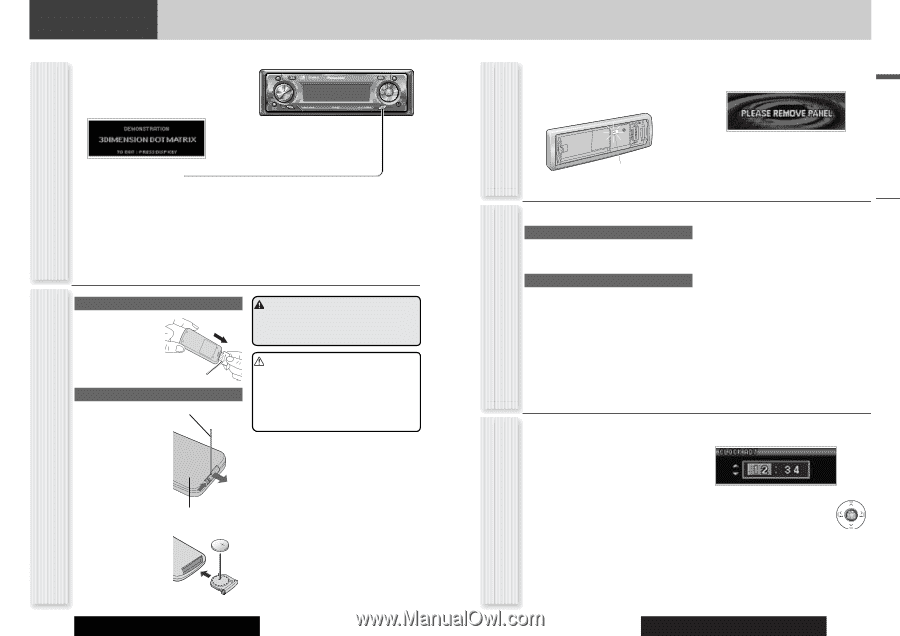
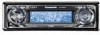
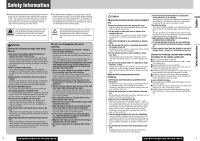
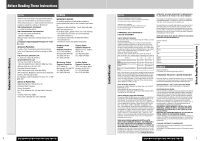
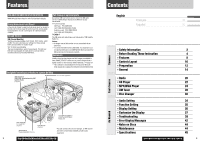
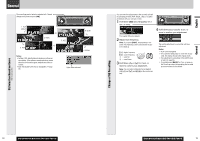
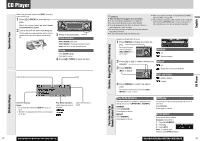
Preparation The demonstration message appears for first use. SRC CQ-C8401U 1 Set your car's ignition switch to the ACC or On position. The demonstration screen appears. First Time Power On (DEMONSTRATION) 2 Press [DISP] (Display). The demonstration screen is cancelled, and no more appears. 3 Press [SRC] (PWR: Power). Note: If you would like to turn on the power and make the demonstration message appear, hold down [SRC] (PWR: Power) for 4 sec. or more after turning off the power in other than the XM mode. Remote Control Preparation Preparation Before Initial Use Pull the insulation film out from the backside of remote control gently. Warning Keep batteries and insulation film out of reach of infants. If an infant ingests a battery, please seek immediate medical attention. Insulation film Battery Replacement q Remove the battery holder Tough pointed object with the remote control unit placed on a flat surface. q Stick your thumbnail into the groove, and push the holder in the direction of the arrow, and at the same time. w Pull it out in the direction of the arrow using a w q tough pointed object. Back side Cautions ¡Remove and dispose of an old battery immediately. ¡Do not disassemble, heat or short a battery. Do not throw a battery into a fire or water. ¡Follow local regulations when disposing of a battery. ¡Improper use of a battery may cause overheating, an explosion or ignition, resulting in injury or a fire. Note: Battery Information: Battery Type: Panasonic lithium battery (CR2025) (Included in the remote control) Battery Life: Approximately 6 months under normal use (at room temperature) w Put a battery in the case with (+) side facing up. e Put the case back. 2 3 12 CQ-C8401U/C8301U/C7401U/C7301U Clock adjustment Other Settings Security Function Setting The following functions are activated when the Security Function is ON. (a page 35) ¡ The security indicator lights up when removing the face plate. ¡ The alarm sounds and the message appears on the screen to warn you to remove the face plate at ACC off. Security Indicator You may need to set the following depending on the devices to be connected. Using Subwoofer ¡ Subwoofer level adjustment (a page 34) ¡ Subwoofer low pass filter (a page 34) Connecting XM tuner ¡ Connect the optional XM receiver (XMD1000). ¡ To connect the XM receiver (XMD1000), it is required to use an optional extension cord (XMDPAN100) that is produced by XM exclusively for Panasonic products. Getting Started It is required to sign up to become an XM Satellite Radio subscriber. After checking your XM Satellite Radio ID, sign up on the XM's website or by calling them. 1Check of XM Satellite Radio ID ¡ Write down the ID indicated on the lower right of your XM receiver (XMD1000). ¡ Radio ID also can be found by turning your XM Radio to channel 0. (a page 28.) 2 Activate the XM Satellite Radio Select either of the below to sign up. ¡ Web site: http://www.xmradio.com/activation ¡ Phone number: 1-800-XM-RADIO (1-800-967-2436) Note: Refer to the operating instructions for the XM receiver for details. Note: Adjust the clock when "ADJUST" appears on the display. 1 Press [MENU] to display the menu display. For using the remote control, hold down [SEL] (MENU) for 2 sec. or more. 2 Press []] or [[] to display the DISPLAY menu. 3 Press [{] to select "CLOCK ADJ". 4 Press [BAND] (SET) to confirm the display. 5 Adjust the setting value. [[]: Adjusting minutes []]: Adjusting hours [}]: Forward [{]: Backward 6 Press [BAND] (SET) to confirm the adjustment. 7 Press [MENU]. For using the remote control, hold down [SEL] (MENU) for 2 sec. or more. CQ-C8401U/C8301U/C7401U/C7301U 13 Preparation English
-
 1
1 -
 2
2 -
 3
3 -
 4
4 -
 5
5 -
 6
6 -
 7
7 -
 8
8 -
 9
9 -
 10
10 -
 11
11 -
 12
12 -
13
-
14
-
15
-
16
-
17
-
18
-
19
-
20
-
21
-
22
-
23
-
24
-
25
-
26
-
27
-
28
-
29
-
30
-
31
-
32
-
33
-
34
-
35
-
36
-
37
-
38
-
39
-
40
-
41
-
42
-
43
-
44
-
45
-
46
-
47
-
48
-
49
-
50
-
51
-
52
-
53
-
54
-
55
-
56
-
57
-
58
-
59
-
60
-
61
-
62
-
63
-
64
-
65
-
66
 |
 |