Panasonic HX-A1 HX-A1 Owner s Manual - Page 31
How to remove the battery
 |
View all Panasonic HX-A1 manuals
Add to My Manuals
Save this manual to your list of manuals |
Page 31 highlights
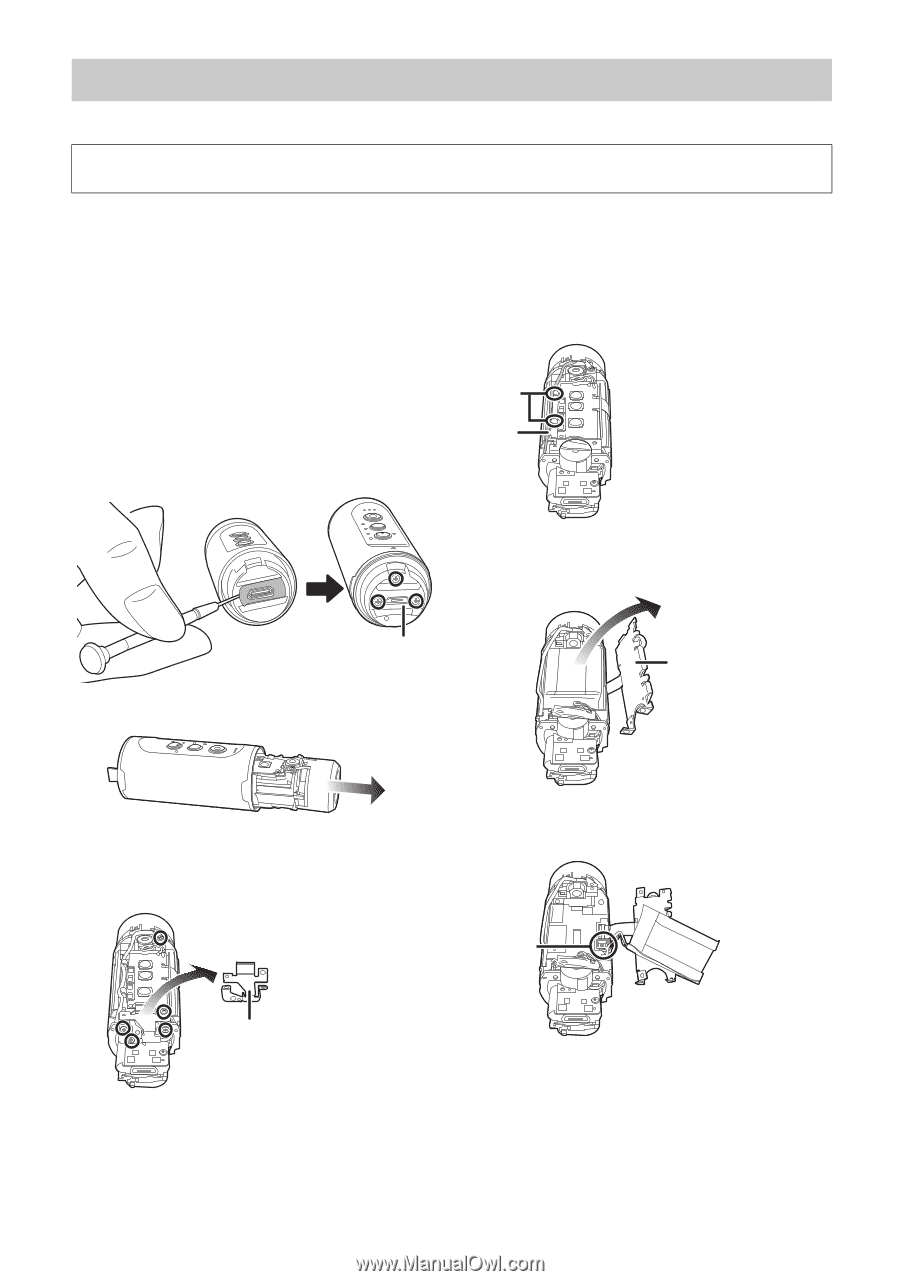
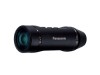
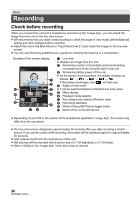
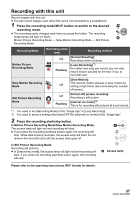
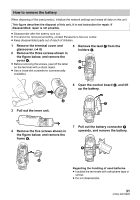
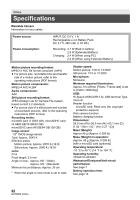
How to remove the battery When disposing of the used product, initialize the network settings and erase all data on this unit. This figure describes the disposal of this unit, it is not instruction for repair. If disassembled, repair is not possible. ≥ Disassemble after the battery runs out. ≥ If it cannot be removed smoothly, contact Panasonic's Service center. ≥ Keep disassembled parts out of reach of children. 1 Remove the terminal cover and glasscover. (l 8) 2 Remove the three screws shown in the figure below, and remove the cover A. ≥ Before removing the screws, peel off the label on the terminal with a sharp object. ≥ Use a cross-slot screwdriver (commercially available). 5 Remove the lead C from the holders D. 6 Open the control board E, and lift up the battery. 3 Pull out the inner unit. 4 Remove the five screws shown in the figure below, and remove the frame B. 7 Pull out the battery connector F upwards, and remove the battery. Regarding the handling of used batteries ≥ Insulate the terminals with cellophane tape or similar. ≥ Do not disassemble. 31 (ENG) SQT0885
-
 1
1 -
2
-
3
-
4
-
5
-
6
-
7
-
8
-
9
-
10
-
11
-
12
-
13
-
14
-
15
-
16
-
17
-
18
-
19
-
20
-
21
-
22
-
23
-
24
-
25
-
 26
26 -
 27
27 -
 28
28 -
 29
29 -
 30
30 -
 31
31 -
 32
32 -
 33
33 -
 34
34 -
 35
35 -
 36
36 -
37
-
38
-
39
-
40
-
41
-
42
 |
 |