Panasonic HX-A1M Owners Manual
Panasonic HX-A1M Manual
 |
View all Panasonic HX-A1M manuals
Add to My Manuals
Save this manual to your list of manuals |
Panasonic HX-A1M manual content summary:
- Panasonic HX-A1M | Owners Manual - Page 1
Owner's Manual Wearable Camera HX-A1M Model No. Please read these instructions carefully before using this product, and save this manual for future use. Register online at www.panasonic.com/register (U.S. customers only) SQW0376 - Panasonic HX-A1M | Owners Manual - Page 2
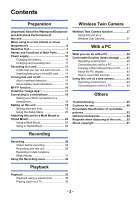
15 About battery level indications 15 Wi-Fi® function 16 Install the "Image App 17 Connecting to a smartphone 18 Setting up a Wi-Fi connection to a Using this unit as a web camera 43 Operating environment 43 Connecting this unit to a PC 44 Others Troubleshooting 45 Cautions for use 49 - Panasonic HX-A1M | Owners Manual - Page 3
as a result of being hit or dropped etc. If an impact to this unit occurs, it should be inspected (subject to a fee) by a Panasonic's Service Center to verify that the waterproofing is still effective. ≥ The waterproof performance may be degraded due to the strong water pressure when this unit is - Panasonic HX-A1M | Owners Manual - Page 4
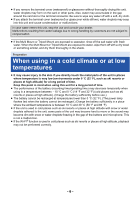
this unit. If foreign objects are caught in it, water may leak in and cause malfunctions and other problems. ≥ Do not leave this unit for a long period of time in places where temperature is very low (at high altitude etc.) or very high (inside a - Panasonic HX-A1M | Owners Manual - Page 5
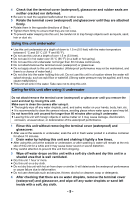
after using it. ≥ Thoroughly wipe off any water droplets, sand, and saline matter on your hands, body, hair, etc. ≥ It is recommended to clean the camera indoors, avoiding places where water spray or sand may fall. Do not leave this unit uncared for longer than 60 minutes after using it underwater - Panasonic HX-A1M | Owners Manual - Page 6
≥ If you remove the terminal cover (waterproof) or glasscover without thoroughly drying this unit, water droplets may form on the card or other parts. Also, water may accumulate in the gap around the card slot or the terminal connector. Be sure to wipe any water off with a soft, dry cloth. ≥ If you - Panasonic HX-A1M | Owners Manual - Page 7
) Wearable Camera for recording highdefinition motion pictures. ≥ AVCHD and MPEG2 motion pictures are different formats, and are not therefore supported by about recorded content Panasonic does not accept any responsibility for damages directly or indirectly due to any type of problems that result in - Panasonic HX-A1M | Owners Manual - Page 8
different from the original. ≥ Depending on the firmware version you are using, captured screens described in this owner's manual may differ from the actual screens. ≥ Names, icons, contents and services of applications may be changed with no prior notice. Please note that they may differ from the - Panasonic HX-A1M | Owners Manual - Page 9
Preparation Names and Functions of Main Parts 12 13 1 2 5 Inside the terminal cover 6 3 15 4 7 89 10 11 14 16 1 Microphone 2 Access lamp (l 14) 3 Recording mode lamps ≥ [ ]: Motion picture recording lamp ≥ [ ]: Slow motion recording lamp ≥ [ ]: Still picture recording lamp 4 Power lamp - Panasonic HX-A1M | Owners Manual - Page 10
Preparation Power supply Charging the battery When this unit is purchased, the battery is not charged. Charge the battery fully before using this unit for the first time. ≥ This unit has a built-in rechargeable lithium-ion battery. Do not remove except when disposing of this unit. (l 55) ≥ It is - Panasonic HX-A1M | Owners Manual - Page 11
looking at the "Image App" screen (l 28) or the recording mode lamps (l 15). ≥ This unit heats up after use or charging. This is not a malfunction. ≥ For information about charging with a mobile USB charger or an AC adaptor, check the support site. http://panasonic.jp/support/global/cs/e_cam/index - Panasonic HX-A1M | Owners Manual - Page 12
battery at the same time. ≥ For information on the use of an Extended Battery, including how to attach and charge it, refer to the operating instructions for it. - 12 - - Panasonic HX-A1M | Owners Manual - Page 13
card, etc. e.g.: ≥ For the latest information on the cards that have been confirmed to operate with this unit, check the support website below. http://panasonic.jp/support/global/cs/e_cam/index.html (This website is in English only.) ≥ When using the microSDHC Card/microSDXC Card on another device - Panasonic HX-A1M | Owners Manual - Page 14
Inserting/removing a microSD card When using a microSD card not from Panasonic, or one previously used on other equipment, for the first time on this unit, format the microSD card. (l 20) When the microSD card is formatted, - Panasonic HX-A1M | Owners Manual - Page 15
battery. ≥ When the battery level reaches 10% or below, the power lamp flashes. ≥ You can also check the battery level by looking at the "Image App" screen. (l 28) - 15 - - Panasonic HX-A1M | Owners Manual - Page 16
if used in countries other than those where this unit is sold, and Panasonic takes no responsibility for any violations. ∫ There is the risk that data and settings of your device such as the smartphone, please read the operating instructions of the device. ≥ This unit uses the 2.4 GHz frequency band. - Panasonic HX-A1M | Owners Manual - Page 17
≥ Refer to [Help] in the "Image App" menu about how to operate. ≥ The service may not be able to be used properly depending on the type of smartphone being used. For information on the "Image App", check the support website below. http://panasonic.jp/support/global/cs/e_cam/index.html (This Site is - Panasonic HX-A1M | Owners Manual - Page 18
App" on your smartphone. (l 17) 2 Turn on the Wi-Fi function of your smartphone. ≥ For further details, please read the operating instructions red. Default setting SSID: Password: A1-wearable a12345678 ∫ To terminate the Wi-Fi connection recommend you keep this owner's manual in a safe place. ≥ - Panasonic HX-A1M | Owners Manual - Page 19
connection. ≥ For more information, refer to the [Help] in the "Image App" menu. Setting date and time The date and time setting of this unit is with that of the smartphone. Synchronize to adjust the clock, etc. 1 Tap # [Camera setup]. 2 Tap [Date & time]. ≥ When you want to adjust the clock, - Panasonic HX-A1M | Owners Manual - Page 20
Menu For settings on the Setup menu, tap # [Camera setup] # respective items on the "Image App" screen. ≥ For more information, refer to the [Help] in the "Image App" menu. ≥ Displayed items may differ depending on your OS or "Image App" version. [Alert Sound] You can hear a confirmation - Panasonic HX-A1M | Owners Manual - Page 21
51. [Select USB mode] Set whether to use this unit as an external drive (card reader) for a PC or as a web camera when you connect it to a PC. ([PC]/[Web camera]) ≥ Select the desired setting before connecting this unit to a PC. ≥ When using this unit as a card reader, refer to page 40 - Panasonic HX-A1M | Owners Manual - Page 22
Preparation Attaching this unit to a Multi Mount or Tripod Mount You can attach this unit to a Multi Mount or Tripod Mount and perform recording. ≥ When the Tripod Mount is attached to a tripod or similar item, do not hold this unit or adjustment belt to carry the assembled items. ≥ It may not be - Panasonic HX-A1M | Owners Manual - Page 23
4 Fasten the Multi Mount securely by aligning the two fasteners to one another. ≥ Fasten securely to prevent the Multi Mount from falling off. ≥ Dust, etc. adhering to the hook and loop fastener will weaken the adhesion. Before attaching it, check if dust, lint, etc. is adhering. 5 Attach this unit - Panasonic HX-A1M | Owners Manual - Page 24
4 Attach this unit to the Multi Mount as shown in the figure. (l 24) Attaching this unit to the Multi Mount ≥ Before attaching this unit, fasten the Multi Mount securely with the band and the hook and loop fastener. 1 While holding the tightening nut A, tighten the adjustment knob B by rotating it - Panasonic HX-A1M | Owners Manual - Page 25
5 While holding the tightening nut A, loosen the adjustment knob B by rotating it towards UNLOCK to adjust the direction of this unit. 6 While holding the tightening nut A, rotate the adjustment knob B by rotating it towards LOCK until this unit is fastened securely. Removing this unit from the - Panasonic HX-A1M | Owners Manual - Page 26
Using a Tripod Mount Attaching the tripod mount to a tripod, etc. The tripod mounting hole A of the tripod mount is compatible with the screw (1/4-20 UNC) of a tripod, etc. ≥ If you attach a screw with a length of 6 mm (0.24 q) or more to a Tripod Mount, it may wobble. Attaching this unit to the - Panasonic HX-A1M | Owners Manual - Page 27
Removing this unit from the Tripod Mount While holding D, loosen the tightening nut C by rotating it towards UNLOCK, and remove this unit. UNLOCK LOCK ≥ This unit is not waterproof when the terminal cover (USB connection) is in use. In this case, do not use this unit underwater or touch it - Panasonic HX-A1M | Owners Manual - Page 28
on the live view screen. ≥ You can use [Shooting guidelines] (l 34) as a guide for checking the balance of a composition. Example of the screen display: 1080/30p ) or 2.7 M (wide). ≥ Refer to [Help] in the "Image App" menu about how to operate. ≥ When an Extended Battery (optional) is - Panasonic HX-A1M | Owners Manual - Page 29
a set interval. *1 You need to set [Recording Mode] of the "Image App" to [Loop Recording]. (l 32) *2 You need to select a setting other than [OFF] for [Interval rec mode] of the "Image App". (l 33) 2 Press the recording start/stop button. In Motion Picture Recording - Panasonic HX-A1M | Owners Manual - Page 30
of recordable pictures. ≥ It may take approximately 3 seconds to stop motion picture recording. Use the alert sound function or look at the "Image App" screen to confirm that the motion picture recording has stopped. ≥ You cannot change the angle of view mode setting during recording. ≥ You cannot - Panasonic HX-A1M | Owners Manual - Page 31
Recording in dark locations (Night Mode) You can record brighter images in dark locations using an infrared (IR) light (commercially available). Preparation: Turn off this unit. (l 15) 1 Rotate the glasscover (normal shooting) 1 in the direction of the arrow to remove it. 2 Rotate the supplied - Panasonic HX-A1M | Owners Manual - Page 32
the Recording menu Tap # [Record Setup] # respective items on the "Image App" screen. ≥ For more information, refer to the [Help] in the "Image App" menu. ≥ Displayed items may differ depending on your OS or "Image App" version. [Recording Mode] You can record images with a variety of recording - Panasonic HX-A1M | Owners Manual - Page 33
[Pixels / Frame rate] You can switch the image quality of the motion pictures you record. Available [Pixels / Frame rate] differs depending on the [Recording Mode] setting. ≥ When [Recording Mode] is set to [Normal Shooting] (l 32): The greater the number is, the higher the image quality is. - Panasonic HX-A1M | Owners Manual - Page 34
, etc. [Indoor 2] Color fluorescent lamps, sodium lamps in gymnasiums etc. [User] The color tone set in [Custom] To set the White Balance manually ≥ When recording under mercury vapor lamps, sodium lamps, spotlights in a theater, etc. or when recording a sunset/sunrise, etc., fill the entire - Panasonic HX-A1M | Owners Manual - Page 35
. ≥ For more information, refer to the [Help] in the "Image App" menu. Preparation: Connect this unit with the smartphone and start Image App. (l 18) Example of the motion picture playback screen display: 1 Camera function 2 Upload 3 Number of motion picture/still picture scenes 4 Remaining - Panasonic HX-A1M | Owners Manual - Page 36
this unit and the smartphone is lost when "Image App" is in Playback Mode, "Image App" will start up in Recording Mode when they are reconnected TV If your TV is equipped with an SD card slot that supports the playback of MP4 files, you can play back the files instructions for the TV. - 36 - - Panasonic HX-A1M | Owners Manual - Page 37
Using this unit as a Wireless Sub Camera 1 (On the Main Camera) Set up the Wireless Twin Camera function. For information on the setup procedure for the Main Camera and compatible devices, check the support website below. (As of May 2015) http://panasonic.jp/support/global/cs/e_cam/index.html 2 (On - Panasonic HX-A1M | Owners Manual - Page 38
-Fi lamp will light green and you will hear an alert sound. ≥ Main Camera information (SSID, etc.) will be saved to this unit. When connecting for the finger. ≥ The Wi-Fi lamp will go off. ∫ To connect to another Main Camera In Step 3, while the Wi-Fi lamp is flashing green, press and hold the - Panasonic HX-A1M | Owners Manual - Page 39
streaming site or other online service. (When [Select USB mode] of the "Image App" is set to [Web camera]) ∫ Playing back and software products: j For Windows: Windows Movie Maker (versions that support MPEG-4 AVC/H.264) j For Mac: iMovie (supported OS version: OS X v10.10) ≥ If these software - Panasonic HX-A1M | Owners Manual - Page 40
use this unit as a card reader, you need a PC that meets the following system requirements: ≥ Even if the system requirements mentioned in this owner's manual are fulfilled, some PCs cannot be used. ≥ The USB equipment operates with the driver installed as standard in the OS. ∫ For use with Windows - Panasonic HX-A1M | Owners Manual - Page 41
[Select USB mode] of the "Image App" to [PC]. (l 21) 1 Memory Card, check the following support site. http://panasonic.net/avc/sdcard/information/SDXC. click the on-screen display that lets you eject [HX-A1]. ≥ Depending on your PC's settings, this software, and copy motion pictures or still pictures to a - Panasonic HX-A1M | Owners Manual - Page 42
About the PC display The folder structure of a microSD card on which this unit has performed recording is as follows. Example folder structure of a microSD card: CAM_SD ≥ Folder numbers range from 100 to 999. Five alphabetic characters after a three-digit DCIM 100CDPFQ number indicate the file - Panasonic HX-A1M | Owners Manual - Page 43
To use this unit as a web camera, you need a PC that meets the following system requirements. ≥ Even if the system requirements mentioned in this owner's manual are fulfilled, some PCs cannot be used. ≥ Please also check the system requirements for your software. ∫ For use with Windows OS Windows - Panasonic HX-A1M | Owners Manual - Page 44
using a motion picture streaming service (USTREAM, etc.). Preparation: ≥ Set [Select USB mode] of the "Image App" to [Web camera]. (l 21) ≥ Register information on how to perform live broadcasts and obtain and use live broadcast software, refer to the live broadcast site you use. ≥ When using a Wi - Panasonic HX-A1M | Owners Manual - Page 45
Others Troubleshooting ∫ It is not a malfunction in following cases The lens fogs up. ≥ This is due to condensation. It is not a malfunction. Please refer to page 4. Problem This unit cannot be turned on. This unit does not stay on long enough. Power Check points ≥ Charge the battery again to - Panasonic HX-A1M | Owners Manual - Page 46
a card reader/web camera. To resolve the problem, terminate the Wi-Fi App" to [PC]. (l 21) ≥ When using this unit as a web camera, set [Select USB mode] of the "Image App" to [Web camera]. (l 21) ≥ To disconnect the USB cable safely, double-click the icon in the task tray and follow the instructions - Panasonic HX-A1M | Owners Manual - Page 47
of the Android device, turn it off. Problem This unit does not turn off, even after closing "Image App". If the microSD card is inserted in points ≥ This unit can be turned off by tapping # [Camera function] # [Camera power off] on the "Image App" screen. ≥ If the microSD card is formatted on a - Panasonic HX-A1M | Owners Manual - Page 48
is not operating correctly, take note of the alert sound to resolve any problems. "2 Beeps" sound 4 times ≥ The clock of this unit is not also connect this unit to the smartphone and check the status on the "Image App" screen. (A message indicating the status of this unit will be displayed.) "3 - Panasonic HX-A1M | Owners Manual - Page 49
a dry cloth. ≥ Use of benzine, paint thinner, alcohol, or dishwashing liquid may alter the camera body or peel the surface finish. Do not use these solvents. ≥ When using a chemical dust cloth, follow the instructions that came with the cloth. Do not use this unit for surveillance purposes or other - Panasonic HX-A1M | Owners Manual - Page 50
including the SSID and Password for the Main Camera connected to this unit, will be saved on or other handlings. Please note in advance that Panasonic is not liable in any way for any note that:". (l 51) When uploading images on web services. ≥ Images may contain information that can be used for - Panasonic HX-A1M | Owners Manual - Page 51
For the latest update information, check the support website below. (As of May 2015) http://panasonic.jp/support/global/cs/e_cam/ index.html (This site set after the purchase ([Camera Wi-Fi settings] # [Camera SSID settings] in the "Image App") j SSID/Password of Main Camera that was connected to - Panasonic HX-A1M | Owners Manual - Page 52
Others Recordable time/Number of recordable pictures microSD cards are only mentioned with their main memory size. Approximate recordable time ≥ The default setting is [1920k1080/30p]. ≥ The stated times are the approximate recordable times for continuous recording. ≥ The recordable time may be - Panasonic HX-A1M | Owners Manual - Page 53
Approximate number of recordable pictures ≥ The stated number is the approximate number of recordable pictures. ≥ The number of recordable pictures depends on the subject being recorded. Picture size Aspect ratio 4 GB microSD card 16 GB 64 GB 2.7 M 2.1 M 2176k1224 1920k1080 16:9 1800 2500 - Panasonic HX-A1M | Owners Manual - Page 54
, the Tripod Mount (supplied) is required. ≥ Please also refer to the operating instructions of the Video Camera Mount (For Handlebar). ≥ Refer to page 26 for information on the Tripod Mount. ∫ When attaching the Video Camera Mount (For Handlebar) and Tripod Mount 1 Remove the Quick Shoe of the - Panasonic HX-A1M | Owners Manual - Page 55
(l 51) first and remove the built-in battery from this unit. Please refer to page 56 about how to remove the battery. Thank you for supporting our battery recycling efforts. ≥ Please make sure that the battery is disposed of at an officially assigned location, if there is one in your country - Panasonic HX-A1M | Owners Manual - Page 56
This figure describes the disposal of this unit, it is not instruction for repair. If disassembled, repair is not possible. ≥ Disassemble after the battery runs out. ≥ If it cannot be removed smoothly, contact Panasonic's Service Center. ≥ Keep disassembled parts out of reach of children. 1 Remove - Panasonic HX-A1M | Owners Manual - Page 57
trademarks of Intel Corporation in the U.S. and/or other countries. ≥ App Store is a service mark of Apple Inc. ≥ Android and Google Play are trademarks or ≥ Other names of systems and products mentioned in these instructions are usually the registered trademarks or trademarks of the manufacturers - Panasonic HX-A1M | Owners Manual - Page 58
Panasonic Corporation Web site: http://www.panasonic.com
-
 1
1 -
 2
2 -
 3
3 -
 4
4 -
 5
5 -
 6
6 -
 7
7 -
8
-
9
-
10
-
11
-
12
-
13
-
14
-
15
-
16
-
17
-
18
-
19
-
20
-
21
-
22
-
23
-
24
-
25
-
26
-
27
-
28
-
29
-
30
-
31
-
32
-
33
-
34
-
35
-
36
-
37
-
38
-
39
-
40
-
41
-
42
-
43
-
44
-
45
-
46
-
47
-
48
-
49
-
50
-
51
-
52
-
53
-
54
-
55
-
56
-
57
-
58
 |
 |
Owner’s Manual
Wearable Camera
Model No.
HX-A1M
Please read these instructions carefully before using this product, and save this manual for
future use.
SQW0376
Register online at www.panasonic.com/register
(U.S. customers only)