Panasonic KX-HNC600 Installation Guide - CA - Page 18
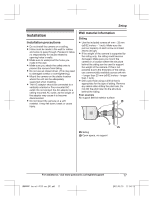
Setup, Concrete, ALC autoclaved lightweight cellular, Other materials mortar, tile, etc.
 |
View all Panasonic KX-HNC600 manuals
Add to My Manuals
Save this manual to your list of manuals |
Page 18 highlights
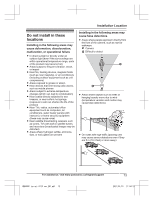
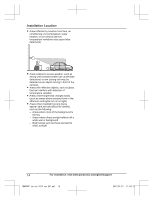
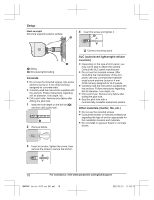
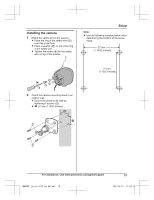
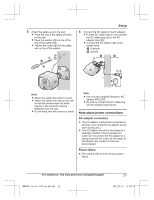
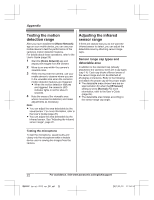
Setup Ideal example 4 Insert the screw and tighten it. Structure supports exterior surface 2 2 1 1 Siding 2 Structure behind siding Concrete R Do not use the included screws. Use screw anchors (screw ø: 4 mm (5/32 inches)) designed for concrete walls. R Carefully read the instructions supplied with the anchors. Follow instructions regarding drill bit diameter, hole depth, etc. R Drill a pilot hole. Remove any debris after drilling the pilot hole. 1 Mark the hole depth on the drill bit (1) and then drill a pilot hole. 1 2 Remove debris. 2 Camera mounting stand ALC (autoclaved lightweight cellular concrete) R Depending on the type of ALC panel, you may not be able to attach the camera. Consult the ALC panel manufacturer. R Do not use the included screws. After consulting the manufacturer of the ALC panel, use only commercially-available metal screw anchors (screw ø: 4 mm (5/32 inches)) designed for ALC panels. R Carefully read the instructions supplied with the anchors. Follow instructions regarding drill bit diameter, hole depth, etc. R Drill a pilot hole. Remove any debris after drilling the pilot hole. R Seal the pilot hole with a commercially-available waterproof sealant. Other materials (mortar, tile, etc.) R Do not use the included screws. R Consult the builder or licenced professional regarding the type of anchor appropriate for the installation location and materials. R Do not install on gypsum board or concrete blocks. 3 Insert an anchor, tighten the screw, then remove the screw to secure the anchor. 18 For assistance, visit www.panasonic.ca/english/support HNC600C_(en_en)_0113_ver.201.pdf 18 2017/01/13 11:54:13
-
 1
1 -
2
-
3
-
4
-
5
-
6
-
7
-
8
-
9
-
10
-
11
-
12
-
 13
13 -
 14
14 -
 15
15 -
 16
16 -
 17
17 -
 18
18 -
 19
19 -
 20
20 -
 21
21 -
 22
22 -
 23
23 -
24
-
25
-
26
-
27
-
28
-
29
-
30
-
31
-
32
-
33
-
34
-
35
-
36
-
37
-
38
-
39
-
40
-
41
-
42
-
43
-
44
-
45
-
46
-
47
-
48
-
49
-
50
-
51
-
52
-
53
-
54
-
55
-
56
-
57
-
58
-
59
-
60
-
61
-
62
-
63
-
64
 |
 |
