Panasonic PV GS31 Digital Video Camera - Page 54
Connecting the Camcorder to a, personal computer, With DV Cable optional - usb driver
 |
UPC - 037988978007
View all Panasonic PV GS31 manuals
Add to My Manuals
Save this manual to your list of manuals |
Page 54 highlights
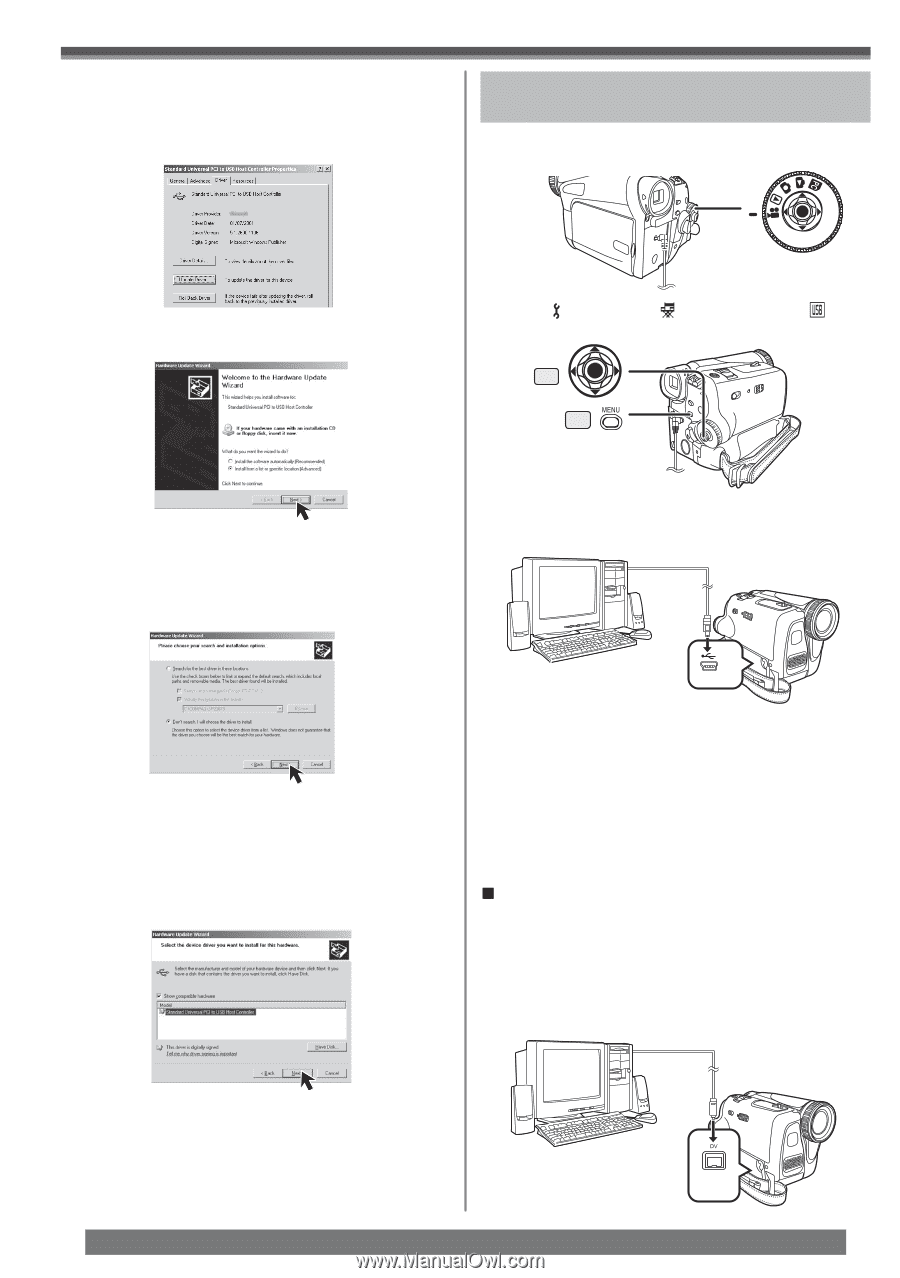
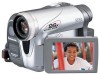
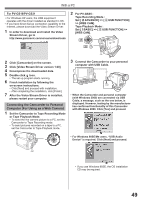
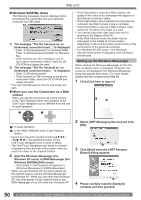
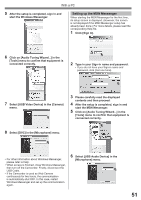
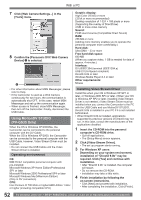
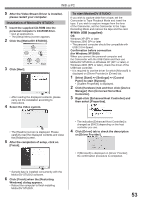
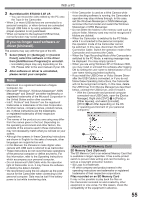
With a PC If a description other than [Microsoft] is displayed • Update the driver with the following procedure. 1 Click [Update Driver...]. Connecting the Camcorder to a personal computer 1 Set the Camcorder to Tape Recording Mode or Tape Playback Mode. 2 Check [Install from a list or specific location (Advanced)] and then click [Next]. 2 Set [ BASIC] or [ ADVANCE] >> [ USB FUNCTION] >> [MOTION DV]. 35 30 • When your OS is Windows 2000, click [Next] after [Update Device Driver Wizard] appears. 3 For Windows XP Users: Check [Don't search. I will choose the driver to install] and then click [Next]. • It enters MotionDV STUDIO Mode. 3 Connect the Camcorder to your personal computer with USB Cable. For Windows 2000 Users: Check [Display a list of the known drivers for this device so that I can choose a specific driver] and then click [Next]. 4 Click [Standard Universal PCI to USB Host Controller] and then click [Next]. 4 Select [Start] >> [All Programs (Programs)] >> [Panasonic] >> [MotionDV STUDIO 5.3E LE for DV] >> [MotionDV STUDIO LE for DV]. • Using the MotionDV STUDIO for Windows, a variety of visual effects can be added and titles can be created. • You cannot record a video edited by the PC onto the Tape in the Camcorder. „ With DV Cable (optional) OS: Windows Me/2000/XP 1 Set the Mode Dial to Tape Recording Mode or Tape Playback Mode. 2 Connect the Camcorder to the personal computer with DV Cable. 5 Click [Finish]. • The update of the driver is completed. Connect the Camcorder. 54 For assistance, please call : 1-800-211-PANA(7262) or, contact us via the web at: http://www.panasonic.com/contactinfo
-
 1
1 -
2
-
3
-
4
-
5
-
6
-
7
-
8
-
9
-
10
-
11
-
12
-
13
-
14
-
15
-
16
-
17
-
18
-
19
-
20
-
21
-
22
-
23
-
24
-
25
-
26
-
27
-
28
-
29
-
30
-
31
-
32
-
33
-
34
-
35
-
36
-
37
-
38
-
39
-
40
-
41
-
42
-
43
-
44
-
45
-
46
-
47
-
48
-
 49
49 -
 50
50 -
 51
51 -
 52
52 -
 53
53 -
 54
54 -
 55
55 -
 56
56 -
 57
57 -
 58
58 -
 59
59 -
60
-
61
-
62
-
63
-
64
-
65
-
66
-
67
-
68
-
69
-
70
-
71
-
72
-
73
-
74
-
75
-
76
-
77
-
78
-
79
-
80
 |
 |