Panasonic PVGS70D PVGS70D User Guide - Page 41
Wipe Mode and Mix Mode, Picture-in-Picture Mode, Press the Recording Start/Stop Button to restart
 |
View all Panasonic PVGS70D manuals
Add to My Manuals
Save this manual to your list of manuals |
Page 41 highlights
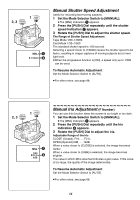
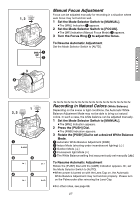
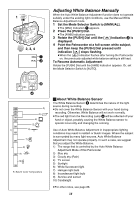
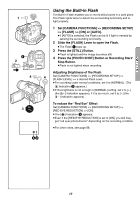
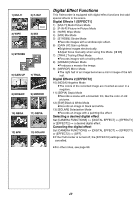
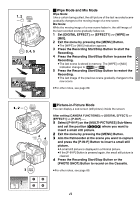
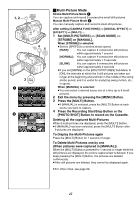
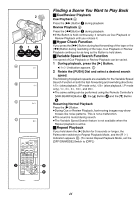
1, 2 MENU WB/SHUTTER IRIS/MF/VOL/JOG PUSH 3, 4, 5 WIPE WIPE WIPE MIX MIX MIX ª Wipe Mode and Mix Mode Wipe Mode: Like a curtain being pulled, the still picture of the last recorded scene gradually changes to the moving image of a new scene. Mix Mode: While the moving image of a new scene fades in, the still image of the last recorded scene gradually fades out. 1 Set [DIGITAL EFFECT] >> [EFFECT1] >> [WIPE] or [MIX]. 2 Exit the menu by pressing the [MENU] Button. ≥The [WIPE] or [MIX] Indication appears. 3 Press the Recording Start/Stop Button to start the Recording. 4 Press the Recording Start/Stop Button to pause the Recording. ≥The last scene is stored in memory. The [WIPE] or [MIX] Indication changes to [B] or [C]. 5 Press the Recording Start/Stop Button to restart the Recording. ≥The last image of the previous scene gradually changes to the new scene. ≥For other notes, see page 89. 1, 2 MENU WB/SHUTTER IRIS/MF/VOL/JOG PUSH 4 PHOTO SHOT 4 3 MULTI/ P-IN-P 12 34 ª Picture-in-Picture Mode You can display a sub-screen (still picture) inside the screen. After setting [CAMERA FUNCTIONS] >> [DIGITAL EFFECT] >> [EFFECT1] >> [P-IN-P]...... 1 Select [P-IN-P] on the [MULTI-PICTURES] Sub-Menu and set the position (1234) where you want to insert a small still picture. 2 Exit the menu by pressing the [MENU] Button. 3 Aim the Palmcorder at the scene you want to capture and press the [P-IN-P] Button to insert a small still picture. ≥A small still picture is displayed in a Normal picture. ≥If the [P-IN-P] Button is pressed again, the small still picture is cleared. 4 Press the Recording Start/Stop Button or the [PHOTO SHOT] Button to record on the Cassette. ≥For other notes, see page 89. 41
-
 1
1 -
2
-
3
-
4
-
5
-
6
-
7
-
8
-
9
-
10
-
11
-
12
-
13
-
14
-
15
-
16
-
17
-
18
-
19
-
20
-
21
-
22
-
23
-
24
-
25
-
26
-
27
-
28
-
29
-
30
-
31
-
32
-
33
-
34
-
35
-
 36
36 -
 37
37 -
 38
38 -
 39
39 -
 40
40 -
 41
41 -
 42
42 -
 43
43 -
 44
44 -
 45
45 -
 46
46 -
47
-
48
-
49
-
50
-
51
-
52
-
53
-
54
-
55
-
56
-
57
-
58
-
59
-
60
-
61
-
62
-
63
-
64
-
65
-
66
-
67
-
68
-
69
-
70
-
71
-
72
-
73
-
74
-
75
-
76
-
77
-
78
-
79
-
80
-
81
-
82
-
83
-
84
-
85
-
86
-
87
-
88
-
89
-
90
-
91
-
92
-
93
-
94
-
95
-
96
-
97
-
98
-
99
-
100
-
101
-
102
-
103
-
104
-
105
-
106
-
107
-
108
-
109
-
110
-
111
-
112
-
113
-
114
 |
 |
