Panasonic PVL453D PVL453 User Guide - Page 35
Special Features, Recording
 |
View all Panasonic PVL453D manuals
Add to My Manuals
Save this manual to your list of manuals |
Page 35 highlights
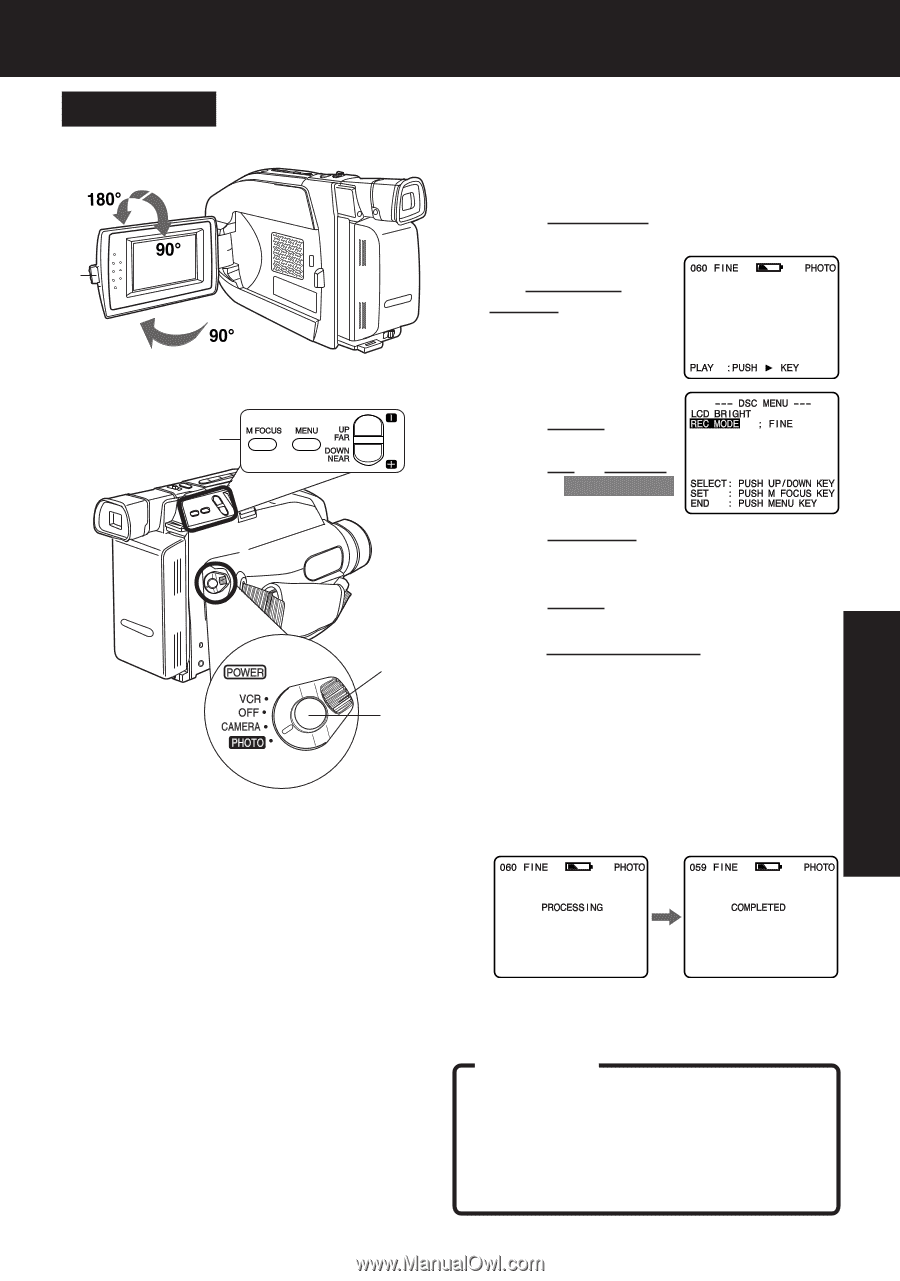
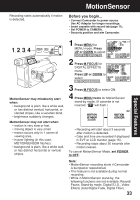
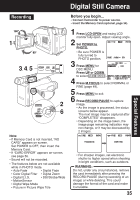
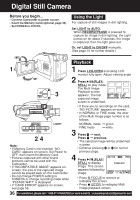
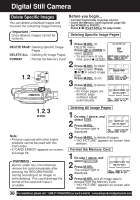
Digital Still Camera Special Features Recording 1 3, 4, 5 2 6 Note: • If Memory Card is not inserted, "NO CARD" appears on-screen. Set POWER to OFF, then insert the Memory Card. • If "CARD ERROR" appears on-screen, see page 56. • Sound will not be recorded. • The features below are not available while in PHOTO mode. • Auto Fade • Digital Fade • Color Digital Filter • Digital Zoom • Digital E.I.S. • Still/Strobe/Wide • MotionSensor • Digital Wipe Mode • Picture in Picture Wipe Title Before you begin... • Connect Camcorder to power source. • Insert the Memory Card (optional, page 34). 1 Press LCD-OPEN and swing LCD monitor fully open. Adjust viewing angle. 2 Set POWER to PHOTO. • Be sure POWER is fully turned to PHOTO position. 3 Press MENU for DSC MENU. Press UP or DOWN to select REC MODE . 4 Press M.FOCUS to select NORMAL or FINE (page 49). 5 Press MENU to exit. 6 Press RECORD/PAUSE to capture image. • As the image is processed, the status screens below appear. The next image may be captured after "COMPLETED" disappears. • Depending on the image taken, the image page remaining indication may not change, or it may be decreased by 2 images. • For sharper images, set electronic shutter to higher speed when shooting in bright conditions, such as outdoors. WARNING: Do not, under any circumstances, remove the card immediately after pressing the RECORD/PAUSE (during recording of an image) or while deleting. This could damage the format of the card and make it unusable. 35
-
 1
1 -
2
-
3
-
4
-
5
-
6
-
7
-
8
-
9
-
10
-
11
-
12
-
13
-
14
-
15
-
16
-
17
-
18
-
19
-
20
-
21
-
22
-
23
-
24
-
25
-
26
-
27
-
28
-
29
-
 30
30 -
 31
31 -
 32
32 -
 33
33 -
 34
34 -
 35
35 -
 36
36 -
 37
37 -
 38
38 -
 39
39 -
 40
40 -
41
-
42
-
43
-
44
-
45
-
46
-
47
-
48
-
49
-
50
-
51
-
52
-
53
-
54
-
55
-
56
-
57
-
58
-
59
-
60
 |
 |