Panasonic SAAK340 SAAK240 User Guide - Page 11
Cassette tape - Play and record Continued, Recording
 |
View all Panasonic SAAK340 manuals
Add to My Manuals
Save this manual to your list of manuals |
Page 11 highlights
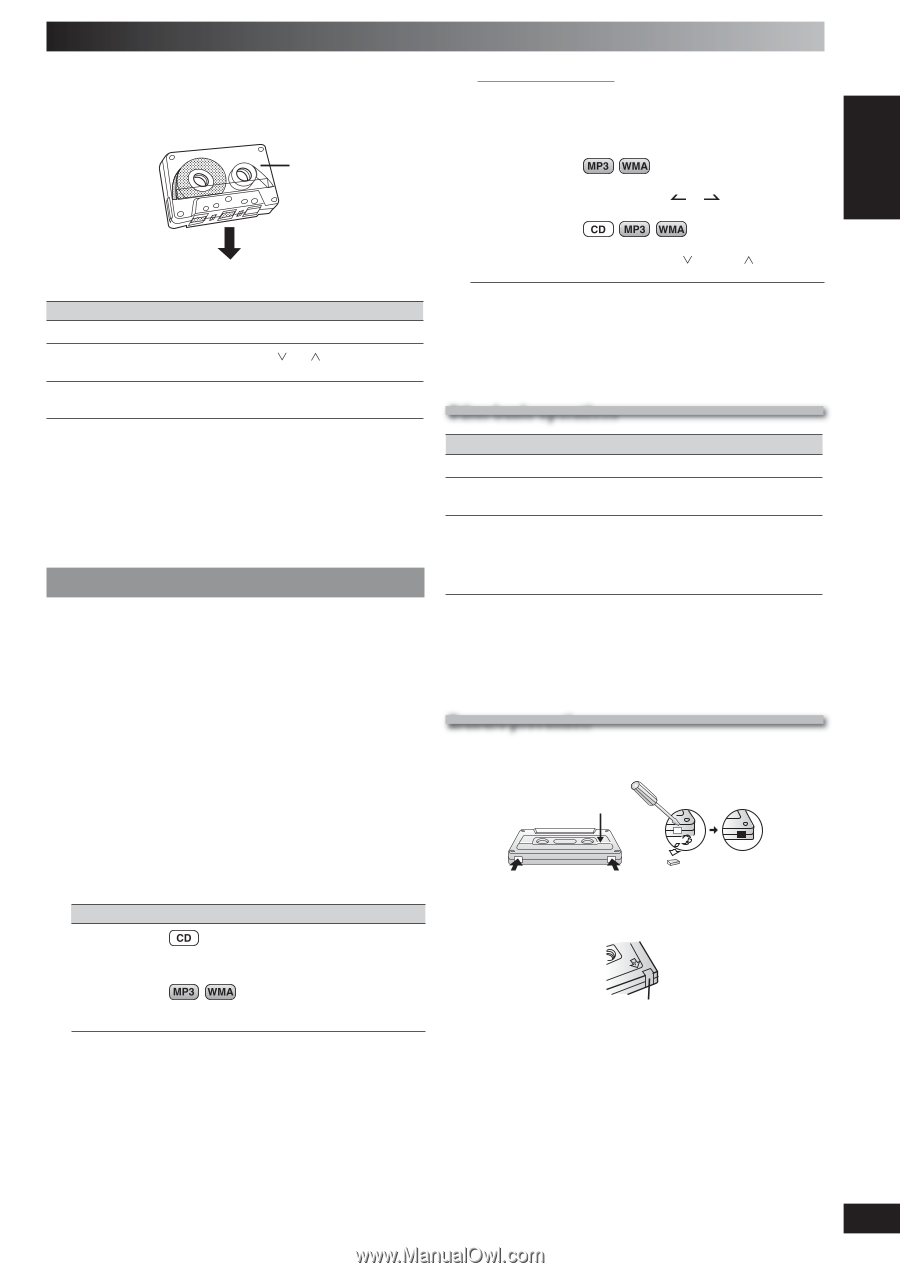
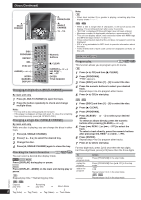
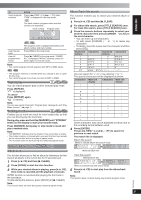
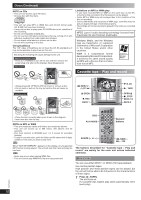
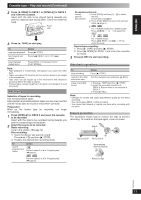
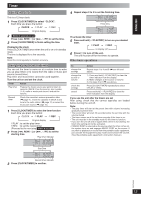
ENGLISH DANSK Cassette tape - Play and record (Continued) 2 Press [0 OPEN] for DECK 1 or [OPEN 0] for DECK 2 and insert the cassette. Insert with the side to be played facing towards you and the exposed tape facing down. Close the holder by hand. Front side By remote control only record 1) Press [DISC] and then [1] ~ [5] to select specific the disc. discs/tracks Ensure disc is stopped. 2) Press [PLAY MODE] to select the desired mode (\ page 7). 3) For 1-ALBUM mode and 1-SONG mode: Press [ALBUM ( or )] to select the album. 3 Press [3, TAPE] to start play. To stop tape playback fast-forward and rewind select between loaded decks Action Press [ 7, STOP]. Press [4 / REW / ] or [ / FF / ¢]. Press [DECK 1/2] (remote control : [PLAY MODE]). Note: • Tape playback is momentarily interrupted if you open the other deck. • Tapes exceeding 100 minutes are thin and can break or get caught in the mechanism. • Tape slack can get caught up in the mechanism and should be wound up before the tape is played. • Endless tapes can get caught up in the deck's moving parts if used incorrectly. Recording Selection of tapes for recording Use normal position tapes. High position and metal position tapes can be used, but this unit will not be able to record or erase them correctly. Preparation Wind up the leader tape so recording can begin immediately. 1 Press [OPEN 0] for DECK 2 and insert the cassette to be recorded. Insert with the side to be recorded facing towards you and the exposed tape facing down. 2 Select the source to be recorded. Radio recording: Tune in the station. (\ page 12) Disc recording: ➀ Insert the disc(s) you want to record. Press [6, CD] and then [7, STOP]. ➁ Prepare the desired disc recording mode. To record programmed tracks Action Perform steps 2 to 4 in "Program play" (\ page 8). For 1-SONG mode: Press [4, REW / ] or [¢, / FF] to select the track. Tape-to-tape recording: ➀ Press [3, TAPE] and then [7, STOP]. ➁ Press [0 OPEN] for DECK 1 and insert the cassette to record. 3 Press [¶, REC] to start recording. Other basic operations To Action stop recording Press [7, STOP]. record on the other Turn the cassette over and press [¶, REC]. side of the tape erase a recorded sound 1) Press [3, TAPE] and then [7, STOP]. 2) Insert the recorded cassette into DECK 2. Ensure there is no cassette in DECK 1. 3) Press [¶, REC]. Note: • Changes to volume and sound adjustments quality do not affect recording. • You cannot open DECK 1 while recording. • You cannot fast-forward or rewind one deck while recording with the other. Erasure prevention The illustration shows how to remove the tabs to prevent recording. To record on the tape again, cover as shown. Side A Tab for side B Tab for side A To re-record Normal cassette Perform steps 3 to 6 in "Program play" (\ page 8). Adhesive tape FRANÇAIS LANG - 4 LANG - 5 RQTV0061 11 RQT8043
-
 1
1 -
2
-
3
-
4
-
5
-
 6
6 -
 7
7 -
 8
8 -
 9
9 -
 10
10 -
 11
11 -
 12
12 -
 13
13 -
 14
14 -
 15
15 -
 16
16 -
17
-
18
-
19
-
20
-
21
-
22
-
23
-
24
-
25
-
26
-
27
-
28
 |
 |