Panasonic SAPM47 SAPM47 User Guide - Page 6
Connections
 |
View all Panasonic SAPM47 manuals
Add to My Manuals
Save this manual to your list of manuals |
Page 6 highlights
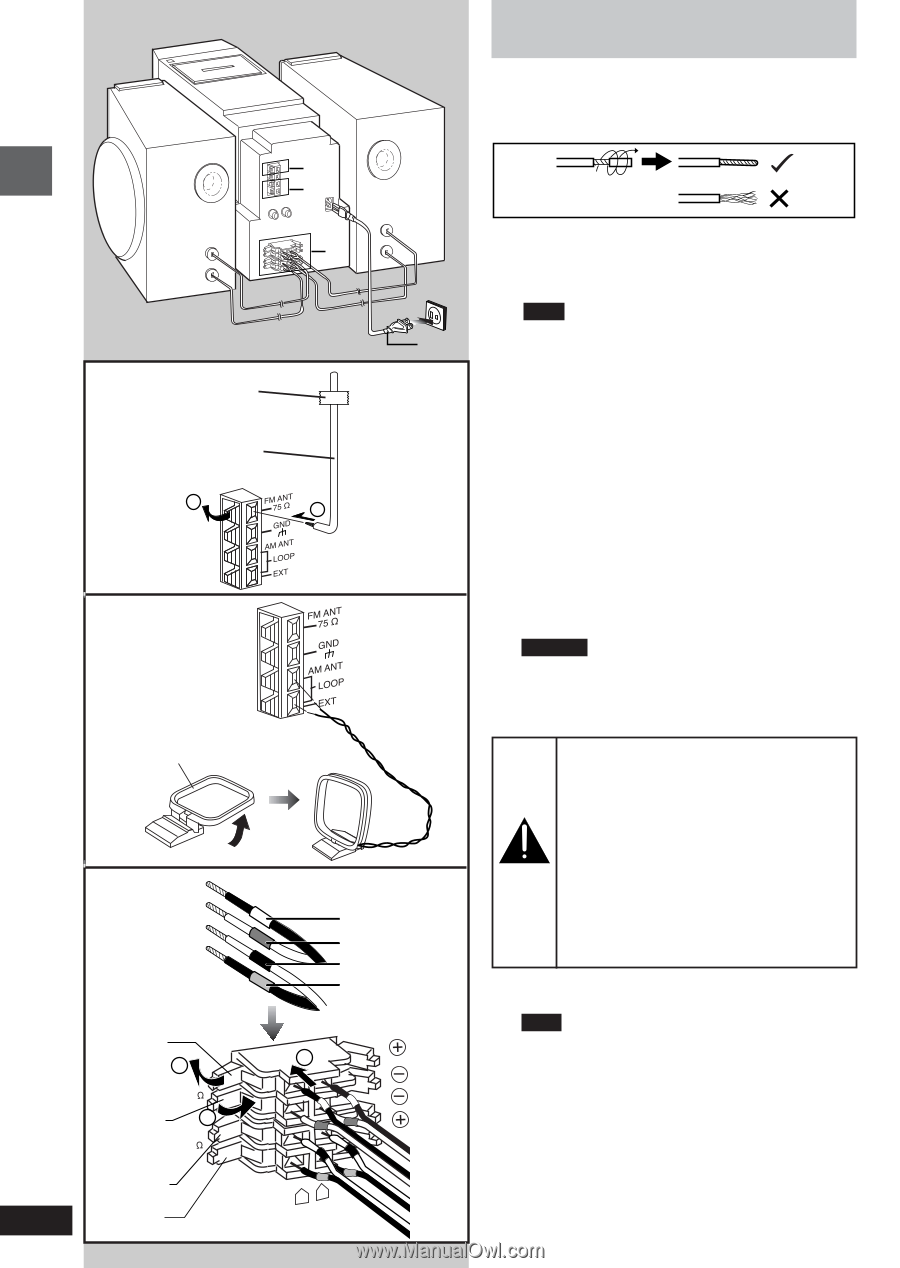
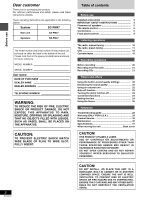
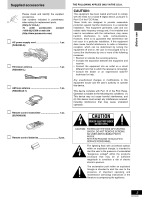
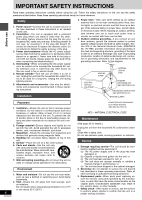
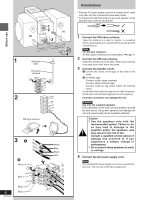
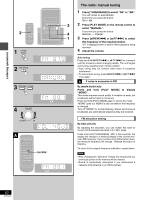
Connections Before use 1 2 (L) (R) 3 4 1 Adhesive tape FM indoor antenna 1 2 2 AM loop antenna 3A B White Blue Black Red Gray (+) 1 Red (ª) HIGH(6B)lack (·) Blue (-) 3 LOW(6 ) 2 Black (·) 6 RQT6530 Black (-) Red (+) RL Red (ª) • Plug the AC power supply cord into a household AC outlet only after all other connections have been made. • To prepare the AM loop antenna wire and speaker cords, twist the vinyl cover tip and pull off. 1 Connect the FM indoor antenna. Tape the antenna to a wall or column, in a position where radio signals are received with the least amount of interference. Note For the best reception: An FM outdoor antenna is recommended. (\ page 7) 2 Connect the AM loop antenna. Stand the antenna up on its base. Keep loose antenna cord away from other wires and cords. 3 Connect the speaker cords. A Confirm the colors of the tags on the ends of the cords. B For White tags: Connect cords to gray terminals. For Blue, Black and Red tags: Connect cords so tag colors match the terminal colors. Cords with white and blue tags are for high frequency. Cords with red and black tags are for low frequency. Incorrect connection can damage the unit. Caution Use only the supplied speakers. The combination of the main unit and speakers provide the best sound. Using other speakers can damage the unit and sound quality will be negatively affected. Caution • Use the speakers only with the recommended system. Failure to do so may lead to damage to the amplifier and/or the speakers, and may result in the risk of fire. Consult a qualified service person if damage has occurred or if you experience a sudden change in performance. • Do not attach these speakers to walls or ceilings. 4 Connect the AC power supply cord. Note The included AC power supply cord is for use with this unit only. Do not use it with other equipment.
-
 1
1 -
 2
2 -
 3
3 -
 4
4 -
 5
5 -
 6
6 -
 7
7 -
 8
8 -
 9
9 -
 10
10 -
 11
11 -
 12
12 -
13
-
14
-
15
-
16
-
17
-
18
-
19
-
20
-
21
-
22
-
23
-
24
-
25
-
26
-
27
-
28
-
29
-
30
-
31
-
32
 |
 |