Panasonic WJ-ND400/1000 Operating Instructions - Page 117
Removin, until [HDD Operate] appears on the screen.
 |
View all Panasonic WJ-ND400/1000 manuals
Add to My Manuals
Save this manual to your list of manuals |
Page 117 highlights
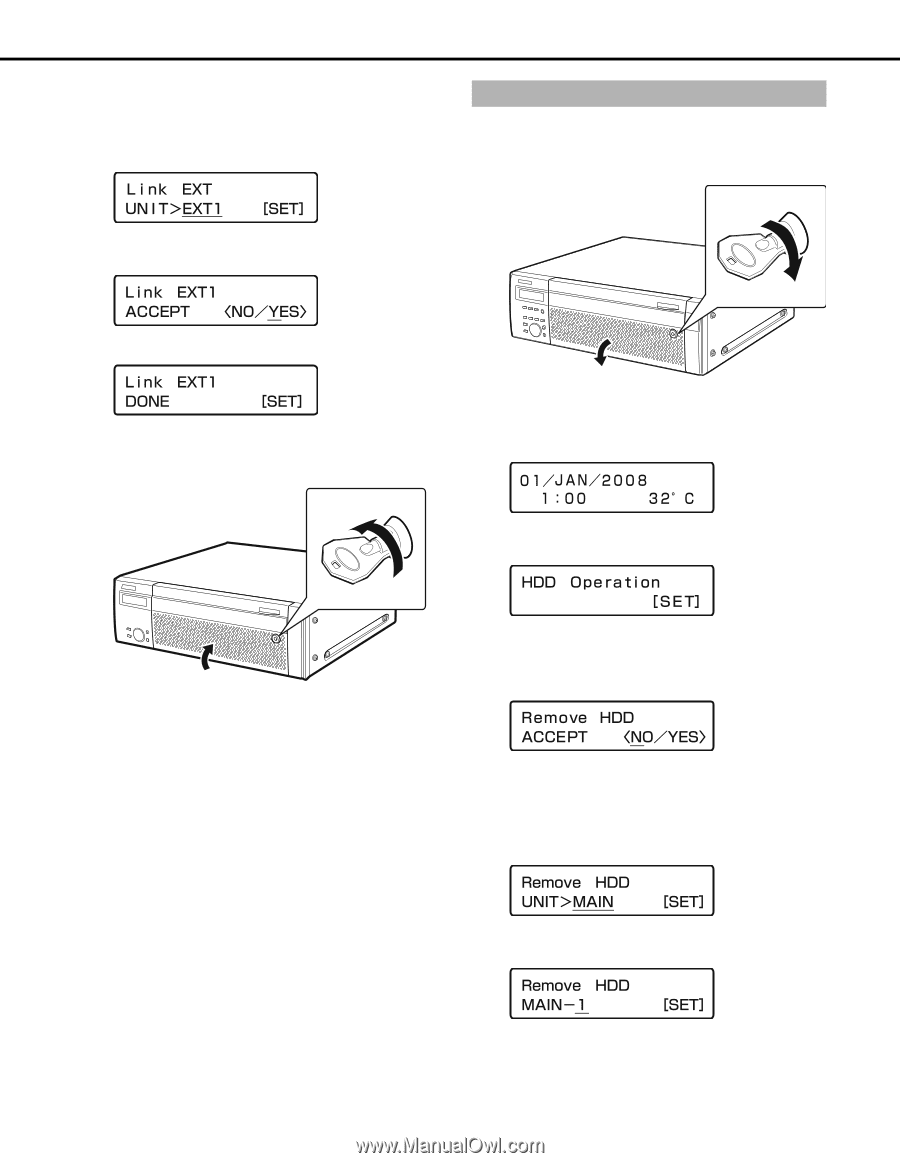
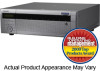
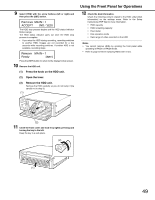
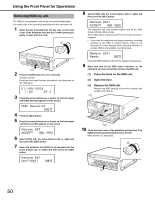
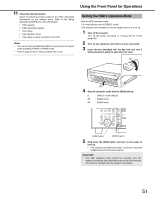
Using the Front Panel for Operations 7 Select [YES] with the arrow buttons (left or right) and then press the [SET] button. 8 Select the number of the extension unit where you installed the HDD with the arrow buttons (up or down) and press the [SET] button. 9 Select [YES] with the arrow buttons (left or right) and then press the [SET] button. Removing HDDs You can remove HDD units from the recorder while it is in operation. 1 Insert the key (included) into the key hole and turn it while pressing in gently to open the front cover. (1) All the HDDs installed in the extension unit are recognized for recording. Press the [SET] button to return to the display format screen. 10 Close the front cover of the extension unit and lock it by lightly pressing and turning the key to the left. (2) (2) 2 Press the [USE] button for over 2 seconds. A buzzer sounds. Press the front panel buttons according to the directions on the LCD. 3 Press the arrow buttons (up or down) on the front panel until [HDD Operate] appears on the screen. (1) 11 Check the available disk space. Check the following content related to the HDD under [Disk information] on the settings menu. Refer to the Setup Instructions (PDF file) for more information. • HDD capacity • HDD remaining capacity • Hour meter • Disk operation mode • Date range of video recorded on the HDD 4 Press the [SET] button. 5 Press the arrow buttons (up or down) on the front panel until [Remove HDD] appears on the screen. 6 Select [YES] with the arrow buttons (left or right) and then press the [SET] button. 7 Select the HDD to be removed (Recorder: MAIN, Extension unit: EXT) with the arrow buttons (up or down) and then press the [SET] button. 8 Select the HDD to be removed with the arrow buttons (up or down) and then press the [SET] button. 48
-
 1
1 -
2
-
3
-
4
-
5
-
6
-
7
-
8
-
9
-
10
-
11
-
12
-
13
-
14
-
15
-
16
-
17
-
18
-
19
-
20
-
21
-
22
-
23
-
24
-
25
-
26
-
27
-
28
-
29
-
30
-
31
-
32
-
33
-
34
-
35
-
36
-
37
-
38
-
39
-
40
-
41
-
42
-
43
-
44
-
45
-
46
-
47
-
48
-
49
-
50
-
51
-
52
-
53
-
54
-
55
-
56
-
57
-
58
-
59
-
60
-
61
-
62
-
63
-
64
-
65
-
66
-
67
-
68
-
69
-
70
-
71
-
72
-
73
-
74
-
75
-
76
-
77
-
78
-
79
-
80
-
81
-
82
-
83
-
84
-
85
-
86
-
87
-
88
-
89
-
90
-
91
-
92
-
93
-
94
-
95
-
96
-
97
-
98
-
99
-
100
-
101
-
102
-
103
-
104
-
105
-
106
-
107
-
108
-
109
-
110
-
111
-
 112
112 -
 113
113 -
 114
114 -
 115
115 -
 116
116 -
 117
117 -
 118
118 -
 119
119 -
 120
120 -
 121
121 -
 122
122 -
123
-
124
-
125
-
126
-
127
-
128
-
129
-
130
-
131
-
132
-
133
-
134
-
135
-
136
-
137
-
138
-
139
-
140
-
141
-
142
-
143
-
144
-
145
-
146
-
147
-
148
-
149
-
150
-
151
-
152
-
153
-
154
-
155
-
156
-
157
-
158
-
159
-
160
-
161
-
162
-
163
-
164
-
165
-
166
-
167
-
168
-
169
-
170
-
171
-
172
-
173
-
174
-
175
-
176
-
177
-
178
-
179
-
180
-
181
-
182
-
183
-
184
-
185
-
186
-
187
-
188
-
189
-
190
-
191
-
192
-
193
-
194
-
195
-
196
-
197
-
198
-
199
-
200
-
201
-
202
-
203
-
204
-
205
-
206
-
207
-
208
-
209
-
210
-
211
-
212
-
213
-
214
-
215
-
216
-
217
-
218
-
219
-
220
-
221
-
222
-
223
-
224
-
225
-
226
-
227
-
228
-
229
-
230
-
231
-
232
-
233
 |
 |