Pentax ZX-60 ZX-60 Manual - Page 8
Quick, Shooting
 |
View all Pentax ZX-60 manuals
Add to My Manuals
Save this manual to your list of manuals |
Page 8 highlights
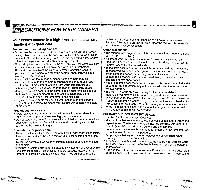
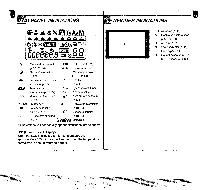
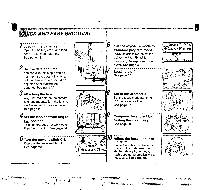
f.s.7=1BallailMOSSUZ';: QUICK AND EASY SHOOTING AKIMAIVEIMUSVII,, NOISIMMIBMIENIEBUICSM.W.MMTIVPMENNSIONON 1Loading the batteries Open the battery cover and load two CR2 Lithium batteries. See page 19. 2 Set the date and time You can skip this step if you do not imprint the data at this time, but the date and time should be adjusted after loading the batteries. See page 24. 3 Attaching the lens Align the red dots on the camera and lens mounts. Turn the lens to clockwise until it clicks in place. See page 28. 4 Set the lens aperture ring to A position This camera does not work other than A , position. See page 34. 5 Turn the power switch ON. Depress the main switch button. See page 23. t. o DATE Set the exposure mode to Standard program mode. Move the select lever to set the pointer 41. to 1 while depressing the exposure mode button. See page 34. Loading the film. See page 30. Set to the Autofocus Set the focus mode switch to AF in down position. See page 37. Compose the subject by turning the zoom ring. See page 38. e1 J7, 10 Adjust the focus and take (DON/OFF Olt A 2G ItPl TVA% a picture. Frame the subject in the focus frame 77 and depress the shutter release button. Auto I flash pops up automatically if it necessary. See page 40. ON/OFF (iik, A it 1$11TvAvM Av T250 8.0 e_ v im, `{t
-
 1
1 -
2
-
 3
3 -
 4
4 -
 5
5 -
 6
6 -
 7
7 -
 8
8 -
 9
9 -
 10
10 -
 11
11 -
 12
12 -
 13
13 -
14
-
15
-
16
-
17
-
18
-
19
-
20
-
21
-
22
-
23
-
24
-
25
-
26
-
27
-
28
-
29
-
30
-
31
-
32
-
33
-
34
-
35
-
36
-
37
-
38
-
39
-
40
-
41
-
42
-
43
-
44
-
45
-
46
-
47
-
48
-
49
-
50
-
51
-
52
-
53
-
54
-
55
-
56
-
57
-
58
 |
 |
