Pfaff 332 Owner's Manual - Page 21
Auiô,sate - parts
 |
View all Pfaff 332 manuals
Add to My Manuals
Save this manual to your list of manuals |
Page 21 highlights
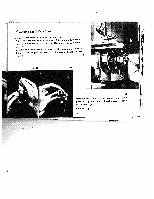
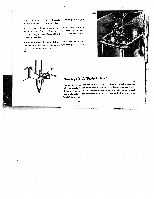
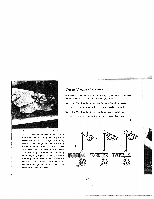
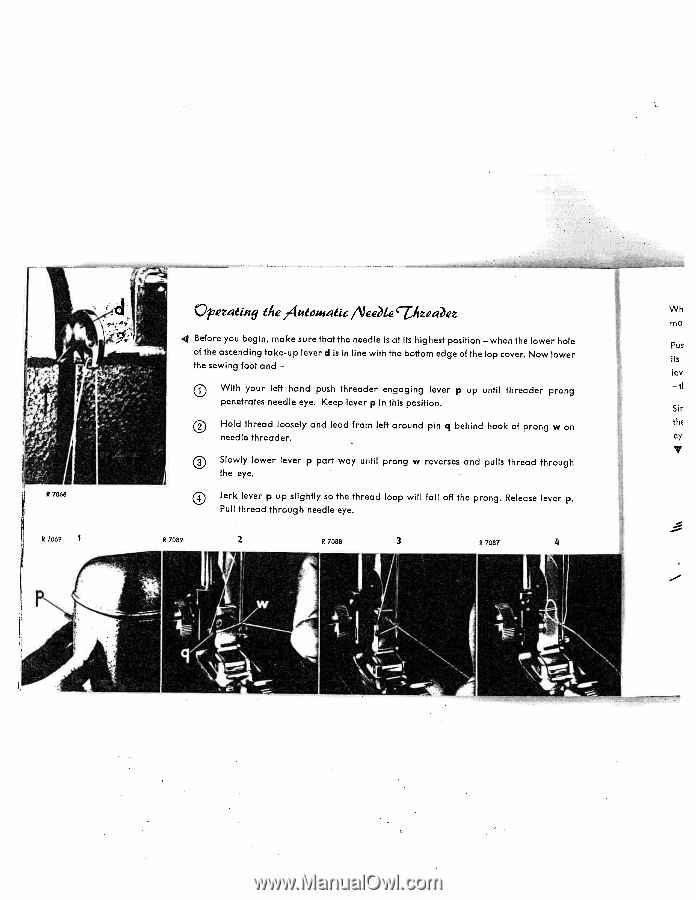
R 7068 the Auiô,sate ,'\ee1e '7hea?er 4 Before you begin, make sure that the needle is at its highest position - when the lower hole Pus of the ascending take-up lever d is in line with the bottom edge of the top cover. Now lower its the sewing foot and - 1ev With your left hand push threader engaging lever p up until threader prong $1 penetrates needle eye. Keep lever p in this position. Sir Hold thread loosely and lead from left around pin q behind hook of prong w on needle threader. V Slowly lower lever p part way until prong w reverses and pulls thread through the eye. Jerk lever p up slightly so the thread ioop will fall off the prong. Release lever p. Pull thread through needle eye. S 7c169 I S 7089 2 R7088 3 R7087 4
-
 1
1 -
2
-
3
-
4
-
5
-
6
-
7
-
8
-
9
-
10
-
11
-
12
-
13
-
14
-
15
-
 16
16 -
 17
17 -
 18
18 -
 19
19 -
 20
20 -
 21
21 -
 22
22 -
 23
23 -
 24
24 -
 25
25 -
 26
26 -
27
-
28
-
29
-
30
-
31
-
32
-
33
-
34
-
35
-
36
-
37
-
38
-
39
-
40
-
41
-
42
-
43
-
44
-
45
-
46
-
47
-
48
-
49
-
50
-
51
-
52
-
53
-
54
-
55
-
56
-
57
-
58
 |
 |
the
Auiô,sate
,‘\ee1e
‘7hea?er
4
Before
you
begin,
make
sure
that
the
needle
is
at
its
highest
position
—
when
the
lower
hole
Pus
of
the
ascending
take-up
lever
d
is
in
line
with
the
bottom
edge
of
the
top
cover.
Now
lower
its
the
sewing
foot
and
—
1ev
With
your
left
hand
push
threader
engaging
lever
p
up
until
threader
prong
$1
penetrates
needle
eye.
Keep
lever
p
in
this
position.
Sir
Hold
thread
loosely
and
lead
from
left
around
pin
q
behind
hook
of
prong
w
on
needle
threader.
V
Slowly
lower
lever
p
part
way
until
prong
w
reverses
and
pulls
thread
through
the
eye.
Jerk
lever
p
up
slightly
so
the
thread
ioop
will
fall
off
the
prong.
Release
lever
p.
Pull
thread
through
needle
eye.
R
7068
S
7c169
I
S
7089
2
R7088
3
R7087
4