Pfaff SMARTER BY 155 Anniversary Edition Manual - Page 28
Darning with the three-step zigzag stitch, Repairing tears, Sewing on buttons, length to 0.
 |
View all Pfaff SMARTER BY 155 Anniversary Edition manuals
Add to My Manuals
Save this manual to your list of manuals |
Page 28 highlights
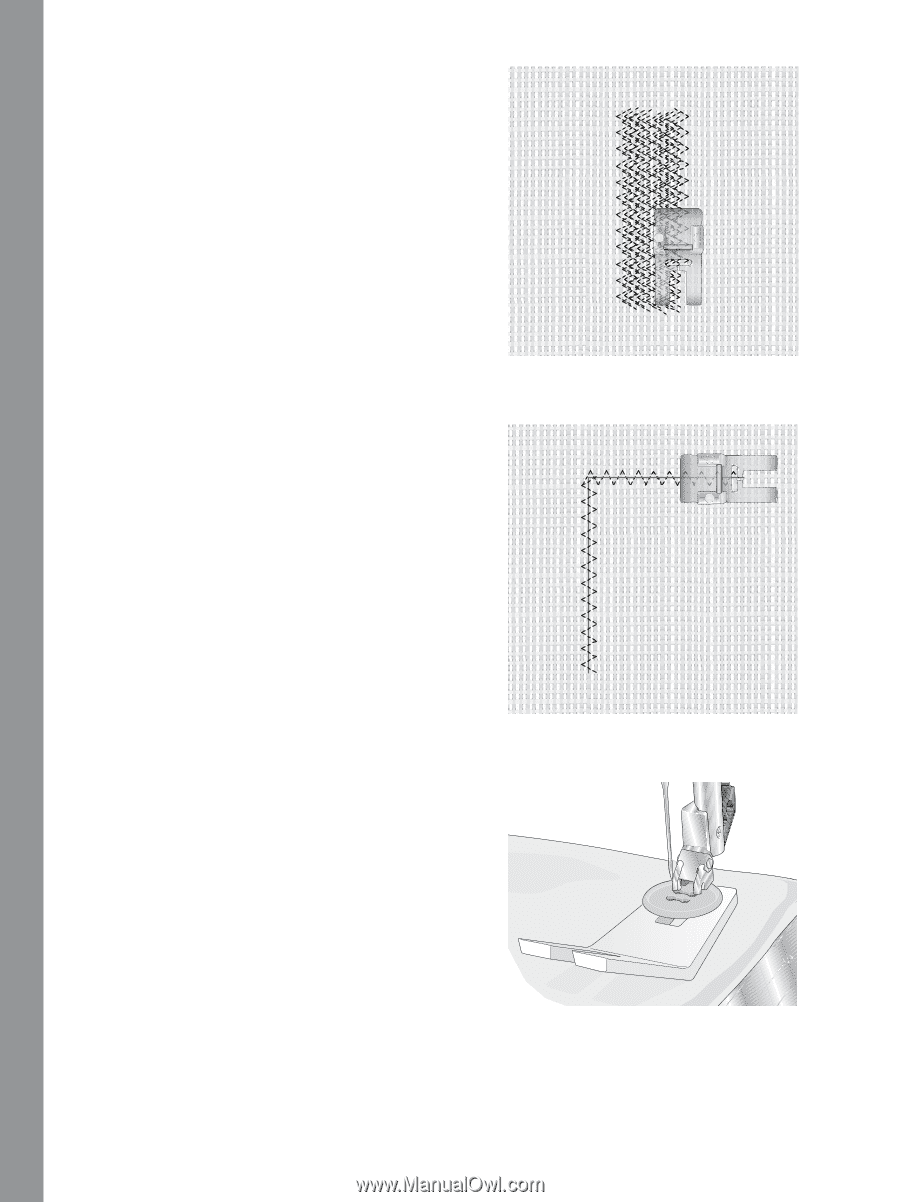
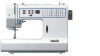
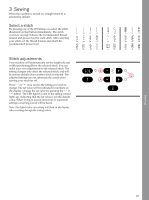
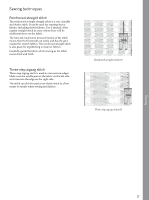
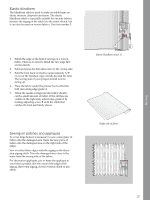
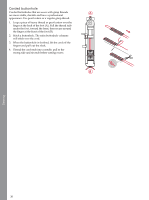
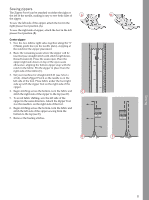
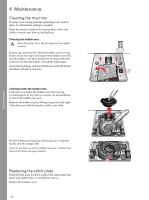
Sewing Darning with the three-step zigzag stitch A small hole or tear is easily darned with the three-step zigzag stitch. Sew over the damaged area in rows until it is well covered. Make sure that the rows overlap. Tip: To make the darning even sturdier, place a fabric underneath the hole/tear before sewing. Repairing tears For tears, frayed edges or small holes, reinforce the area by placing a piece of fabric underneath the damaged area. Fabric should be of similar type/weight and piece should be slightly larger than the damaged area. Sew over the area using the zigzag stitch or the threestep zigzag stitch. Trim the fabric underneath close to the stitching. Sewing on buttons Sew buttons quickly with your sewing machine. 1. Remove the presser foot and lower the feed dogs. 2. Set the machine for zigzag stitch and set the stitch length to 0. 3. Mark the fabric where the button is to be sewn. Place the fabric and button under the ankle. Lower the presser foot. Turn the handwheel to check that the holes in the button are aligned with the swing of the needle. Adjust if necessary. Note: The pre-set width of 3mm is recommended for most buttons. When sewing a tiny button or a very large coat button, decrease or increase the stitch width until the swing of the needle matches the holes of the button. Note: Do not use this technique if the button is less than 1 cm (3/8") in diameter. 28
-
 1
1 -
2
-
3
-
4
-
5
-
6
-
7
-
8
-
9
-
10
-
11
-
12
-
13
-
14
-
15
-
16
-
17
-
18
-
19
-
20
-
21
-
22
-
 23
23 -
 24
24 -
 25
25 -
 26
26 -
 27
27 -
 28
28 -
 29
29 -
 30
30 -
 31
31 -
 32
32 -
 33
33 -
34
-
35
-
36
 |
 |