Pfaff ambition Essential Owner's Manual - Page 23
Auto-lock function
 |
View all Pfaff ambition Essential manuals
Add to My Manuals
Save this manual to your list of manuals |
Page 23 highlights
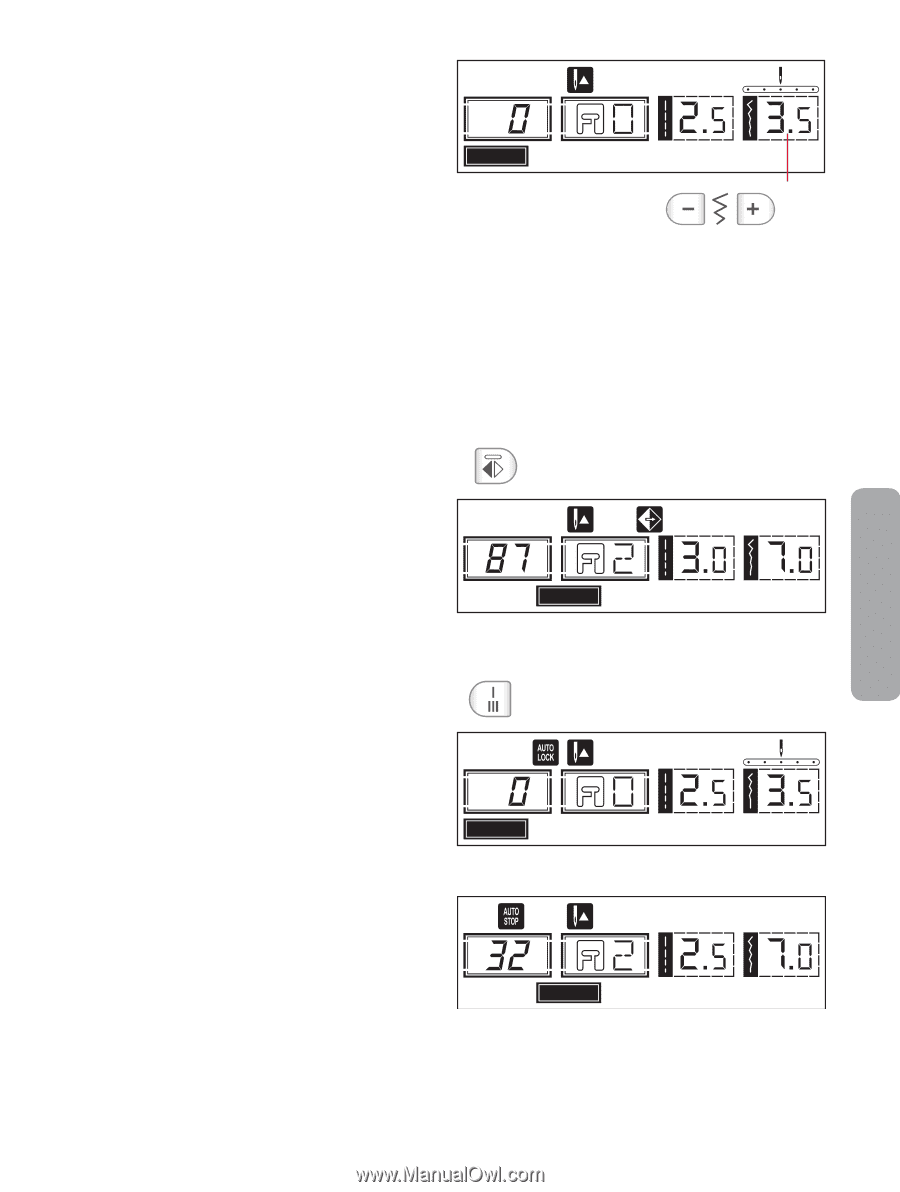
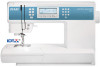
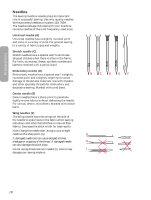
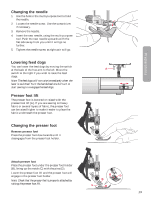
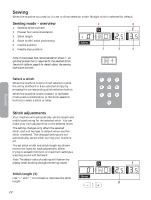
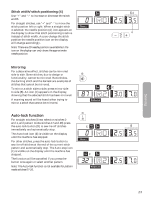
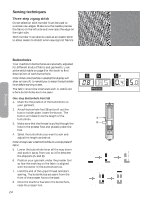
Stitch width/stitch positioning (4) A Use "+" and "-" to increase or decrease the stitch width. For straight stitches, use "+" and "-" to move the stitch position left or right. When a straight stitch Direct is selected, the needle position (A) icon appears on the display to show that stitch positioning is active 4 instead of stitch width. As you change the stitch position the needle position icon on the display will change accordingly. Note: There are 29 needle positions available but the icon on the display can only show the approximate needle position. Mirroring For a decorative effect, stitches can be mirrored side to side. Some stitches, due to design or B functionality, cannot be mirrored. Buttonholes, the darning stitch and the bartack are examples of stitches that cannot be mirrored. To mirror a stitch side to side, press mirror side C to side (B). An icon (C) appears on the display, showing that the selected stitch has been mirrored. A warning sound will be heard when trying to mirror a stitch that cannot be mirrored. Patterns Auto-lock function For straight stitches (direct selection stitches 0 and 1, and pattern mode stitches 17 and 48) press the auto-lock button (D) to sew tie-off stitches immediately and automatically stop. The Auto-lock icon (E) is visible on the display until the machine has stopped. For other stitches, press the auto-lock button to sew tie-off stitches at the end of the current stitch pattern and automatically stop. The Auto-stop icon (F) is visible on the display until the machine has stopped. The function will be cancelled if you press the button once again or select another pattern. Note: The Auto-lock function is not available for pattern mode stitches 07-16. D E Direct F Patterns Sewing 23
-
 1
1 -
2
-
3
-
4
-
5
-
6
-
7
-
8
-
9
-
10
-
11
-
12
-
13
-
14
-
15
-
16
-
17
-
 18
18 -
 19
19 -
 20
20 -
 21
21 -
 22
22 -
 23
23 -
 24
24 -
 25
25 -
 26
26 -
 27
27 -
 28
28 -
29
-
30
-
31
-
32
-
33
-
34
-
35
-
36
 |
 |