Pfaff ambition Essential Owner's Manual - Page 31
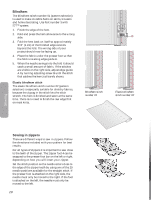
Sewing a sequence
 |
View all Pfaff ambition Essential manuals
Add to My Manuals
Save this manual to your list of manuals |
Page 31 highlights
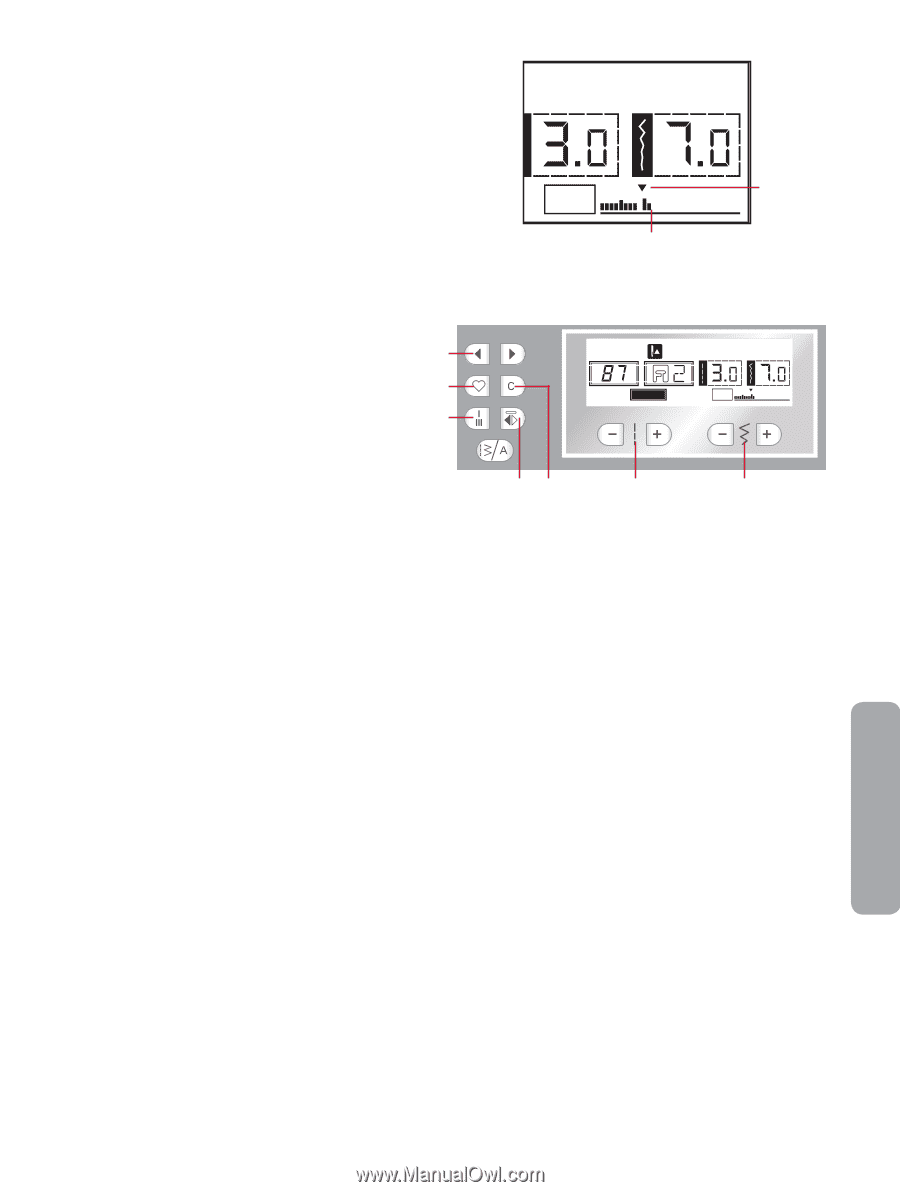
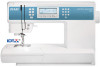
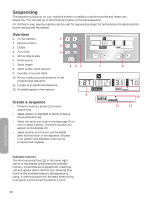
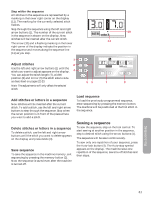
Step within the sequence All stitches in the sequence are represented by a marking in the lower right corner on the display (11). The marking for the currently selected stitch flashes. Step through the sequence using the left and right arrow buttons (1). The number of the current stitch in the sequence is shown on the display. New stitches will be inserted after the current stitch. The arrow (10) and a flashing marking in the lower right corner of the display indicate the position in the sequence and moves along the sequence line (11) as you step. 1 Adjust stitches 2 Use the left and right arrow buttons (1) until the stitch you want to adjust appears on the display. 4 You can adjust the stitch length (7), width/ position (8) and mirror (5) the stitch side to side as described on pages 22-23. Note: The adjustments will only affect the selected stitch. MEM 10 11 Patterns MEM 53 7 8 Add stitches or letters in a sequence New stitches will be inserted after the current stitch. To add a stitch, use the left and right arrow buttons to step through the sequence. Stop when the cursor position is in front of the place where you want to add a stitch. Delete stitches or letters in a sequence To delete a stitch, use the left and right arrow buttons until the stitch you want to delete appears on the display and press delete (3). Save sequence To save the sequence in the machine memory, exit sequencing by pressing the memory button (2). Now the sequence is saved even after the machine is turned off. Load sequence To load the previously programmed sequence, enter sequencing by pressing the memory button. The machine will be positioned at the first stitch in the sequence. Sewing a sequence To sew the sequence, step on the foot control. To start sewing at another position in the sequence, step to desired stitch using the arrow buttons (1). The sequence will be sewn continuously. To sew only one repetition of your sequence, press the Auto-lock button (4). The Auto-stop symbol appears on the display. The machine sews one repetition of the sequence, sews tie-off stitches and then stops. Sequencing 31
-
 1
1 -
2
-
3
-
4
-
5
-
6
-
7
-
8
-
9
-
10
-
11
-
12
-
13
-
14
-
15
-
16
-
17
-
18
-
19
-
20
-
21
-
22
-
23
-
24
-
25
-
 26
26 -
 27
27 -
 28
28 -
 29
29 -
 30
30 -
 31
31 -
 32
32 -
 33
33 -
 34
34 -
 35
35 -
 36
36
 |
 |