Pfaff hobby serger Owner's Manual - Page 3
Important, Safeguards, Contents, Questions?, Contact, Pfaff, Dealer, Where, Purchased, Product.
 |
View all Pfaff hobby serger manuals
Add to My Manuals
Save this manual to your list of manuals |
Page 3 highlights
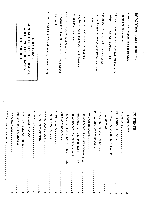
IMPORTANT SAFEGUARDS CONTENTS • Never bend loopers and needle while PRINCIPAL PARTS 2 threading and sewing. ACCESSORIES 3 • Before connecting machine be sure voltage on AC adaptor matches your electrical outlet. • Disconnect AC adaptor from socket outlet when changing needle or when leaving machine unattended. • Do not pull fabric while sewing as this may bend needle and cause needle breakage or damage to machine. INSTRUCTION SYMBOLS 3 CONNECTING AND RUNNING MACHINE 3 TRIAL SEWING 3 ADJUSTING THREAD TENSION 4 PREPARATION FOR THREADING 5 TYING ON THREADING 5 THREADING PATH A (LOWER LOOPER) STEP 1 6 THREADING PATH B (UPPER LOOPER) STEP 2 7 THREADING PATH C (NEEDLE) STEP 3 8 • Handle foot switch with care and avoid dropping it on floor. Be sure not to place anything On top of it. PREPARATION FOR FORMING THREAD CHAIN 8 FORMING THREAD CHAIN 8 START TO SEW 9 SECURING TAIL CHAINS 9 • Check machine is threaded correctly before sewing. TURNING SQUARE CORNER 9 RESTITCH PART OF SEAM 10 QUESTIONS? BLINDSTITCH 11 CONTACT YOUR PFAFF DEALER DECORATIVE FLATLOCK 12 WHERE YOU PURCHASED THIS PRODUCT. JOIN TWO PIECES OF FABRIC 12 CARING FOR YOUR MACHINE 12 CHANGING NEEDLE 12 PERFORMANCE CHECKLIST 12 -
-
 1
1 -
 2
2 -
 3
3 -
 4
4 -
 5
5 -
 6
6 -
 7
7 -
 8
8 -
 9
9 -
10
-
11
-
12
-
13
-
14
 |
 |
