Philips DVDR3475 User manual
Philips DVDR3475 Manual
 |
UPC - 609585128989
View all Philips DVDR3475 manuals
Add to My Manuals
Save this manual to your list of manuals |
Philips DVDR3475 manual content summary:
- Philips DVDR3475 | User manual - Page 1
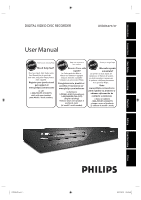
Introduction Connections DIGITAL VIDEO DISC RECORDER DVDR3475/37 User Manual STOP ARRÊT ALTO Basic Setup Recording Playback Editing Function Setup Others E7E4AUD.indd 1 2007/06/20 13:09:48 - Philips DVDR3475 | User manual - Page 2
PHILIPS "family," you're entitled to protection by one of the most comprehensive warranties and outstanding service for investing in a PHILIPS product. P.S. To get the most from your PHILIPS purchase, be sure to closely to prevent operating and maintenance problems. WARNING: To reduce the risk of - Philips DVDR3475 | User manual - Page 3
cable entry as practical. Example of Antenna Grounding as per NEC - National Electric Code GROUND CLAMP ANTENNA LEAD IN WIRE Recording Playback Editing Function Setup E7E4AUD.indd 3 ELECTRIC SERVICE EQUIPMENT ANTENNA DISCHARGE UNIT (NEC SECTION 810-20) GROUNDING CONDUCTORS (NEC SECTION 810 - Philips DVDR3475 | User manual - Page 4
that the user switch the connection to the 'standard definition' output. If there are questions regarding your TV set compatibility with this 525p (480p) DVD player, please contact our customer service center. Declaration of Conformity Model Number: DVDR3475/37 Trade Name: Philips Responsible - Philips DVDR3475 | User manual - Page 5
Setup Recording Playback PRECAUTIONS Supplied Accessories remote control with batteries (AAAx2) user manual RCA audio/video cables quick start guide vibration or strong magnetic fields. User Manual Maintenance Servicing • Please refer to relevant topics on "TROUBLESHOOTING" on pages 87-91 - Philips DVDR3475 | User manual - Page 6
to an External Device 34 Recording from an External Device 35 DV DUBBING 36 Guide to DV and On-Screen Display 36 DVC to DVD Dubbing 37 SETTING A DISC TO PROTECT 39 PLAYING THE DISCS IN OTHER DVD PLAYERS . . . . . 40 Finalizing a Disc 40 Auto Finalizing 41 6 EN E7E4AUD.indd 6 2007 - Philips DVDR3475 | User manual - Page 7
Block Noise 59 Editing INFORMATION ON DISC EDITING 60 Guide to a Title List 60 Editing Discs 60 HDMI 84 Reset All 86 Others TROUBLESHOOTING 87 Frequently Asked Questions 91 LANGUAGE CODE 92 GLOSSARY 93 SPECIFICATIONS 94 LIMITED WARRANTY 95 Recording Playback Editing Function Setup - Philips DVDR3475 | User manual - Page 8
Used in this User Manual To specify for what disc type each function is, we put the following symbols at the beginning of each item to operate. * DVD-RW/-R recorded in VR mode or non compatible recording format are not playable. * DVD-RW recorded in the mode other than +VR is not recordable on this - Philips DVDR3475 | User manual - Page 9
3* 4 5 6* 7 8 3475 Connections Basic Setup Recording Playback (*) The unit can also be turned on by pressing these buttons. 1. STANDBY-ON button Press to turn the unit on and off. If timer programmings have been set, press to set the unit in timer-standby mode. 2. Disc tray Place a disc when - Philips DVDR3475 | User manual - Page 10
batteries when you notice a fall off in the operating range of the remote control. • The maximum operable ranges from the unit are as follows. - of used batteries, please comply with governmental regulations or environmental public instruction's rules that apply in your country or area. • Do not - Philips DVDR3475 | User manual - Page 11
HDMI connector's video signal output mode. 19. REPEAT button Press to display the repeat menu. 20. OPEN/CLOSE A button* Press to open or close the disc tray. 21. TITLE button Press to display the title list. 22. SETUP button • Press to display the main menu. • During DVD playback or recording. • Press - Philips DVDR3475 | User manual - Page 12
time / remaining time • Clock • Selected external input position • Remaining time for one-touch timer recording • Selected HDMI OUTPUT mode Display Message Appears when the disc tray is opening. Appears when the disc tray is closing. Appears when a disc is loaded on the disc tray. - Philips DVDR3475 | User manual - Page 13
jack of this unit, you can also use S-video out jack, component video output jack, or HDMI out jack (no audio out jack connection required) for connecting to your TV. With this setup: • You can record any unscrambled channel by selecting the channel on the external tuner. Be sure that the external - Philips DVDR3475 | User manual - Page 14
]. General Setting Playback Display Video Recording Clock DivX HDMI Reset All Progressive Scan TV Aspect Video InpVuidteo Input E1 (Rear) E2 (Front) 5 Recording Clock DivX HDMI Reset All Progressive Scan TV Aspect E1V(Rideeaor)InpVuidteo Input E1Vi(dReeoarIn) E2S-(VFirdoenot)In 6 Press [SETUP] - Philips DVDR3475 | User manual - Page 15
remote control that selects an external input channel until the DVD recorder's opening picture appears. Check your TV owner's manual for details. Note • Connect this unit directly to the TV. If the RCA audio/video cables are connected to a VCR, pictures may be distorted due to the copy protection - Philips DVDR3475 | User manual - Page 16
select the HDMI output mode. The output mode changes as follows every time [HDMI] is pressed. Front Panel Display Video Output Signal 480 Progressive Press [HDMI] 720 Progressive Press [HDMI] 1080 interlaced Press [HDMI] 1080 Progressive Press [HDMI] • The HDMI mode that is not supported by display - Philips DVDR3475 | User manual - Page 17
back the digital video images of a DVD via an HDMI connection, it is necessary that both the player and the display device (or an AV amplifier) support a copyright protection system called HDCP (high-bandwidth digital content protection system). HDCP is copy protection technology that comprises data - Philips DVDR3475 | User manual - Page 18
IN R AV IN S-VIDEO AV OUT HDMI OUT COAXIAL DIGITAL AUDIO OUTPUT PCM / store. Connection Setting Setup >General Setting >Playback Digital multi channel surround format cannot be recorded as digital sound by an MD or DAT theaters. • Playing back a DVD using incorrect settings may generate - Philips DVDR3475 | User manual - Page 19
Setup Recording GUIDE TO ON-SCREEN DISPLAYS AND MENUS This unit uses the following on-screen displays and menus to guide you to the easy operations. The on-screen displays give you the information on the loaded disc, the disc/file in playback, or the HDMI 00 / 1:23:45 DVD Video E1 (Rear) 5 12 SP - Philips DVDR3475 | User manual - Page 20
GUIDE TO ON-SCREEN DISPLAYS AND MENUS Title/File Name Information Title Name Information Title Name My Title 1 File Name Information File Name My File 1 1. Displays title/file name. HDMI Information 1 2 Video Info. : Audio Info. : 480p Bitstream YCbCr 3 4 * This is an example screen only - Philips DVDR3475 | User manual - Page 21
Disc Edit 1 2 Edit Disc Name Erase Disc 3 Finalize 4 Disc Protect OFF ON Disc Edit 1 23 Edit Disc Name Finalize 34 Disc Protect OFF ON CD Playback Mode 15 26 Random Play Program Play 37 PBC (Video CD only) 48 Slide Show - Philips DVDR3475 | User manual - Page 22
is connected. 2 Use [K / L] to select your desired language, then press [OK] to set language. Initial Setup OSD Language English Français Español 3 Press [OK] to activate "Clock Setting". Initial Setup Clock Setting -- : -- -- 4 Proceed to step 5 in "Clock Setting" on page 23. 22 EN E7E4AUD.indd - Philips DVDR3475 | User manual - Page 23
Setting Playback Display Video Clock Setting Recording Clock JAN / 01 / 2007 ( MON ) DivX 12 : 00 AM HDMI Reset All 4 Use [{ / HDMI Reset All Your setting will be activated. The clock start counting when you press [OK]. 5 Press [SETUP] to exit. Playback Editing Function Setup - Philips DVDR3475 | User manual - Page 24
other than DVD+RW on other DVD players, you will need to finalize. Unrecordable Discs • DVD-RW recorded in the mode other than +VR is not recordable on this unit unless you erase all contents in the disc. (Refer to page 71.) • DVD-R recorded in the mode other than +VR is not recordable on this - Philips DVDR3475 | User manual - Page 25
feature to make the unfinalized +VR mode discs recorded on other unit recordable on this unit. When you make an additional recording on this unit with "Make Recording Compatible" set to "ON", the title menu is automatically converted to our style. 1) Press [SETUP] and use [K / L] to select "General - Philips DVDR3475 | User manual - Page 26
your disc with its label facing up. Align the disc to the disc tray guide. * Make sure the disc is compatible with this unit. (Refer to page MODE] to select a recording mode. Refer to "Recording Mode" on page 24. SP(2Hr) 0:58 5 Press [SOURCE] to select the appropriate external input position (E1 - Philips DVDR3475 | User manual - Page 27
C]. Finalize the recordings so that the disc can be played on regular DVD players. Writing to Disc 90% 1 SP(2Hr) NOV/21/07 11:00AM E1 SP NOV/21/07 0:20:44 2 EMPTY TITLE 1:41:17 SP(2Hr) • Press [STOP C] to exit the title list. Basic Setup Recording Playback Editing Function Setup Others - Philips DVDR3475 | User manual - Page 28
. Guide to Timer Programming Display 3 1 2 Timer Programming JAN/ 2/07 12:00 AM E1 SP SP (1:00) MON JAN/01 11:00AM Date JAN/02 Start End 12:00AM 1:00AM New Program E1/E2 E1 1/1 4 5 1 Title of a timer program (Contains date, time, selected external input position, recording mode of - Philips DVDR3475 | User manual - Page 29
space of the disc when you select the recording mode. Date JAN/02 E1/E2 E1 Start 12 : 00AM Mode SP End 1 : 00AM SP 1 : 00 1/1 Your program setting is now stored. • To set another program, repeat steps 2 to 7. • To exit, press [TIMER] or [SETUP]. • When 2 or more programs are overlapped, "Timer - Philips DVDR3475 | User manual - Page 30
:00AM 1:00AM New Program E1/E2 E1 1/1 Each error number means: E1-22 Recording error other E41 E37-39 than below E24 Unrecordable disc E42 E25-26 Copy prohibited E43 program E29 Disc protected E44 E30 Disc full E45 E35 PCA full *1 E46 E36 Already finalized video format disc E40 Some - Philips DVDR3475 | User manual - Page 31
cancel the timer recording or [STANDBY-ON y] to release timer standby mode ( will disappear). • To cancel the timer standby mode, press [STANDBY B actual recording PPRROOGG. A. A PROG. B The first 2 minutes (at the longest) will be cut off. Note for DVD recording • When the recording time of 2 - Philips DVDR3475 | User manual - Page 32
title list does not appear, press [TITLE]. 3) Press [REC MODE] to select a recording mode. Refer to "Recording Mode" on page 24. 4) Use [K / L] to select a desired channel to record on the external tuner. e.g.) DVD+RW selected title number to be overwritten 1 1 0:01:00 +RW E1 (Rear) You - Philips DVDR3475 | User manual - Page 33
Connections Basic Setup Recording OVERWRITING UNNECESSARY TITLE Hints for Overwriting When you overwrite on the unnecessary title, there were various circumstances such as follows. Please note that following cases only describe the overwriting without any recording mode discrepancy. To - Philips DVDR3475 | User manual - Page 34
EXTERNAL DEVICE RECORDING Connection to an External Device Connect the external device properly to either E2 (front) or E1 (rear) AV OUT COMPONENT VIDEO OUTPUT S-VIDEO HDMI OUT COAXIAL DIGITAL AUDIO OUTPUT PCM / BITSTREAM rear of this unit If you used E2 or E1 connection, make sure to select - Philips DVDR3475 | User manual - Page 35
Introduction Connections Basic Setup Recording EXTERNAL DEVICE RECORDING Recording from an External Device Before recording from an external device, refer to the instructions for the connection on page 34. 1 Turn on the TV and press [STANDBY-ON y], and be sure to select the input of the TV to - Philips DVDR3475 | User manual - Page 36
DV DUBBING Guide to DV and On-Screen Display This function helps you to easily dub the contents of the DVC (digital video camcorder) to DVD. You can control basic operations of the DVC from the remote control of this unit such as playback, fast forward or reverse and stop all operations if the DVC - Philips DVDR3475 | User manual - Page 37
selection. Use [K / L] to select "DV Input", then press [OK]. 1/ 1 1/ 1 Control DV Audio Start Rec DVD Stereo1 +RW E3 (DV-IN) AB-1234 0:00:00 SP(2Hr) 2:00 Recording Playback Editing Function Setup Others E7E4AUD.indd 37 Instructions continue on the next page. EN 37 2007/05/16 14:56:30 - Philips DVDR3475 | User manual - Page 38
select "Control", then press [OK]. Use [K / L] to select "DVD", then mode, refer to "Guide to DV and On-Screen Display" on page 36. • You cannot dub from DVC during timer standby mode. • Date / time and cassette memory data will not be recorded. • Pictures with a copy-guard signal cannot be recorded - Philips DVDR3475 | User manual - Page 39
Basic Setup SETTING A DISC TO PROTECT To prevent accidental recording, editing or erasing the titles, you can protect them from "Disc Edit" menu. 1 Press [SETUP]. 2 Use [K / L] to select "Disc Edit", then press [OK]. 3 Use [K / L] to select "Disc Protect OFF ON", then press [OK]. e.g.) DVD+RW - Philips DVDR3475 | User manual - Page 40
need to finalize DVD+R, DVD-RW or DVD-R to play them back on other DVD players. Finalizing may take several minutes up to an hour. A shorter recording period on the disc will require a longer time period for finalization. Do not unplug the power cord during finalization. 1 Press [SETUP]. 2 Use - Philips DVDR3475 | User manual - Page 41
Connections Basic Setup Recording PLAYING THE DISCS IN OTHER DVD PLAYERS Auto Finalizing You can finalize discs automatically using this function. You can use this function to finalize discs after finishing all timer recordings and at the end of the disc space. 1 Press [SETUP] and use - Philips DVDR3475 | User manual - Page 42
and Canada). This unit uses NTSC, so DVD you play back must be recorded in the NTSC system. You cannot play back DVD recorded in other color systems. Region Codes This unit has been designed to play back DVD with region 1. DVD must be labeled for ALL regions or for region 1 in order to play back on - Philips DVDR3475 | User manual - Page 43
function is on. Cancel PBC function temporarily to perform those operations by following the instruction below. 1) Press [SETUP]. 2) Use [K / L] to select "CD Playback Mode", then press [OK]. "CD Playback Mode" menu will appear. 3) Use [K / L] to select "PBC (Video CD only)", then press [OK]. 4) Use - Philips DVDR3475 | User manual - Page 44
label facing up. Align the disc to the disc tray guide. * Make sure the disc is compatible with this unit Press [PLAY B] to start playback. If you are playing back a DVD-video or video CD with PBC function, a menu may appear. Refer control) function (page 43). 44 EN E7E4AUD.indd 44 2007/05/16 14: - Philips DVDR3475 | User manual - Page 45
up. Align the disc to the disc tray guide. * Make sure the disc is compatible Setup Recording Playback Editing Function Setup Others Note • Some discs may start playback automatically. • You can also start playback by pressing [PLAY B] instead of [OK] at step 4. E7E4AUD.indd 45 Instructions - Philips DVDR3475 | User manual - Page 46
name (Default "No Disc Name") 2. Disc type (DVD+RW/DVD+R/ DVD-RW/DVD-R) 3. Total number of title (include "EMPTY TITLE") 4. Total time of recorded disc space 5. Status of disc protection ("ON" is protected disc.) 6. Making edits compatible/finalize • When DVD+RW is inserted: If the disc needs to be - Philips DVDR3475 | User manual - Page 47
Introduction Connections Basic Setup Recording Playback BASIC PLAYBACK Playing Back an Audio CD dots. • File size of image maximum : 12 MB. Note • The audio source of MP3 files cannot be recorded as digital sound by an MD or DAT deck. • Files whose extension is other than ".mp3(MP3)" ".wma( - Philips DVDR3475 | User manual - Page 48
any lower hierarchy. • Press [s] or [BACK ] to move back to the folder above. To play back the DivX® subtitle created by the user... The subtitle created by the user can be displayed during DivX® playback. 1) After selecting the DivX® file, the "Subtitle List" will appear when "DivX Subtitle" is set - Philips DVDR3475 | User manual - Page 49
services, a registration code is required every time you get the new file from the DivX® VOD services Basic Setup Recording Playback , indicating that the user can view another part does not support, the playback will rewrite them on a DVD+RW/+R or DVD-RW/-R and try to screen in stop mode. • If you - Philips DVDR3475 | User manual - Page 50
muted. DVD or video CD with PBC function may contain a title list, which describes the contents of the disc, or a disc menu, which guides you [DISC MENU] will not always be active with all DVD. • For video CD, when "PBC (Video CD only)" in "CD Playback Mode" menu is "ON", the video CD main menu - Philips DVDR3475 | User manual - Page 51
Introduction Connections Basic Setup Recording SPECIAL PLAYBACK Resume Playback You can play E], approximate speed will be changed as follows. Fast forward or fast reverse playback across titles (for DVD) or files (for MP3 / Windows Media™ Audio files) is not possible. 40x 20x 5x normal - Philips DVDR3475 | User manual - Page 52
only during playback. This function is available only on discs recorded in the Dolby Digital format, and plays back in a . • Audio is PCM during rapid playback mode except when using digital audio connection. • When using digital audio connection (COAXIAL or HDMI), the LPCM sound (2 channel) will be - Philips DVDR3475 | User manual - Page 53
Connections Basic Setup Recording Zoom SPECIAL PLAYBACK Marker Setting 1) During playback, press [INFO] or [ZOOM]. 2) Use [{ / B] to select , then press [OK] within 1 second or wait for 1 second to display the selection menu. e.g.) DVD-video 1/ 5 1/ 5 0:01:00 / 1:23:45 DVD Video This - Philips DVDR3475 | User manual - Page 54
OK]. After the search, playback will start automatically. Note • In search mode display, total numbers of each search contents (title/chapter/time) are video CD with PBC function. 1/ 5 1/ 5 0:01:00 / 1:23:45 DVD Video total number total time of titles total number of the title of chapters 54 - Philips DVDR3475 | User manual - Page 55
Connections Basic Setup Time Search SEARCH 1) During playback, press [INFO]. 2) Use [{ / B] to select , then press [OK]. e.g.) DVD-video 1/ 5 1/ 5 0:01:00 / 1:23:45 DVD Video with PBC function. Recording Playback Editing Function Setup Others E7E4AUD.indd 55 EN 55 2007/05/16 14:56:53 - Philips DVDR3475 | User manual - Page 56
will start. 1/ 5 1/ 5 0:01:00 / 1:23:45 DVD Repeat Title Random Playback You can play back a disc randomly instead of playing back in the original order. 1) Press [SETUP]. 2) Use [K / L] to select "CD Playback Mode", then press [OK]. "CD Playback Mode" menu will appear. 3) Use [K / L] to select - Philips DVDR3475 | User manual - Page 57
Basic Setup Recording REPEAT / RANDOM / PROGRAM PLAYBACK / SLIDE SHOW Program Playback Slide Show You can program the disc to play back in your desired order. You can select the display time between 5 seconds and 10 seconds. 1) Press [SETUP]. 2) Use [K / L] to select "CD Playback Mode", then - Philips DVDR3475 | User manual - Page 58
are playing back. Switching Subtitles Switching Audio Soundtrack DVD-video may have subtitles in 1 or more CODE" on page 92. • For disc with DivX® files, the TV screen only displays the number of subtitle languages and "_ _ _ _" next to the numbers. When playing back a DVD-video recorded - Philips DVDR3475 | User manual - Page 59
TV screen during playing back discs recorded in long time recording mode such as EP or SLP, select "Type 1" or "Type 2". ("Type 2" is more effective.) When playing back discs with a few noises such as DVD-video, select "OFF". Playback Editing Function Setup Others E7E4AUD.indd 59 EN 59 2007 - Philips DVDR3475 | User manual - Page 60
Edit Overwrite NOV/21/07 11:00AM E1 SP NOV/21/07 0:20:44 2 NOV/22/07 11:35AM E1 EP NOV/22/07 0:10:33 3 EMPTY TITLE 1:37:52 SP(2Hr) 6 2 5 recording time is short. • Once you have finalized a DVD+R/DVD-R, you cannot edit or record anything on that disc. 1. Title list: List of the titles recorded - Philips DVDR3475 | User manual - Page 61
increased. For DVD+R/DVD-R, the disc space to record on will not be changed. 3 Use [K / L] to select "Edit", then press [OK]. Play Edit Overwrite 1 SP (2Hr) NOV/21/07 11:00AM E1 SP NOV/21/07 0:20:44 2 NOV/22/07 11:35AM E1 EP NOV/22/07 0:10:33 3 EMPTY TITLE 1:37:52 SP(2Hr - Philips DVDR3475 | User manual - Page 62
Index Picture Title Dividing NOV/21/07 11:00AM E1 SP 0:00:59 3 To enter a title name, follow the steps of "Guide to Edit Title Name" on this page. to the " @!? " mode automatically. *2 Press to , character set will be changed to the previous input mode automatically. • To delete letters - Philips DVDR3475 | User manual - Page 63
Introduction Connections Basic Setup Recording Playback EDITING DISCS Setting Chapter Marks ", then press [OK]. Edit - Chapter Mark 1 Add Delete Delete All Chapter 2/ 2 NOV/21/07 11:00AM E1 SP 0:00:59 Note • When the number of chapter marks in a title is 99 and the number of chapter - Philips DVDR3475 | User manual - Page 64
press [OK]. Edit - Chapter Mark - Delete 1 Yes No Chapter 2/ 2 F NOV/21/07 11:00AM E1 SP 0:00:59 The selected chapter mark will be deleted. 6 Press [BACK ] twice to exit. Data will chapter marks depending on the recording time or edited contents. 64 EN E7E4AUD.indd 64 2007/05/16 14:57:04 - Philips DVDR3475 | User manual - Page 65
Introduction Connections Basic Setup Recording EDITING DISCS Clearing Chapter Marks (cont'd) To delete all chapter - Chapter Mark - Delete All 1 Are you sure? Yes No Chapter 2/ 2 NOV/21/07 11:00AM E1 SP 0:00:59 All chapter marks will be deleted. 6 Press [BACK ] twice to exit. Data will - Philips DVDR3475 | User manual - Page 66
[OK]. Edit - Hide Chapter 1 Chapter 2/ 2 Visible Visible Hidden NOV/21/07 11:00AM E1 SP 0:00:59 5 After this operation is completed, press [BACK ] twice to exit. Data ) NOV/21/07 11:00AM E1 SP NOV/21/07 0:20:44 2 NOV/22/07 11:35AM E1 EP NOV/22/07 0:10:33 3 EMPTY TITLE 1:37:52 SP(2Hr) 66 EN - Philips DVDR3475 | User manual - Page 67
1 Yes No F NOV/21/07 11:00AM E1 SP 0:00:59 A picture for thumbnail will be set. 5 Press [BACK ] to exit. Data will be written onto the disc momentarily. This operation may take a while to be completed. Recording Playback Editing Function Setup Others Note • If the selected picture for - Philips DVDR3475 | User manual - Page 68
then press [OK]. Edit - Title Dividing 1 Yes No F NOV/21/07 11:00AM E1 SP 0:00:59 The title will be divided into 2 new titles. Both title names are of the disc when the number of recording titles reaches the maximum of 49, and the number of recording chapters reaches the maximum of 254. 68 - Philips DVDR3475 | User manual - Page 69
Name Disc Total Titles Disc Space Used Disc Protect Make Edits Compatible DVD+RW 3 0:30:48 OFF Needed ABC abc 123 @! ? Note • You cannot select "Disc Edit" when finalized DVD+R or DVD-R is inserted. 0:00:00 4 To enter a disc name, follow the steps of "Guide to Edit Title Name" on page 62. When - Philips DVDR3475 | User manual - Page 70
Edit" menu. 2 Use [K / L] to select "Disc Protect OFF ON", then press [OK]. e.g.) DVD+RW Disc Edit Edit Disc Name Erase Disc Make Edits Compatible Disc Protect OFF ON • If the disc is already protected, "Disc Protect ON OFF" will appear instead of "Disc Protect OFF ON". 3 Use [K / L] to select "Yes - Philips DVDR3475 | User manual - Page 71
to select "Erase Disc", then press [OK]. e.g.) DVD+RW Disc Edit Edit Disc Name Erase Disc Make Edits Compatible Disc Protect OFF ON 3 Use [K / L] to select . This operation may take a while to be completed. Recording Playback Editing Function Setup Others Note • When you select "Yes" at step - Philips DVDR3475 | User manual - Page 72
Edit" menu. 2 Use [K / L] to select "Make Edits Compatible", then press [OK]. Disc Edit Edit Disc Name Erase Disc Make Edits Compatible Disc Protect OFF ON 3 Use [K / L] to select "Yes", then press [OK]. Disc Edit Edit Disc Name Erase Disc Make Edits Compatible Disc ProteAcct tOivFaFte theOMNake - Philips DVDR3475 | User manual - Page 73
Lock Pages 75-78 OFF Set the parental level for DVD disc playback. level 8 [Adult] to 1 [Kid Safe] Disc Audio Dynamic Range ON Control OFF Compressing the range of sound volume. PCM 48kHz 96kHz Set whether the sound recorded in 96kHz will be down sampled in 48kHz. Dolby Digital - Philips DVDR3475 | User manual - Page 74
SETTINGS Setup DivX Page 83 Items (highlight is the default) DivX®VOD DivX Subtitle HDMI Format Pages 84-85 HDMI code. Set the language for DivX® Subtitle. Set the color space for the HDMI output. Set whether or not to output the HDMI audio signal. Set the black-white contrast level for HDMI - Philips DVDR3475 | User manual - Page 75
Language 4 Audio Language 5 Subtitle Language 6 Angle Icon 7 Still Mode Submenu will appear. 4 Refer to 1 to 7 on pages 76-78 and set the selected item. 5 When you finish with setting, press [SETUP] to exit. Recording Playback Editing Function Setup Others E7E4AUD.indd 75 EN 75 2007/05/16 14 - Philips DVDR3475 | User manual - Page 76
SETUPS Playback (cont'd) 1 Parental Lock (Default: OFF) Some DVD-video feature a parental lock level. Playback will stop if the 1A3n]gle Icon 3 [PG] Still Mode 2 [G] 1 [Kid Safe] General Setting Yes Playback Display Video Recording Clock DivX HDMI Reset All Parental Lock OFF Parental Lock - Philips DVDR3475 | User manual - Page 77
Recording Clock Disc Menu Language Dynamic RAaundgieoCLoanntgroulage DivX B PCM Subtitle Language HDMI C Dolby DigitAanl gle Icon Reset All Still Mode A Dynamic Range Control protection • Even if you select "96kHz", the sound will be down sampled at 48kHz. Playback Editing Function Setup - Philips DVDR3475 | User manual - Page 78
[OK]. General Setting Playback Display Video Recording Clock DivX HDMI Reset All Parental Lock Disc Menu ALuandgiouOaguet Disc Menu Language EnglishAudio Language FrenchSubtitle Language SpanisAhngle Icon Other Still Mode Note • Only the languages supported by the disc can be selected. • Audio - Philips DVDR3475 | User manual - Page 79
Press [STOP C] if you are playing back a disc. 1 Press [SETUP] and use [K / L] to select "General Setting", then press [OK]. 2 Use [K / When you finish with setting, press [SETUP] to exit. Basic Setup Recording Playback Editing Function Setup Others E7E4AUD.indd 79 EN 79 2007/05/16 14:57:16 - Philips DVDR3475 | User manual - Page 80
SETUPS Display (cont'd) 1 OSD Language (Default : English) Set the language for the on-screen display. Use [K / L] to select a setting, then press [OK]. General Setting Playback Display Video Recording Clock DivX HDMI Video Recording Clock DivX HDMI Reset Video Recording Clock DivX HDMI Reset - Philips DVDR3475 | User manual - Page 81
Press [STOP C] if you are playing back a disc. 1 Press [SETUP] and use [K / L] to select "General Setting", then press [OK]. 2 Use [K 5 When you finish with setting, press [SETUP] to exit. Basic Setup Recording Playback Editing Function Setup Others E7E4AUD.indd 81 EN 81 2007/05/16 14:57:17 - Philips DVDR3475 | User manual - Page 82
mode to "ON". 1) Use [K / L] to select "ON", then press [OK]. General Setting Playback Display Video Recording Clock DivX HDMI or press and hold [SETUP] for more than 3 seconds during DVD playback. • When selecting "No" or not pressing any buttons on the unit or remote control within 15 seconds at - Philips DVDR3475 | User manual - Page 83
finish with setting, press [SETUP] to exit. Note • Only the languages supported by the disc can be download the file from the internet and play it back on this unit before you are able to get another code Recording Clock DivX HDMI Reset All DivDDXiivvRXXVRSOuVDbOtDitle Your registration code - Philips DVDR3475 | User manual - Page 84
Setting" menu will appear. 2 Use [K / L] to select "HDMI", then press [OK]. 3 Use [K / L] to select a desired item, then press [OK]. 1 Format 2 HDMI Audio 3 RGB Range 4 Refer to 1 to 3 on page 85 and set the selected item. 5 When you finish with setting, press [SETUP] to exit. 84 EN E7E4AUD.indd 84 - Philips DVDR3475 | User manual - Page 85
General Setting Playback Display Video Recording Clock DivX HDMI Reset All Format RGB RangeHDMI Audio RGB Range Normal Enhanced Your setting will be activated. E7E4AUD.indd 85 EN 85 2007/05/16 14:57:19 Others Function Setup Editing Playback Recording Basic Setup Connections Introduction - Philips DVDR3475 | User manual - Page 86
. SETUPS 1 Press [SETUP] and use [K / L] to select "General Setting", then press [OK]. "General Setting" menu will appear. 2 Use [K / L] to select "Reset All", then press [OK]. 3 Select "Yes" using [K / L] , then press [OK]. General Setting Playback Display Video Recording Clock DivX HDMI Reset - Philips DVDR3475 | User manual - Page 87
to get to your TV, the copy protection signal applied to some DVD could affect the picture quality. Disconnect the playback device in question and connect it directly to your TV. • This unit does not have a tuner to receive TV broadcasting. • You must connect this unit to an external tuner to record - Philips DVDR3475 | User manual - Page 88
discs (such as a CD-ROM) (page 42). • The region code on the DVD-video does not match the unit (page 42). • Moisture has finalized. Discs recorded on this unit cannot be played back on other DVD players. • If you are using DVD+R, DVD-RW/-R disc, please ensure you finalized the disc after recording - Philips DVDR3475 | User manual - Page 89
However, when 16-bit recording mode is selected, audio signal cannot be switched. To record an audio signal, set it to 12 bits. • Check the HDMI connection. (Check the status of the HDMI related indications.) • Check whether the connected monitor device or other device supports HDCP. (This unit will - Philips DVDR3475 | User manual - Page 90
menu, after that you will record to disc (page 25). * If you are still having trouble with the unit after checking "TROUBLESHOOTING", write down the error code and the error description for calling our help line mentioned on the front page to locate an Authorized Service Center. 90 EN E7E4AUD.indd - Philips DVDR3475 | User manual - Page 91
the channels on the external tuner using the remote control of this unit? No, this unit records only DVD. Possible when the region code of the disc is 1 and All. No, you cannot control the unit by PC. Yes, you can. Select "E1" or "E2" as your recording channel, and leave the external tuner on - Philips DVDR3475 | User manual - Page 92
Croatian Czech Danish Dutch English Esperanto Estonian Faroese Fiji Finnish French Frisian Galician Georgian German Greek Greenlandic Guarani Gujarati Hausa Hebrew Hindi LANGUAGE CODE Code 4748 4747 4752 6563 4759 4764 5471 4765 4771 4772 4847 5167 4860 5072 4854 4855 4864 4853 5971 4851 5759 4947 - Philips DVDR3475 | User manual - Page 93
which have been recorded on, possible to play back in DVD players. With this unit, it is possible to finalize DVD+R, DVD-RW, and DVD-R. HDMI (high definition multimedia interface) A digital interface between audio and video source. It can transmit component video, audio, and control signal with one - Philips DVDR3475 | User manual - Page 94
jack x 3 Coaxial digital audio output RCA jack x 1 HDMI output HDMI jack x 1 DVD+RW/+R, DVD-RW/-R, DVD-video, CD-DA, Video CD, CD-RW/-R 120V AC than 80% (no condensation) +VR (video recording) format DVD+Rewritable, DVD+Recordable DVD-Rewritable, DVD-Recordable (+VR mode only) 13.5 MHz MPEG 48 - Philips DVDR3475 | User manual - Page 95
return defective product to Philips. • Labor charges for installation or setup of the product, adjust- ment of customer controls on the product, and per Owner's Manual. TO OBTAIN ASSISTANCE IN THE U.S.A., PUERTO RICO, OR U.S. VIRGIN ISLANDS... Contact Philips Customer Care Center at: 1-888-PHILIPS - Philips DVDR3475 | User manual - Page 96
Corp P.O. Box M67a1r5ie3t9taM, GarAie3tt0a0, 0G6A-030020606 00296 Meet Philips at the Internet http://www.philips.com/welcome DVHDTRS36467050/37 CLASS 1 LASER PRODUCT 82313399 324050256585384 E7E4AUD.indd 96 Printed in China JpnCN-0721/37-3 1VMN23516A ** E7E4AUD 2007/05/16 19:14:48
-
 1
1 -
 2
2 -
 3
3 -
 4
4 -
 5
5 -
 6
6 -
 7
7 -
8
-
9
-
10
-
11
-
12
-
13
-
14
-
15
-
16
-
17
-
18
-
19
-
20
-
21
-
22
-
23
-
24
-
25
-
26
-
27
-
28
-
29
-
30
-
31
-
32
-
33
-
34
-
35
-
36
-
37
-
38
-
39
-
40
-
41
-
42
-
43
-
44
-
45
-
46
-
47
-
48
-
49
-
50
-
51
-
52
-
53
-
54
-
55
-
56
-
57
-
58
-
59
-
60
-
61
-
62
-
63
-
64
-
65
-
66
-
67
-
68
-
69
-
70
-
71
-
72
-
73
-
74
-
75
-
76
-
77
-
78
-
79
-
80
-
81
-
82
-
83
-
84
-
85
-
86
-
87
-
88
-
89
-
90
-
91
-
92
-
93
-
94
-
95
-
96
 |
 |

DIGITAL VIDEO DISC RECORDER
DVDR3475/37
User Manual
STOP
ARRÊT
ALTO
Recording
Playback
Editing
Introduction
Connections
Basic Setup
Function Setup
Others
E7E4AUD.indd
1
E7E4AUD.indd
1
2007/06/20
13:09:48
2007/06/20
13:09:48