Philips SE4502B User manual - Page 25
Menu structure, Select, Phonebook, Menu Name
 |
UPC - 609585145054
View all Philips SE4502B manuals
Add to My Manuals
Save this manual to your list of manuals |
Page 25 highlights
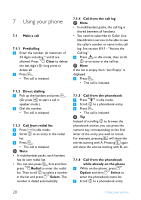
6.7 Menu structure The SE450 has five menus as shown in the following table. Menu Name Icon 1 Phonebook 2 Personal Settings 3 Clock and Alarm 4 Advanced Settings 5 Network Services Press the menu key m to enter menu mode. Use navigation keys n to navigate within the menus and all submenus. Press o Select to enter the next lower menu level. Press c Back to go to the previous menu level. The charts below show the menu trees of your phone. Phonebook Phonebook New Entry List Edit Entry Select Melody Delete Delete All Direct Memory Enter Name: Entry list displayed Entry list displayed Entry list displayed Delete All? Key list and status Enter Number: Melody details for selected entry Delete? List of melodies Edit Delete Getting started 23
-
 1
1 -
2
-
3
-
4
-
5
-
6
-
7
-
8
-
9
-
10
-
11
-
12
-
13
-
14
-
15
-
16
-
17
-
18
-
19
-
 20
20 -
 21
21 -
 22
22 -
 23
23 -
 24
24 -
 25
25 -
 26
26 -
 27
27 -
 28
28 -
 29
29 -
 30
30 -
31
-
32
-
33
-
34
-
35
-
36
-
37
-
38
-
39
-
40
-
41
-
42
-
43
-
44
-
45
-
46
-
47
-
48
-
49
-
50
-
51
-
52
-
53
-
54
-
55
-
56
-
57
-
58
-
59
-
60
-
61
-
62
-
63
-
64
-
65
 |
 |

23
Getting started
6.7
Menu structure
The SE450 has five menus as shown in the following table.
Press the menu key
m
to enter menu mode. Use navigation keys
n
to navigate
within the menus and all submenus.
Press
o
Select
to enter the next lower menu level. Press
c
Back
to go to the
previous menu level.
The charts below show the menu trees of your phone.
Phonebook
Menu Name
Icon
1
Phonebook
2
Personal Settings
3
Clock and Alarm
4
Advanced Settings
5
Network Services
Phonebook
New Entry
Enter Name:
Enter Number:
List
Entry list displayed
Edit Entry
Select Melody
Entry list displayed
Melody details
List of melodies
for selected entry
Delete
Entry list displayed
Delete?
Delete All
Delete All?
Direct Memory
Key list and status
Edit
Delete