Philips TAB7908 User manual - Page 8
Connectors, Wireless subwoofer
 |
View all Philips TAB7908 manuals
Add to My Manuals
Save this manual to your list of manuals |
Page 8 highlights
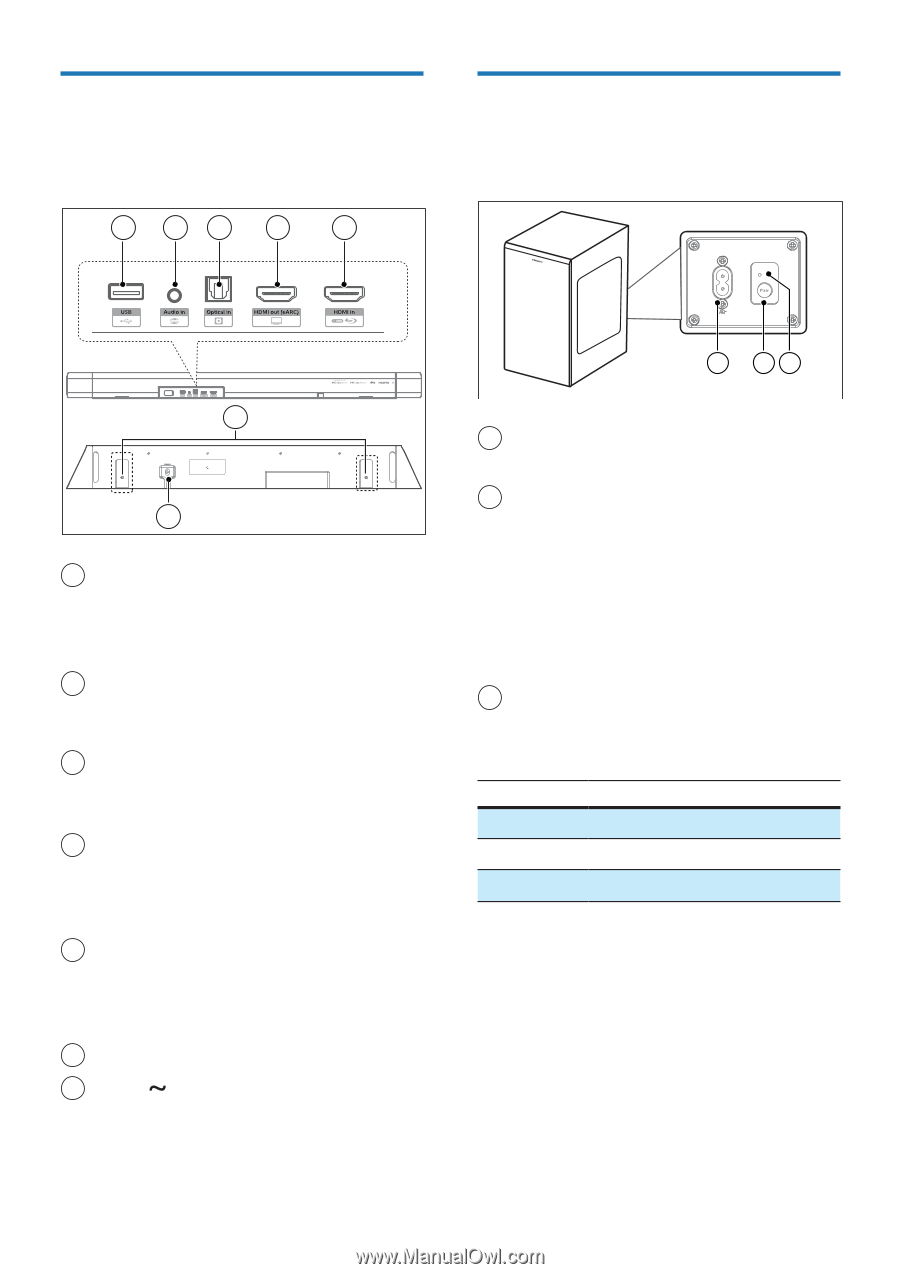
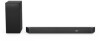
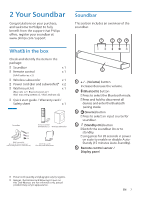
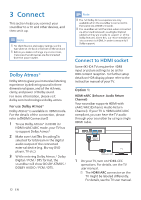
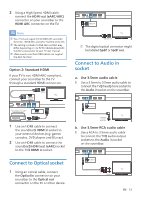
Connectors This section includes an overview of the connectors available on your soundbar. 1 23 4 5 Wireless subwoofer This section includes an overview of the wireless subwoofer. 6 7 1 USB • Connect to a USB storage device for audio media play. • Upgrade software of this product. 2 Audio in Audio input from, for example, an MP3 player (3.5mm jack). 3 Optical in socket Connect to an optical audio output on the TV or a digital device. 4 HDMI out (eARC) socket The port supports the eARC/ARC HDMI feature, connect to the HDMI (eARC/ARC) input on the TV. 5 HDMI in socket Connect to the HDMI source devices, such as a DVD player, Blu-ray Disc™ player, or gaming console. 6 Wall bracket slot 7 AC in socket Connect to the power supply. 1 23 1 AC~ socket Connect to the power supply. 2 Pair button Press and hold to enter the pairing mode for the subwoofer, which is used for Manual Pairing only. (Don't press Pair button as Bar and Subwoofer would be paired automatically after the unit is switched ON) 3 Subwoofer indicator Determine the status based on the wireless subwoofer indicator. LED State Status Fast blink Subwoofer in pairing mode Constant on Connected / Pairing successful Slow blink Pairing failed 8 EN
-
 1
1 -
2
-
 3
3 -
 4
4 -
 5
5 -
 6
6 -
 7
7 -
 8
8 -
 9
9 -
 10
10 -
 11
11 -
 12
12 -
 13
13 -
14
-
15
-
16
-
17
-
18
-
19
-
20
-
21
-
22
-
23
-
24
 |
 |