Pioneer AVIC-D1 Installation Manual
Pioneer AVIC-D1 Manual
 |
UPC - 012562739496
View all Pioneer AVIC-D1 manuals
Add to My Manuals
Save this manual to your list of manuals |
Pioneer AVIC-D1 manual content summary:
- Pioneer AVIC-D1 | Installation Manual - Page 1
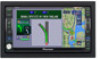
Hardware Manual ENGLISH DOUBLE-DIN DVD NAVIGATION SYSTEM AVIC-D1 - Pioneer AVIC-D1 | Installation Manual - Page 2
- Pioneer AVIC-D1 | Installation Manual - Page 3
in each chapter: How to use this manual Introduction This chapter describes precautions for the use of the Navigation System. How to Use Navigation Unit and Names of the Parts This chapter describes matters that are important to know before using the Navigation System, such as the names of each - Pioneer AVIC-D1 | Installation Manual - Page 4
Overview 1 How to use this manual 1 Terminology 1 Table of Contents 2 Important Safety Information 3 Notes Before Using the System and Additional Safety Information 4 Precaution 4 After-sales service for Pioneer products 6 Product registration 6 Upgrade DVD Map Disc 6 Playable discs 6 Features - Pioneer AVIC-D1 | Installation Manual - Page 5
through your local Pioneer dealer. ❒ Never use headphones while driving. ❒ Do not attempt to install or service your Navigation System by yourself. Installation or servicing of the Navigation System by persons without training and experience in electronic equipment and automotive accessories may be - Pioneer AVIC-D1 | Installation Manual - Page 6
on this product or cords associated with accessories sold with the product may expose you to chemicals listed on proposition 65 known to the could result from contact with liquids. Parking brake interlock Certain functions offered by this Navigation System could be dangerous if used while driving. - Pioneer AVIC-D1 | Installation Manual - Page 7
view camera With an optional rear view camera (sold separately) you are able to use the Navigation System as an aid to keep an eye on trailers, or while backing up. • SCREEN IMAGE MAY APPEAR REVERSED. • USE INPUT ONLY FOR REVERSE OR MIRROR IMAGE REAR VIEW CAMERA. OTHER USE MAY RESULT IN INJURY OR - Pioneer AVIC-D1 | Installation Manual - Page 8
products and technologies. 3. Download owner's manuals, order product catalogues, research new products, and much more. 4. Receive notices of software upgrades and software updates. Upgrade DVD Map Disc Upgrade DVD Map Disc are available for purchase from your local Pioneer dealer. These include the - Pioneer AVIC-D1 | Installation Manual - Page 9
the version of Windows Media Player used to encode WMA files, Pioneer service station regarding the satellite radio tuner that can be connected to this unit. For satellite radio tuner operation, please refer to the Operation Manuals of the Navigation System and Satellite Radio Tuner. Note: The system - Pioneer AVIC-D1 | Installation Manual - Page 10
the brightness of the LCD screen itself to suit your personal preference. Resetting the Microprocessor • Pressing the RESET button deletes the contents of the Navigation System's memory. For details, see section "About the Data being Deleted" of the Operation Manual. Pressing RESET button lets you - Pioneer AVIC-D1 | Installation Manual - Page 11
equipment (for example, a TV tuner) to this Navigation System, be sure to reset that equipment too. ❒ After completing connections or when you want to erase all memorized settings or return the unit to its initial (factory) settings except for some navigation items, switch your engine ON or set the - Pioneer AVIC-D1 | Installation Manual - Page 12
10 - Pioneer AVIC-D1 | Installation Manual - Page 13
Names of the Parts Chapter 1 How to Use Navigation Unit and Names of the Parts Navigation Unit This section gives information about the names of the parts and main features using the buttons. ❒ For more detail operation, functional limitations, please refer to the Operation Manual. (1) MAP button - Pioneer AVIC-D1 | Installation Manual - Page 14
to Use Navigation Unit and Names of the Parts Chapter 1 system automatically adjusts the brightness of the display to compensate for ambient light. ➲ Adjusting the dimmer ➞ Operation Manual (15) LCD panel (16) LCD screen (17) CD loading slot Insert a CD to play. (18) DVD-ROM loading slot Insert a DVD - Pioneer AVIC-D1 | Installation Manual - Page 15
ANTENNA" ➞ Operation Manual Adjusting the Volume 2 Press SRC button to select a source. Press SRC button repeatedly to switch between the following sources: "XM" (XM tuner) - "SIRIUS" (SIRIUS tuner) -"RADIO" (tuner) - "TV" (television) - "AV" (video input) - "S-DVD" (DVD player/ multi-DVD player - Pioneer AVIC-D1 | Installation Manual - Page 16
How to Use Navigation Unit and Names of the Parts Chapter 1 Inserting/Ejecting a Disc • Do not ❒ If the built-in CD drive does not operate properly, an error message such as ERROR-11 may be displayed. ➲ Error messages ➞ Operation Manual Ejecting a CD 1 Press OPEN/CLOSE button. The LCD panel opens - Pioneer AVIC-D1 | Installation Manual - Page 17
Chapter 1 How to Use Navigation Unit and Names of the Parts Inserting the DVD Map Disc 1 Press and hold OPEN/CLOSE button. The LCD panel fully opens, and the DVD-ROM loading slot appears. DVD-ROM loading slot DVD-ROM EJECT button Ejecting the DVD Map Disc 1 Press and hold OPEN/CLOSE button. The - Pioneer AVIC-D1 | Installation Manual - Page 18
How to Use Navigation Unit and Names of the Parts Chapter 1 16 - Pioneer AVIC-D1 | Installation Manual - Page 19
to ACC), the motor sounds. Cause The parking brake cord is not connected. The parking brake is not applied. The source without a video is selected. There was a problem with the rear display or a faulty wiring connection, for example. Rear View is selected on the screen. When the shift lever is in - Pioneer AVIC-D1 | Installation Manual - Page 20
is not firmly secured. Secure the Navigation System firmly. Handling and Care of the Disc Some basic precautions are necessary when handling your discs. DVD Map Discs Do not use discs other than those intended for this product. Use only discs approved by Pioneer. ➲ For suitable discs ➞ Page 6 ❒ If - Pioneer AVIC-D1 | Installation Manual - Page 21
2 of ISO9660 and with the Romeo and Joliet file system can be played back. • It is possible to play , the files will be played back on this player with a short pause between each one, regardless of higher bit rate. • This unit doesn't support the following formats. - Windows Media Audio 9 Professional (5.1ch - Pioneer AVIC-D1 | Installation Manual - Page 22
Appendix WAV additional information • This unit plays back WAV files encoded in Linear PCM (LPCM) format or MS ADPCM format. • You can only play back WAV files in the frequencies 16, 22.05, 24, 32, 44.1 and 48 kHz (LPCM), or 22.05 and 44.1 kHz (MS ADPCM). • The sound quality of WAV files generally - Pioneer AVIC-D1 | Installation Manual - Page 23
authorized PIONEER Service Station for internal inspection, adjustments or repairs. Handling the LCD panel • When the LCD panel is subjected to direct sunlight for a long period of time, it will become very hot resulting in possible damage to the LCD screen. When not using this Navigation System - Pioneer AVIC-D1 | Installation Manual - Page 24
the LCD screen and do not indicate a problem with the Navigation System. • At low temperatures, the LCD screen may be dark for a while after the power is turned on. • The LCD screen will be difficult to see if it is exposed to direct sunlight. • When using a portable phone, keep the antenna of the - Pioneer AVIC-D1 | Installation Manual - Page 25
Navigation GPS Receiver: System L1, C/Acode GPS SPS (Standard Positioning Service) Reception system ........ 8-channel multi-channel reception system Reception frequency ... 1,575.42 MHz Sensitivity 130 dBm Position update frequency Approx. once per second GPS antenna: Antenna /8k/10k/12.5k Hz - Pioneer AVIC-D1 | Installation Manual - Page 26
Appendix Usable sensitivity 8 dBf (0.7 µV/75 Ω, mono, S/ N: 30 dB) 50 dB quieting sensitivity .... 10 dBf (0.9 µV/75 Ω, mono) Signal-to-noise ratio 75 dB (IHF-A network) Distortion 0.3 % (at 65 dBf, 1 kHz, stereo) 0.1 % (at 65 dBf, 1 kHz, mono) Frequency response 30 - 15,000 Hz (±3 dB) Stereo - Pioneer AVIC-D1 | Installation Manual - Page 27
ELECTRONICS (USA) INC. P.O. Box 1540, Long Beach, California 90801-1540, U.S.A. TEL: (800) 421-1404 PIONEER EUROPE NV Haven 1087, Keetberglaan 1, B-9120 Melsele, Belgium TEL: (0) 3/570.05.11 PIONEER ELECTRONICS ASIACENTRE PTE. LTD. 253 Alexandra Road, #04-01, Singapore 159936 TEL: 65-6472-7555
-
 1
1 -
 2
2 -
 3
3 -
 4
4 -
 5
5 -
 6
6 -
 7
7 -
8
-
9
-
10
-
11
-
12
-
13
-
14
-
15
-
16
-
17
-
18
-
19
-
20
-
21
-
22
-
23
-
24
-
25
-
26
-
27
 |
 |

Hardware Manual
DOUBLE-DIN DVD NAVIGATION SYSTEM
AVIC-D1
ENGLISH